

Generating a material in Material Studio
Open Material Studio
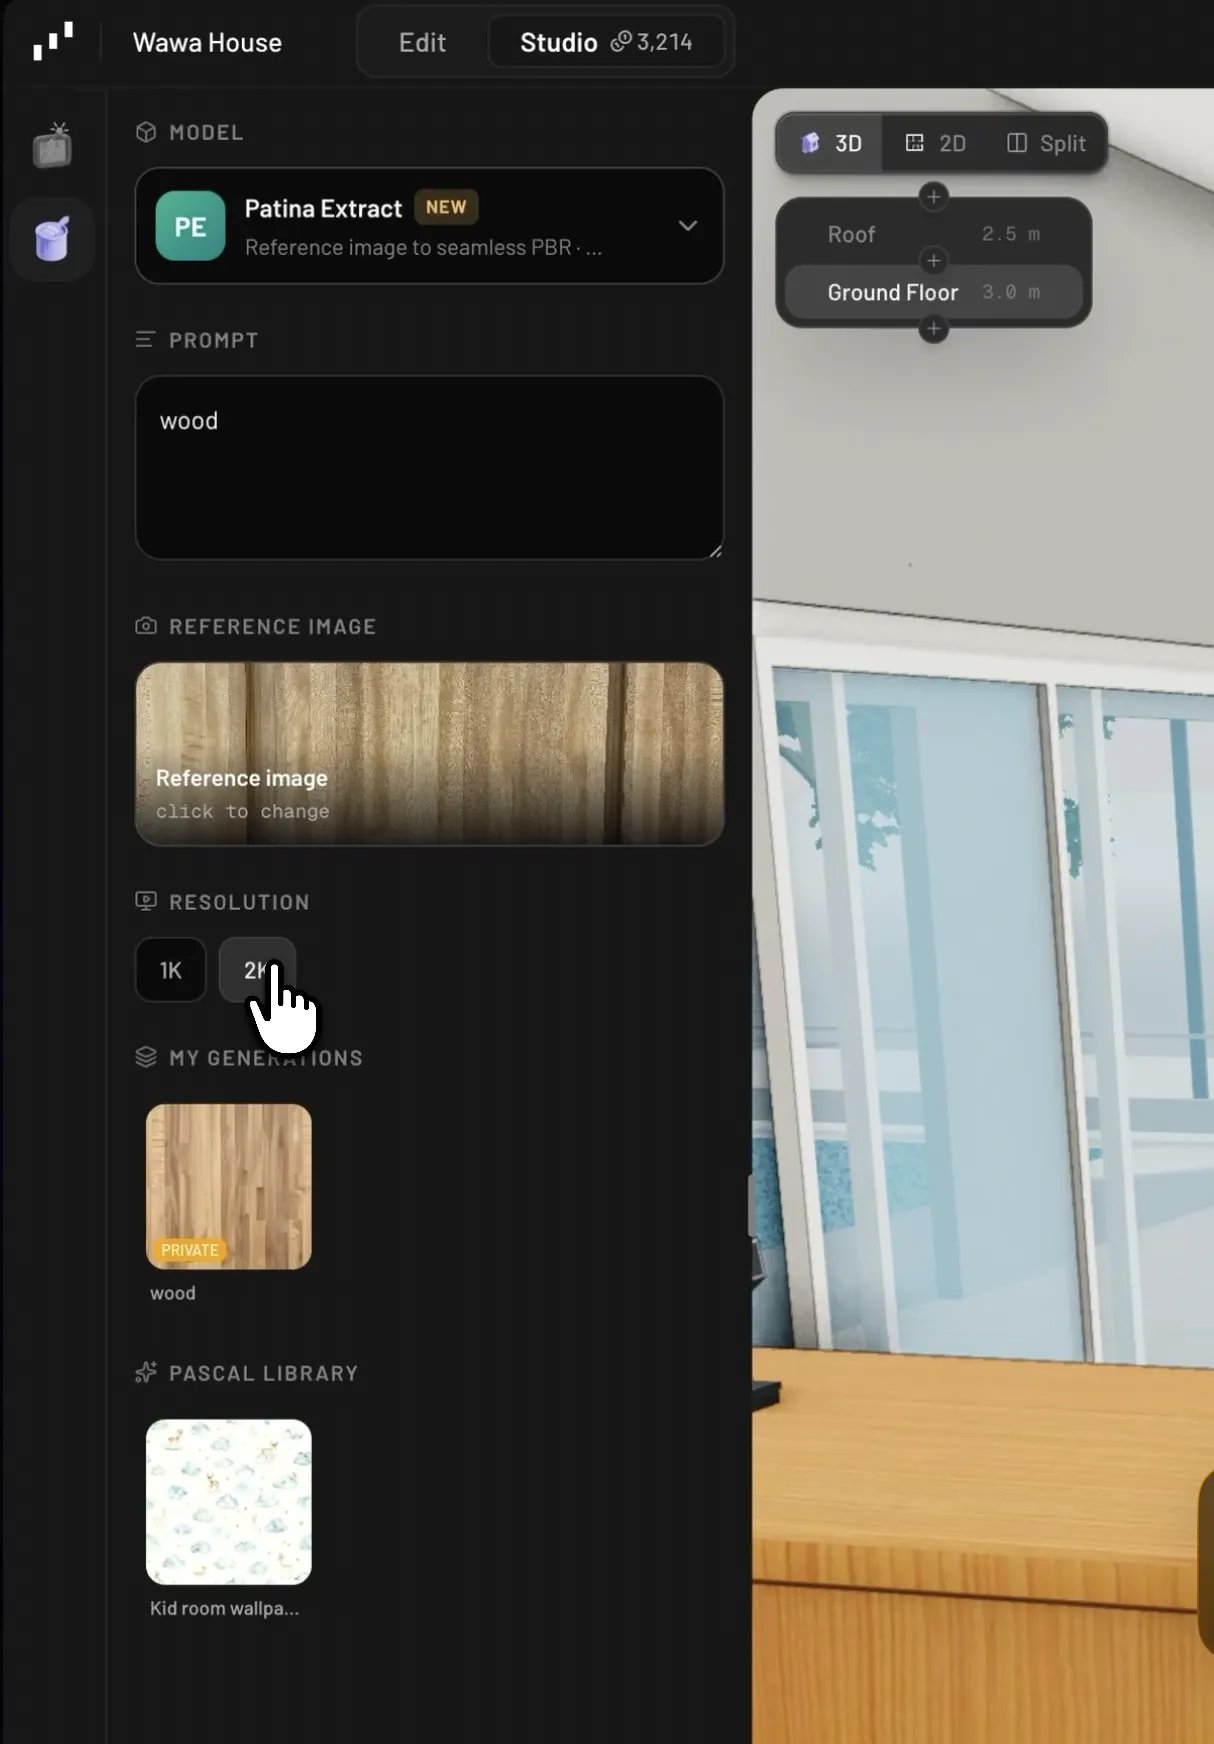
Two ways in:- Switch to Studio with the Edit / Studio toggle in the navbar, then open the Materials tab next to Generate.
- From the paint tool: the first tile in the material catalog is New material — it jumps you straight here.
Pick a model
The Model card opens a picker with three material models, each for a different starting point:Compose and generate
- Prompt — describe the material (“brushed copper with green patina”). With Patina Extract, describe the surface to pull out of the photo (“the weathered brick wall”). Patina Maps needs no prompt at all.
- Reference image — required for Extract and Maps. Pick a render or snapshot from your gallery, capture the viewport, upload a file, or just paste an image into the panel.
- Resolution — 1K or 2K. Patina Maps follows the source image instead.
From generation to painted surface
Click a generated material to open it: a rendered preview up top, then its Name, Visibility, Category, and Textures — the five maps behind every material (Base color, Normal, Roughness, Metalness, Height).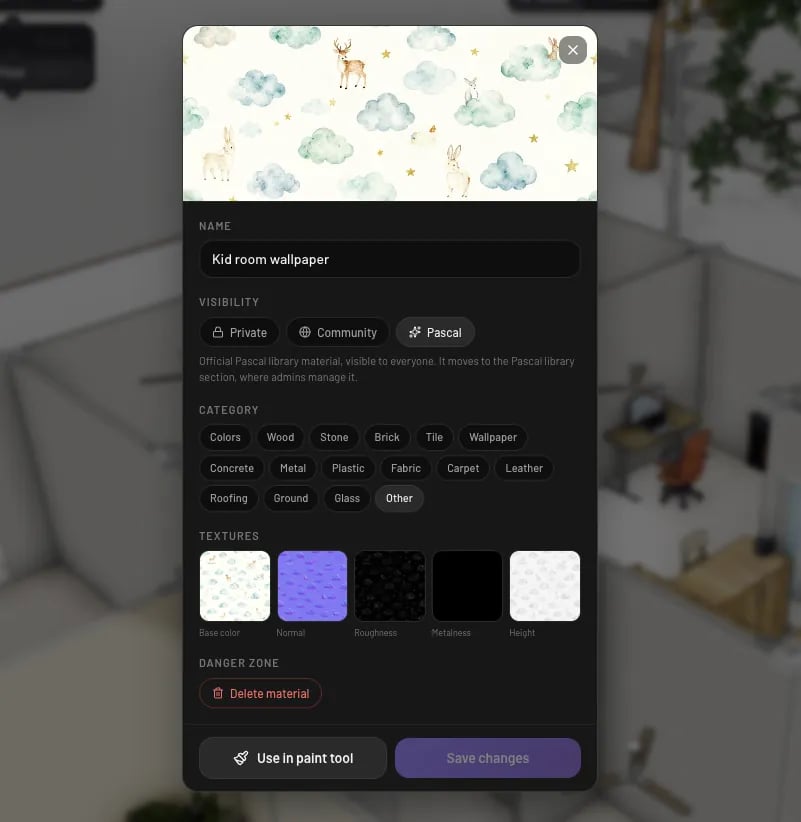
A generated material and its texture maps
Share it or keep it private
Each material has a visibility setting:- Private (the default) — only you can see and use it.
- Community — anyone can find and use it from the paint catalog’s Community tab.
Export the maps
Every map can be downloaded individually — as PNG, WebP, or KTX2 (256, 512, or 1024) — so a material you generate for Pascal also works in the rest of your pipeline.Watch it in action
Prefer to follow along on video? This walkthrough recreates a real kitchen’s wood from a single photo, then generates a wallpaper from text — and paints both onto the home.Turn any photo into a 3D material with Pascal Material Studio