

Give the roof its own level
A roof sits on the level you draw it on, so the usual workflow is to roof from one level up:- Click the + at the top edge of the level selector (Add level above). The levels below stay visible while you work on it.
- Draw the roof on that new, empty level — its corners snap to the wall corners of the level below, so it lands exactly on top of your walls.
Draw a roof
Pick Roof in the Build tab, then:- Click to set the first corner of the footprint.
- Move the cursor — a live ghost of the roof follows — and click the opposite corner to place it.
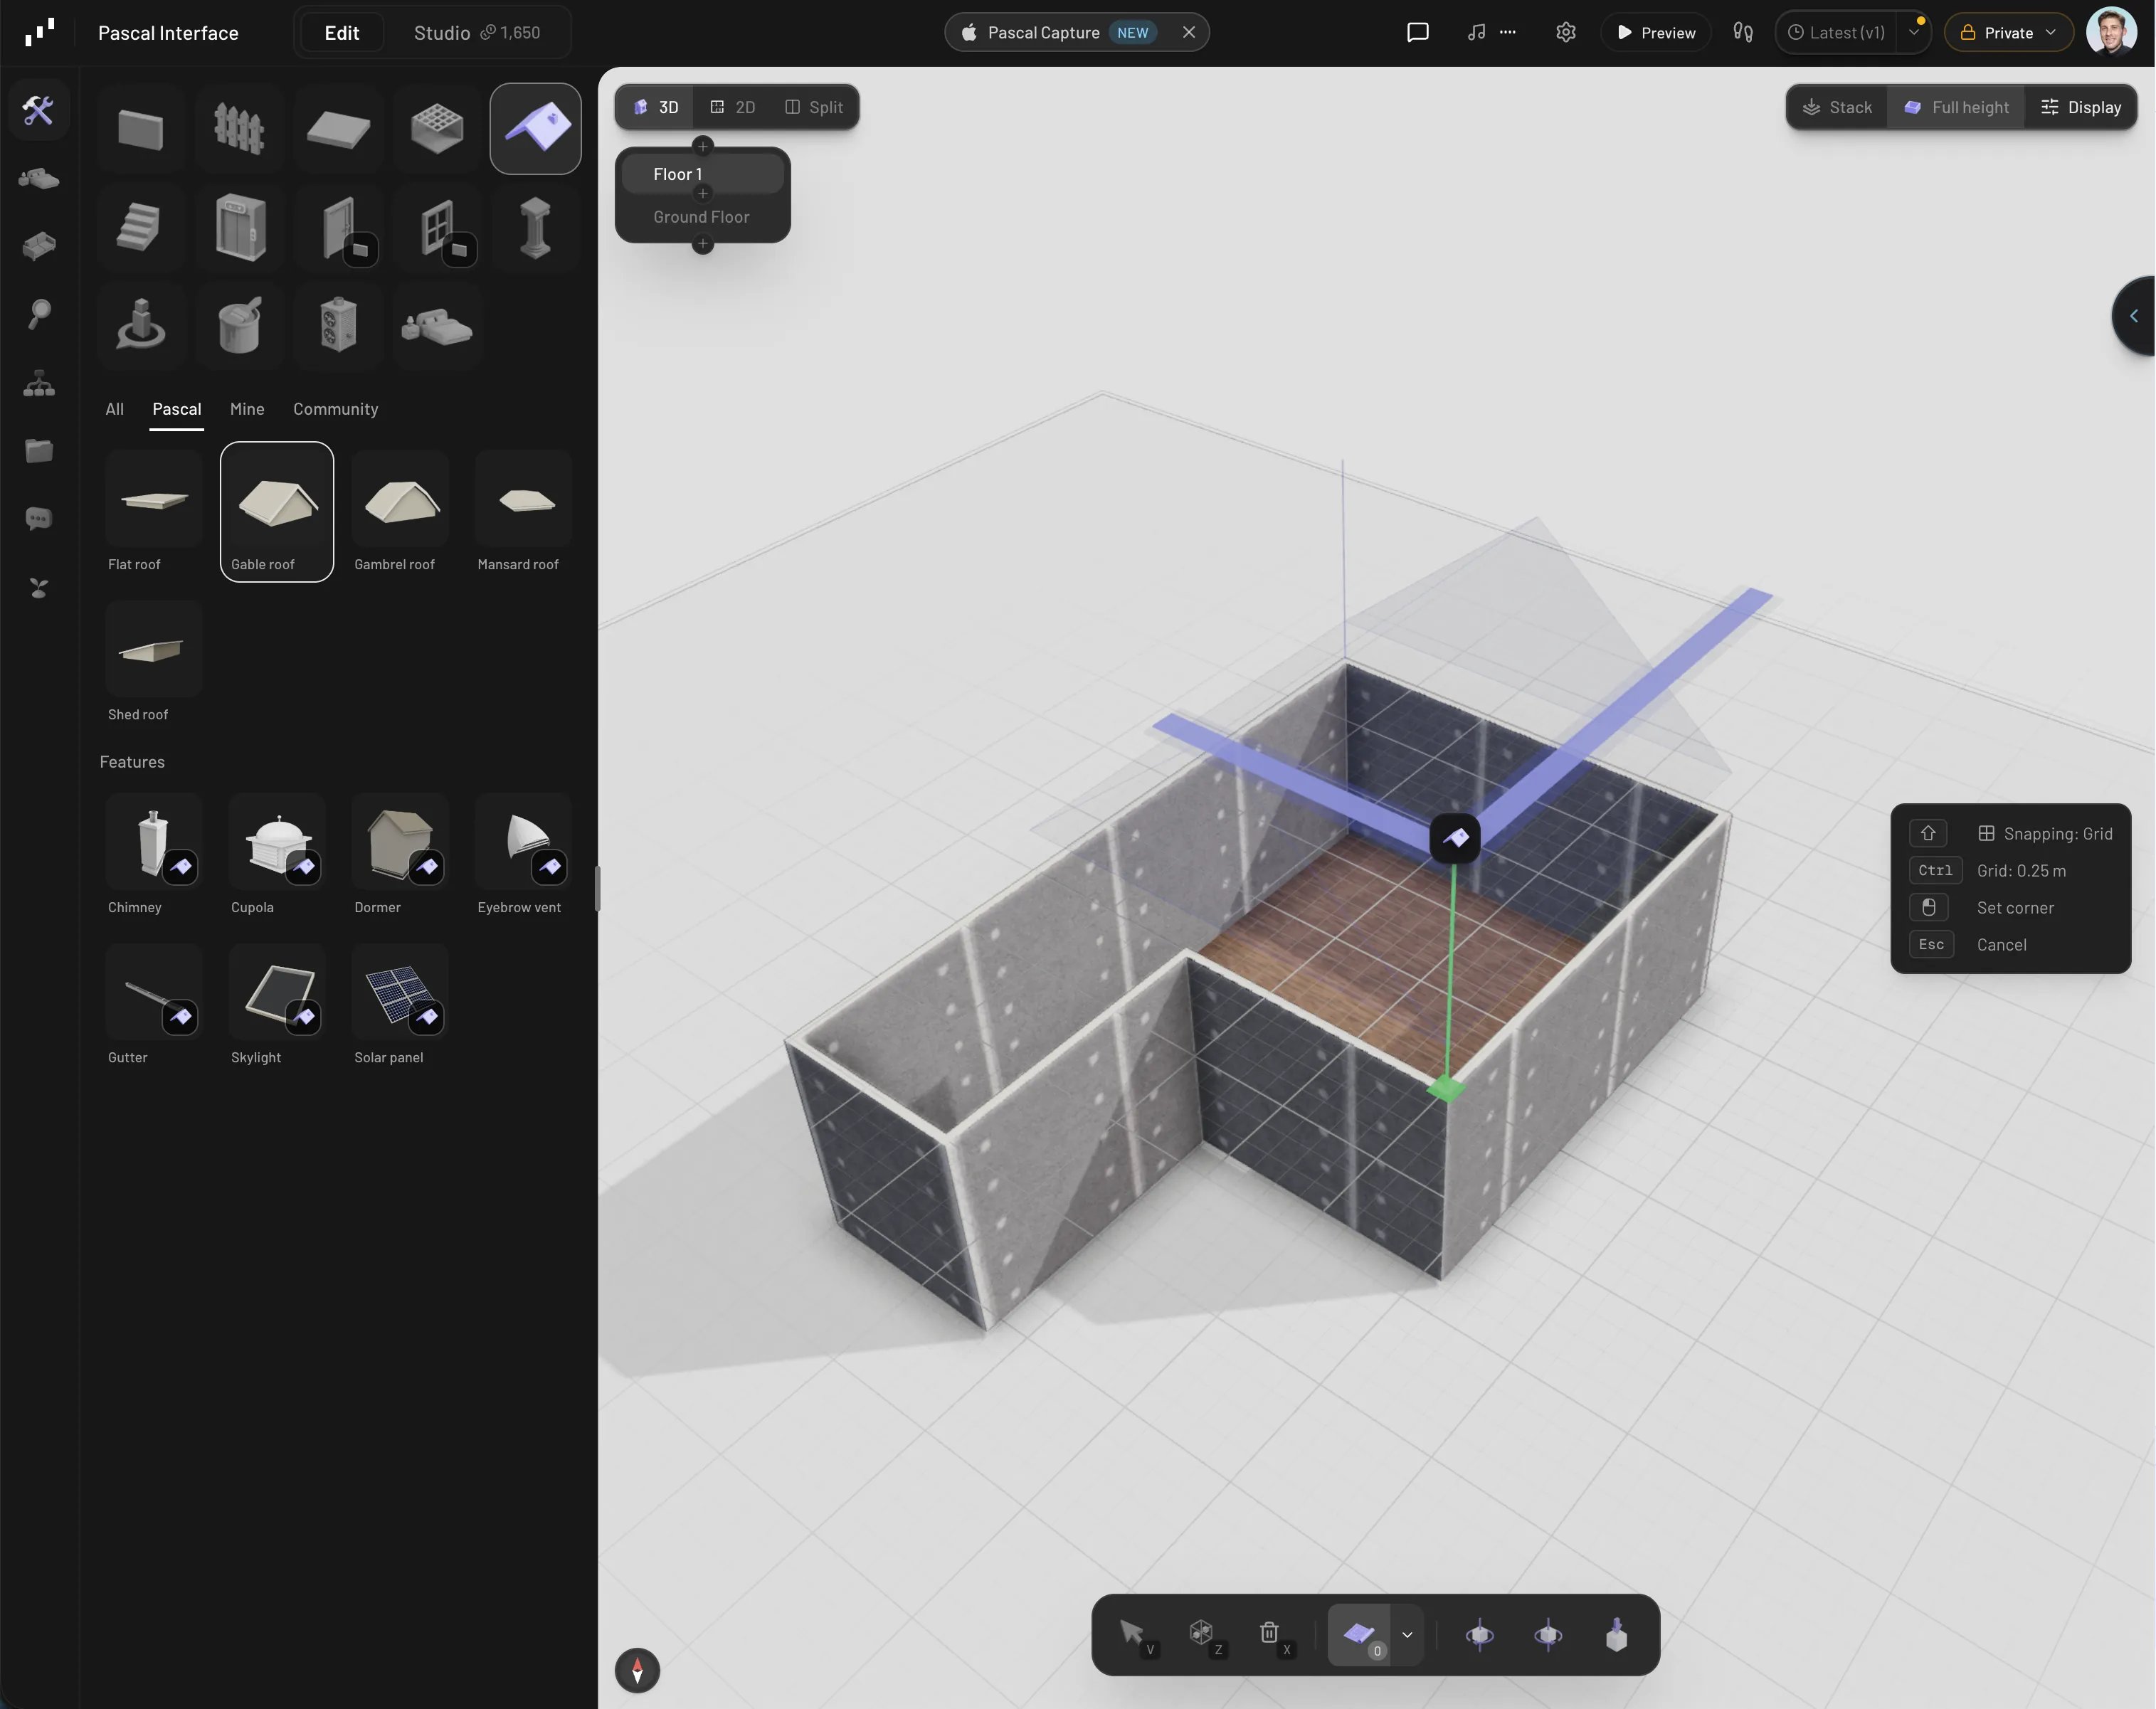
Drawing a roof footprint over existing walls
Roof types
A roof is a container of one or more segments, and the type is set per segment. Select the roof, then click again to select the segment inside it. The Roof Type section of the properties panel offers seven types: Hip, Gable, Shed, Flat, Gambrel, Dutch, and Mansard.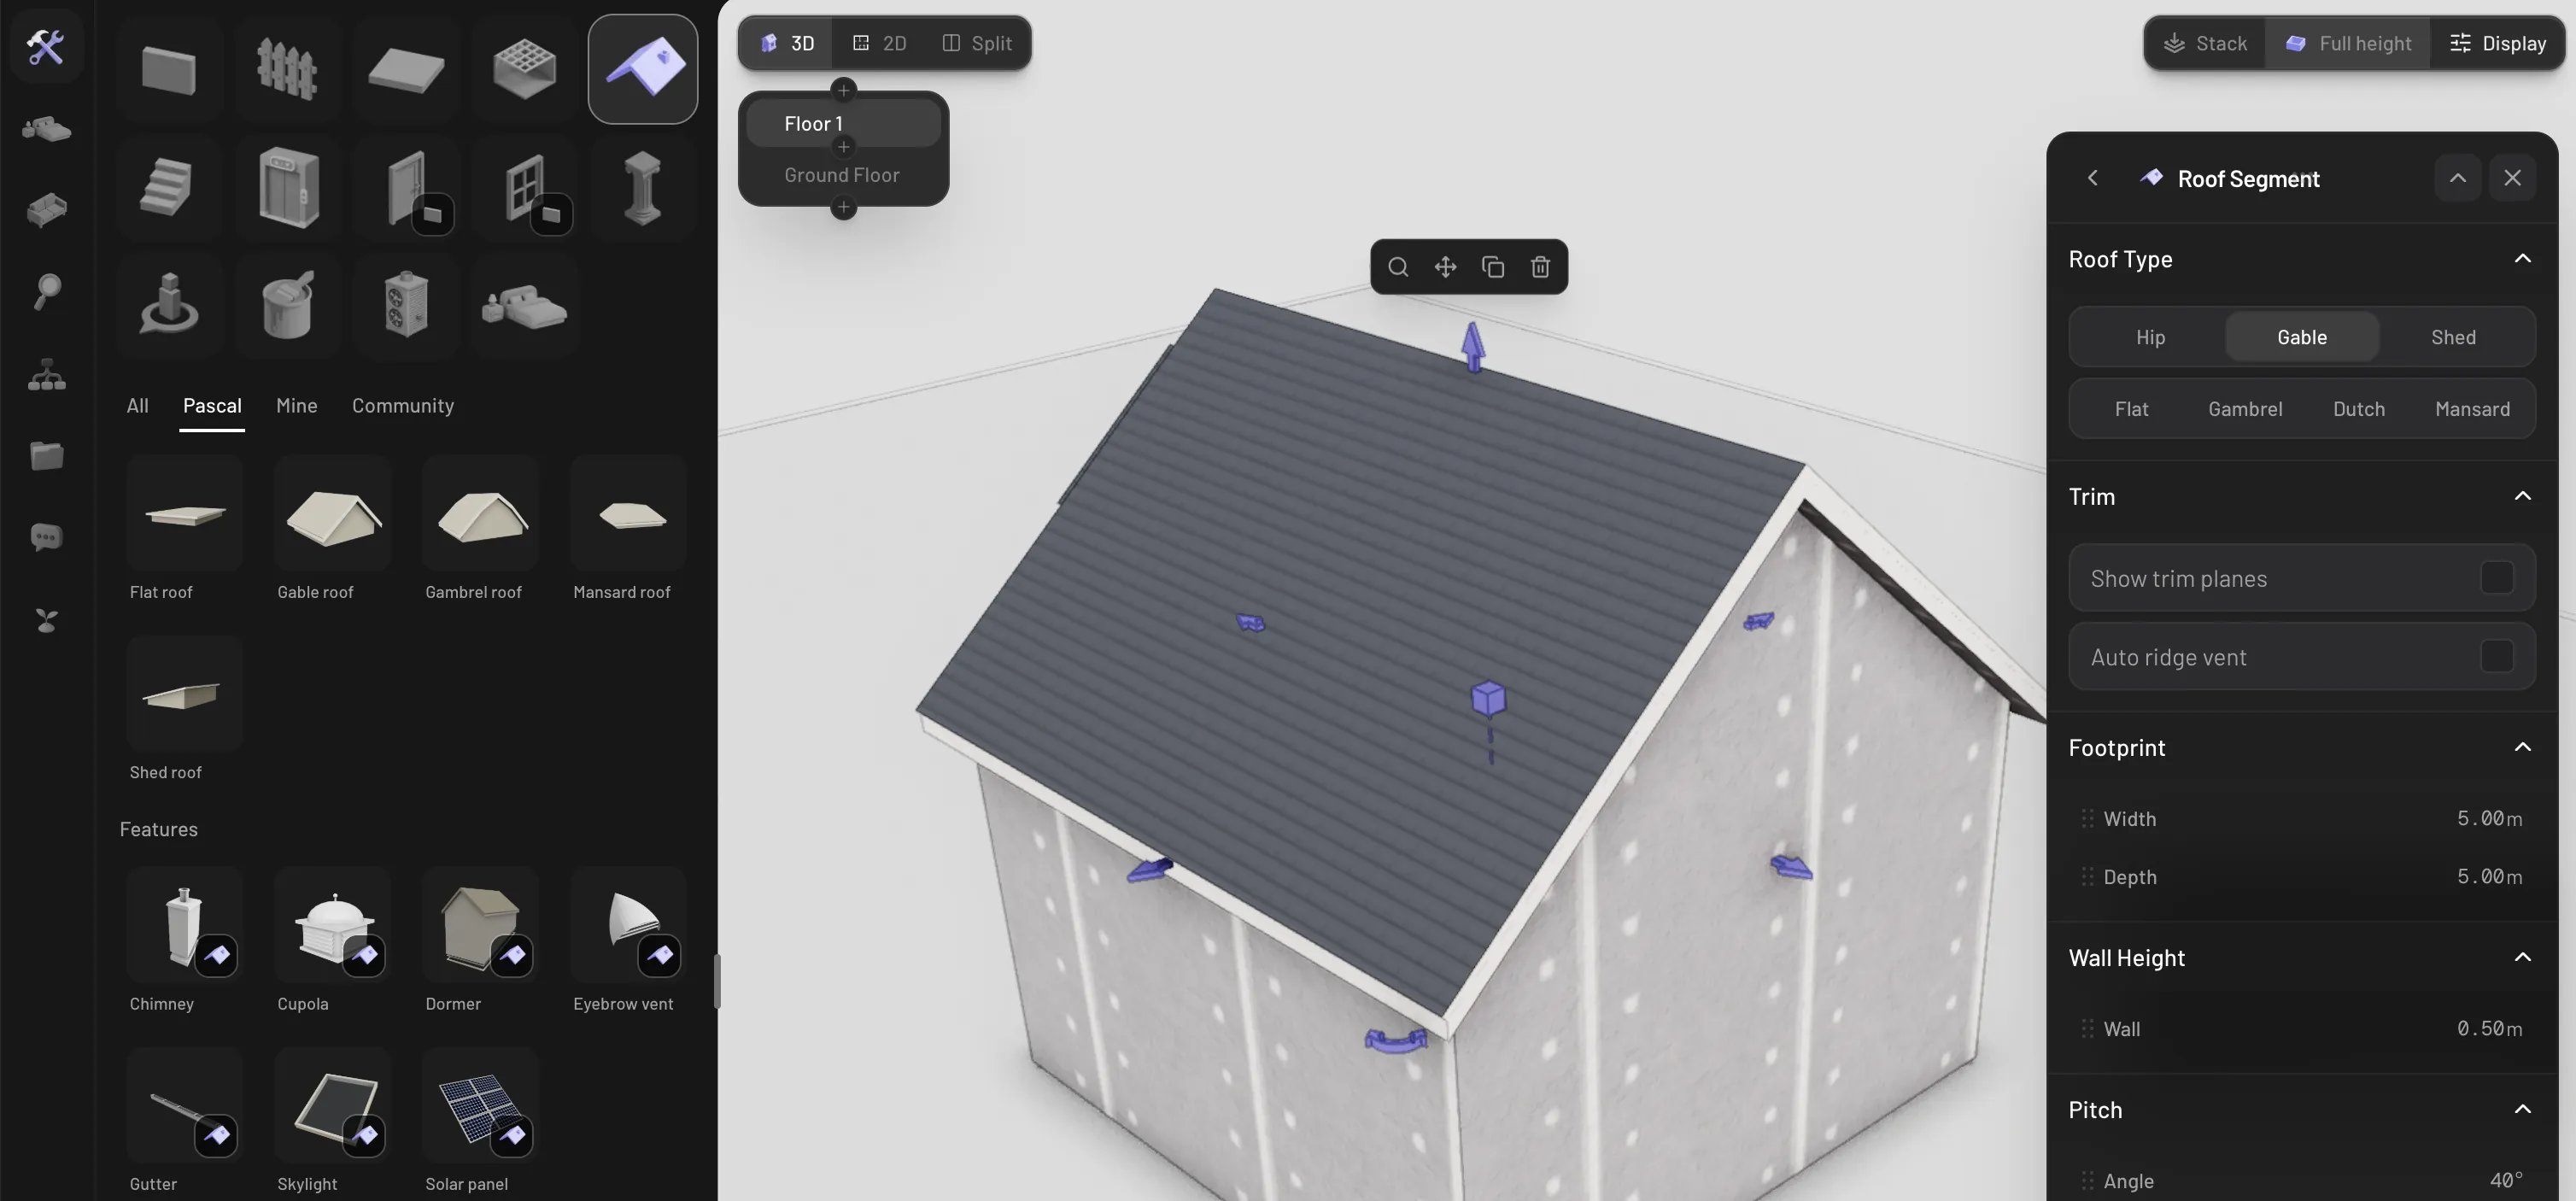
Choosing a roof type
Shape the roof
The segment panel gives you sliders for every dimension:- Footprint — Width and Depth (0.5–25 m).
- Wall Height — the height of the walls the roof generates beneath itself (0–5 m).
- Pitch — the slope Angle (0–60°), with quick presets 3/12, 6/12, 9/12, and 12/12.
- Structure — Wall Thick., Deck Thick., Overhang, and Shingle Thick.
- Shape-specific controls appear for the curvier types — kink position for gambrel, waist controls for mansard and dutch roofs.
- Position and Rotation sliders (with
-45°/+45°buttons) place the roof exactly, and the Move action lets you drag it in the scene — pressRwhile moving to rotate it in steps.
Trim a roof
Turn on Show trim planes in the segment panel to reveal draggable trim handles on each side of the roof. Drag a handle to cut the roof back along that side — a red section preview shows exactly what’s being removed. Use trims to fit segments together or notch a roof around another volume.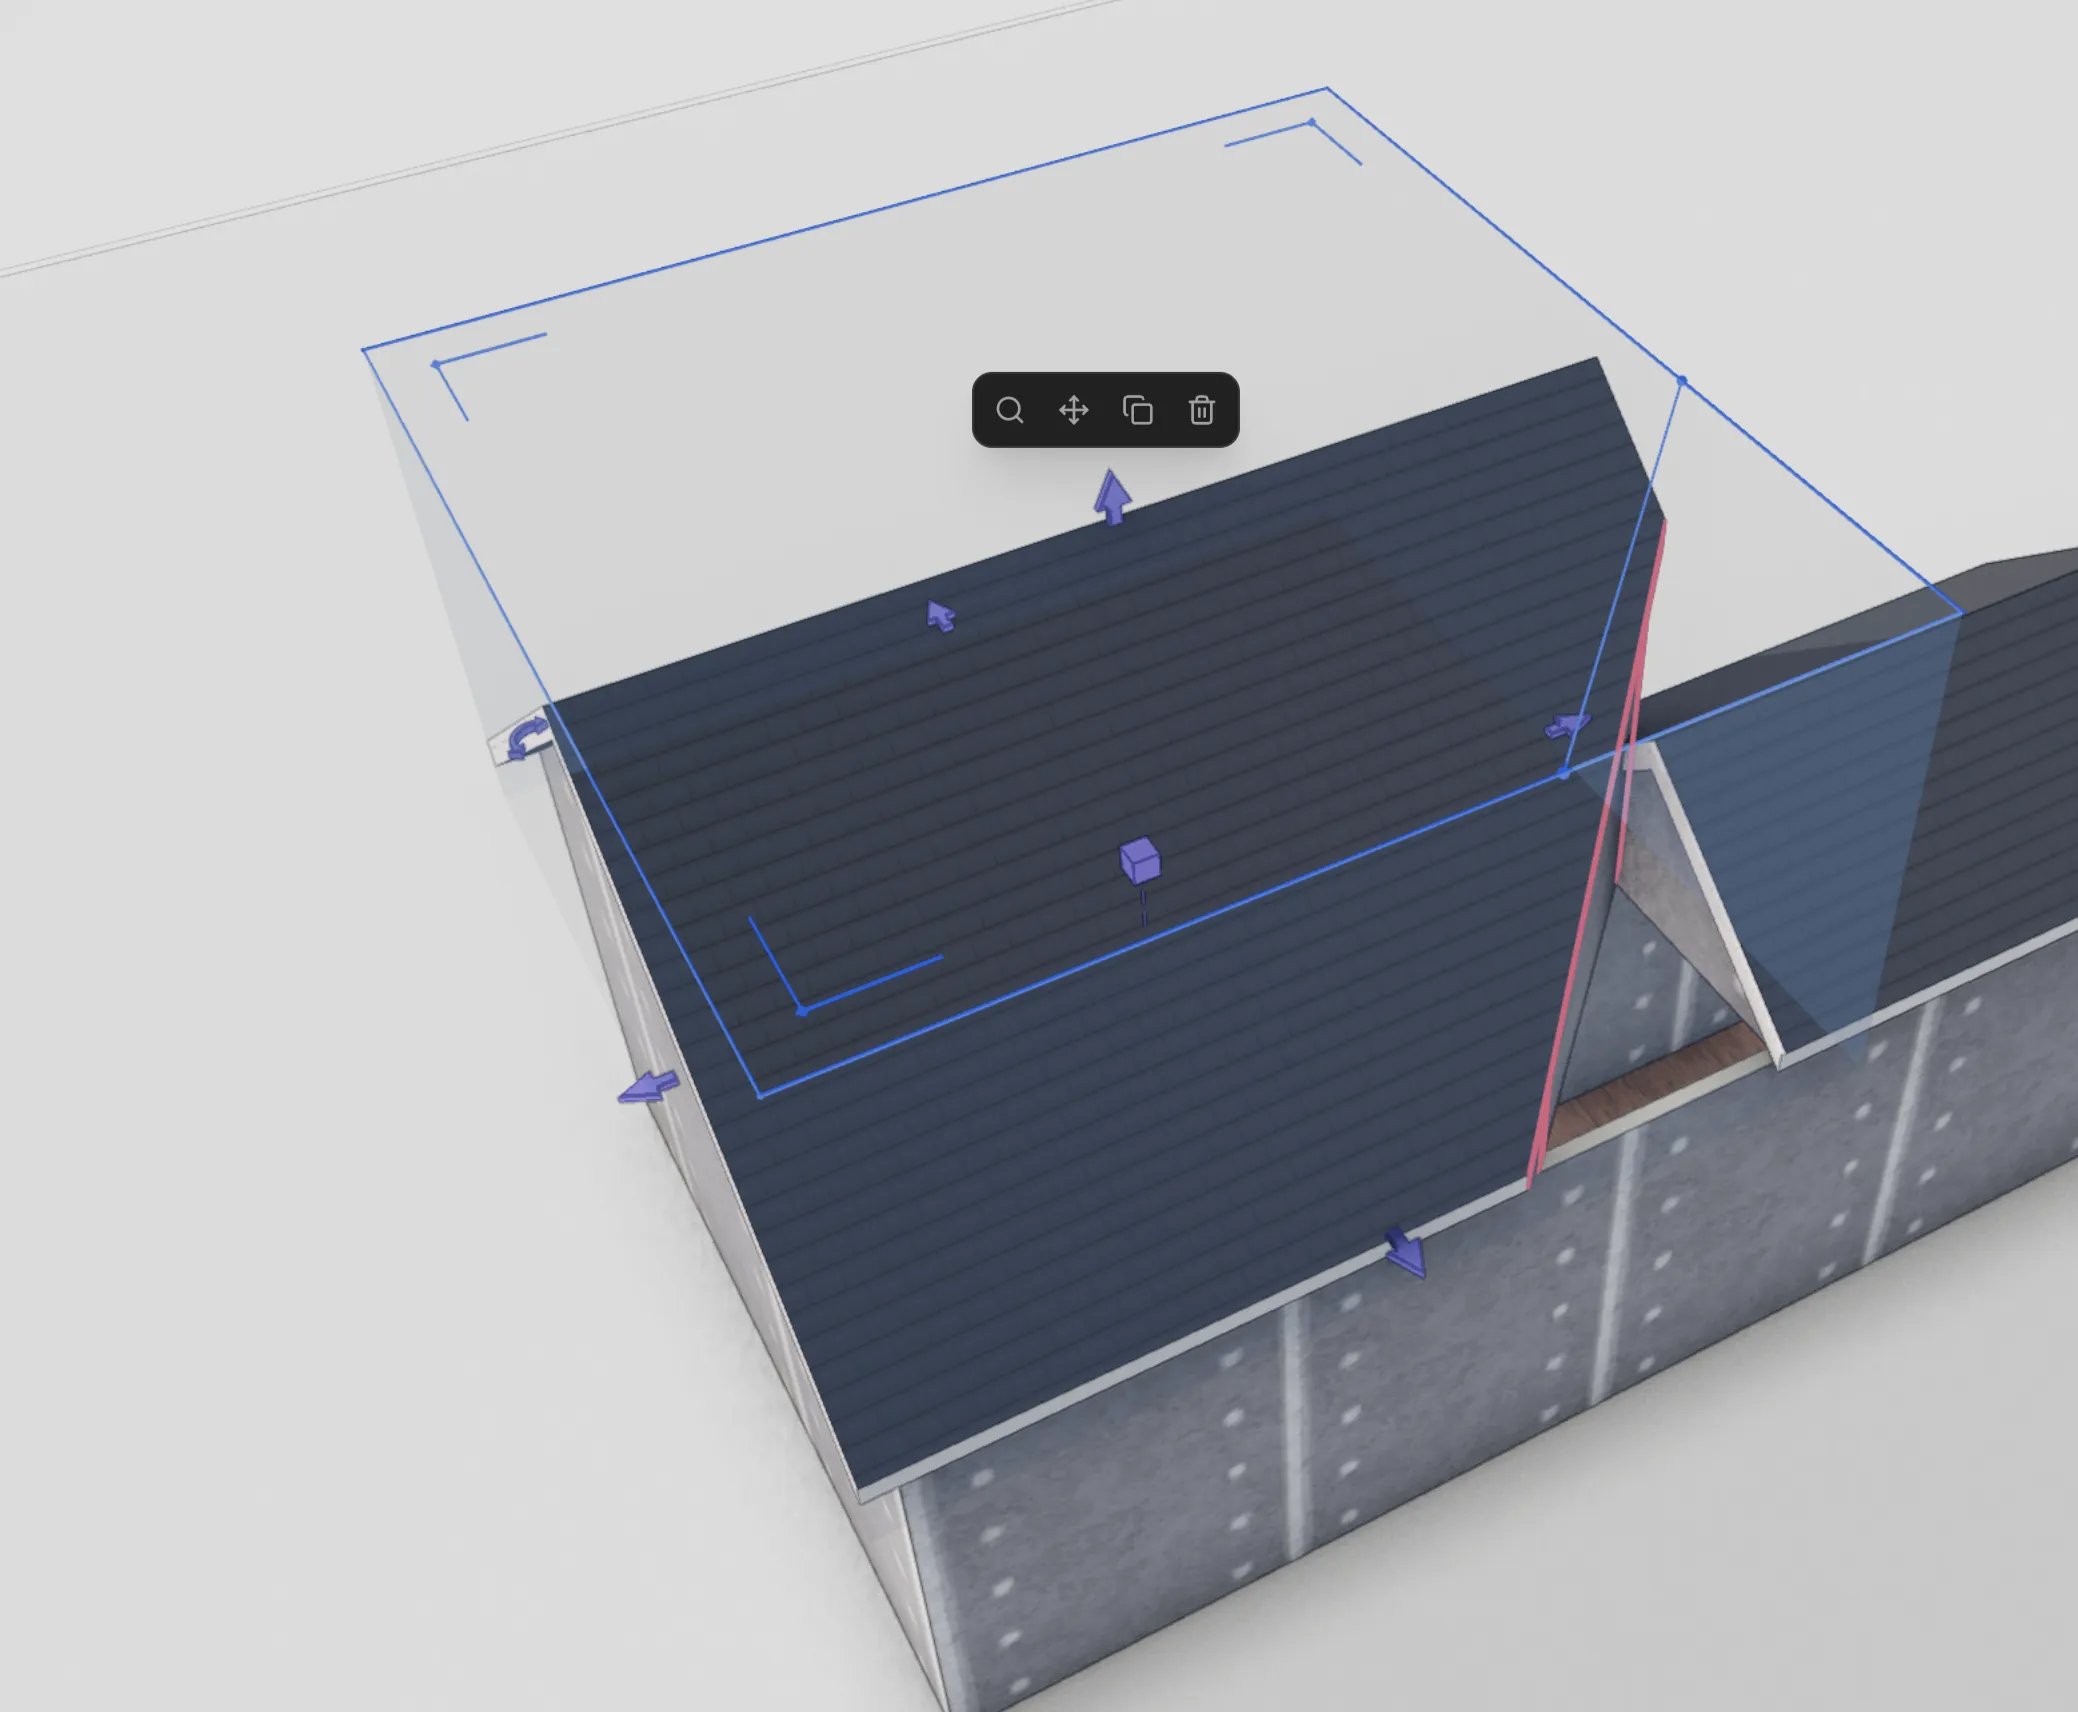
Trimming a roof side with the trim handles
Complex roofs
- Add segments — draw another footprint while a roof (or one of its segments) is selected and the new rectangle joins that roof as an extra segment. That’s how you build L- and T-shaped roofs.
- Duplicate — the Duplicate action clones the whole roof and hands it to you in move mode, ready to drop elsewhere.
- Features — with the Roof tool active, the Build tab shows a Features grid of roof accessories (skylights, chimneys, dormers, vents, and more). Pick one and click the roof segment you want it attached to.
Roof walls and openings
Each segment is a complete volume: it generates its own walls under the roof plane, including the triangular gable ends. Those faces behave like regular walls for openings — you can place doors and windows straight into a gable.Delete a roof
The roof panel’s Delete action removes the whole roof; a segment’s Delete removes just that segment and keeps the rest. Selecting a roof and pressingDelete or Backspace works too.