

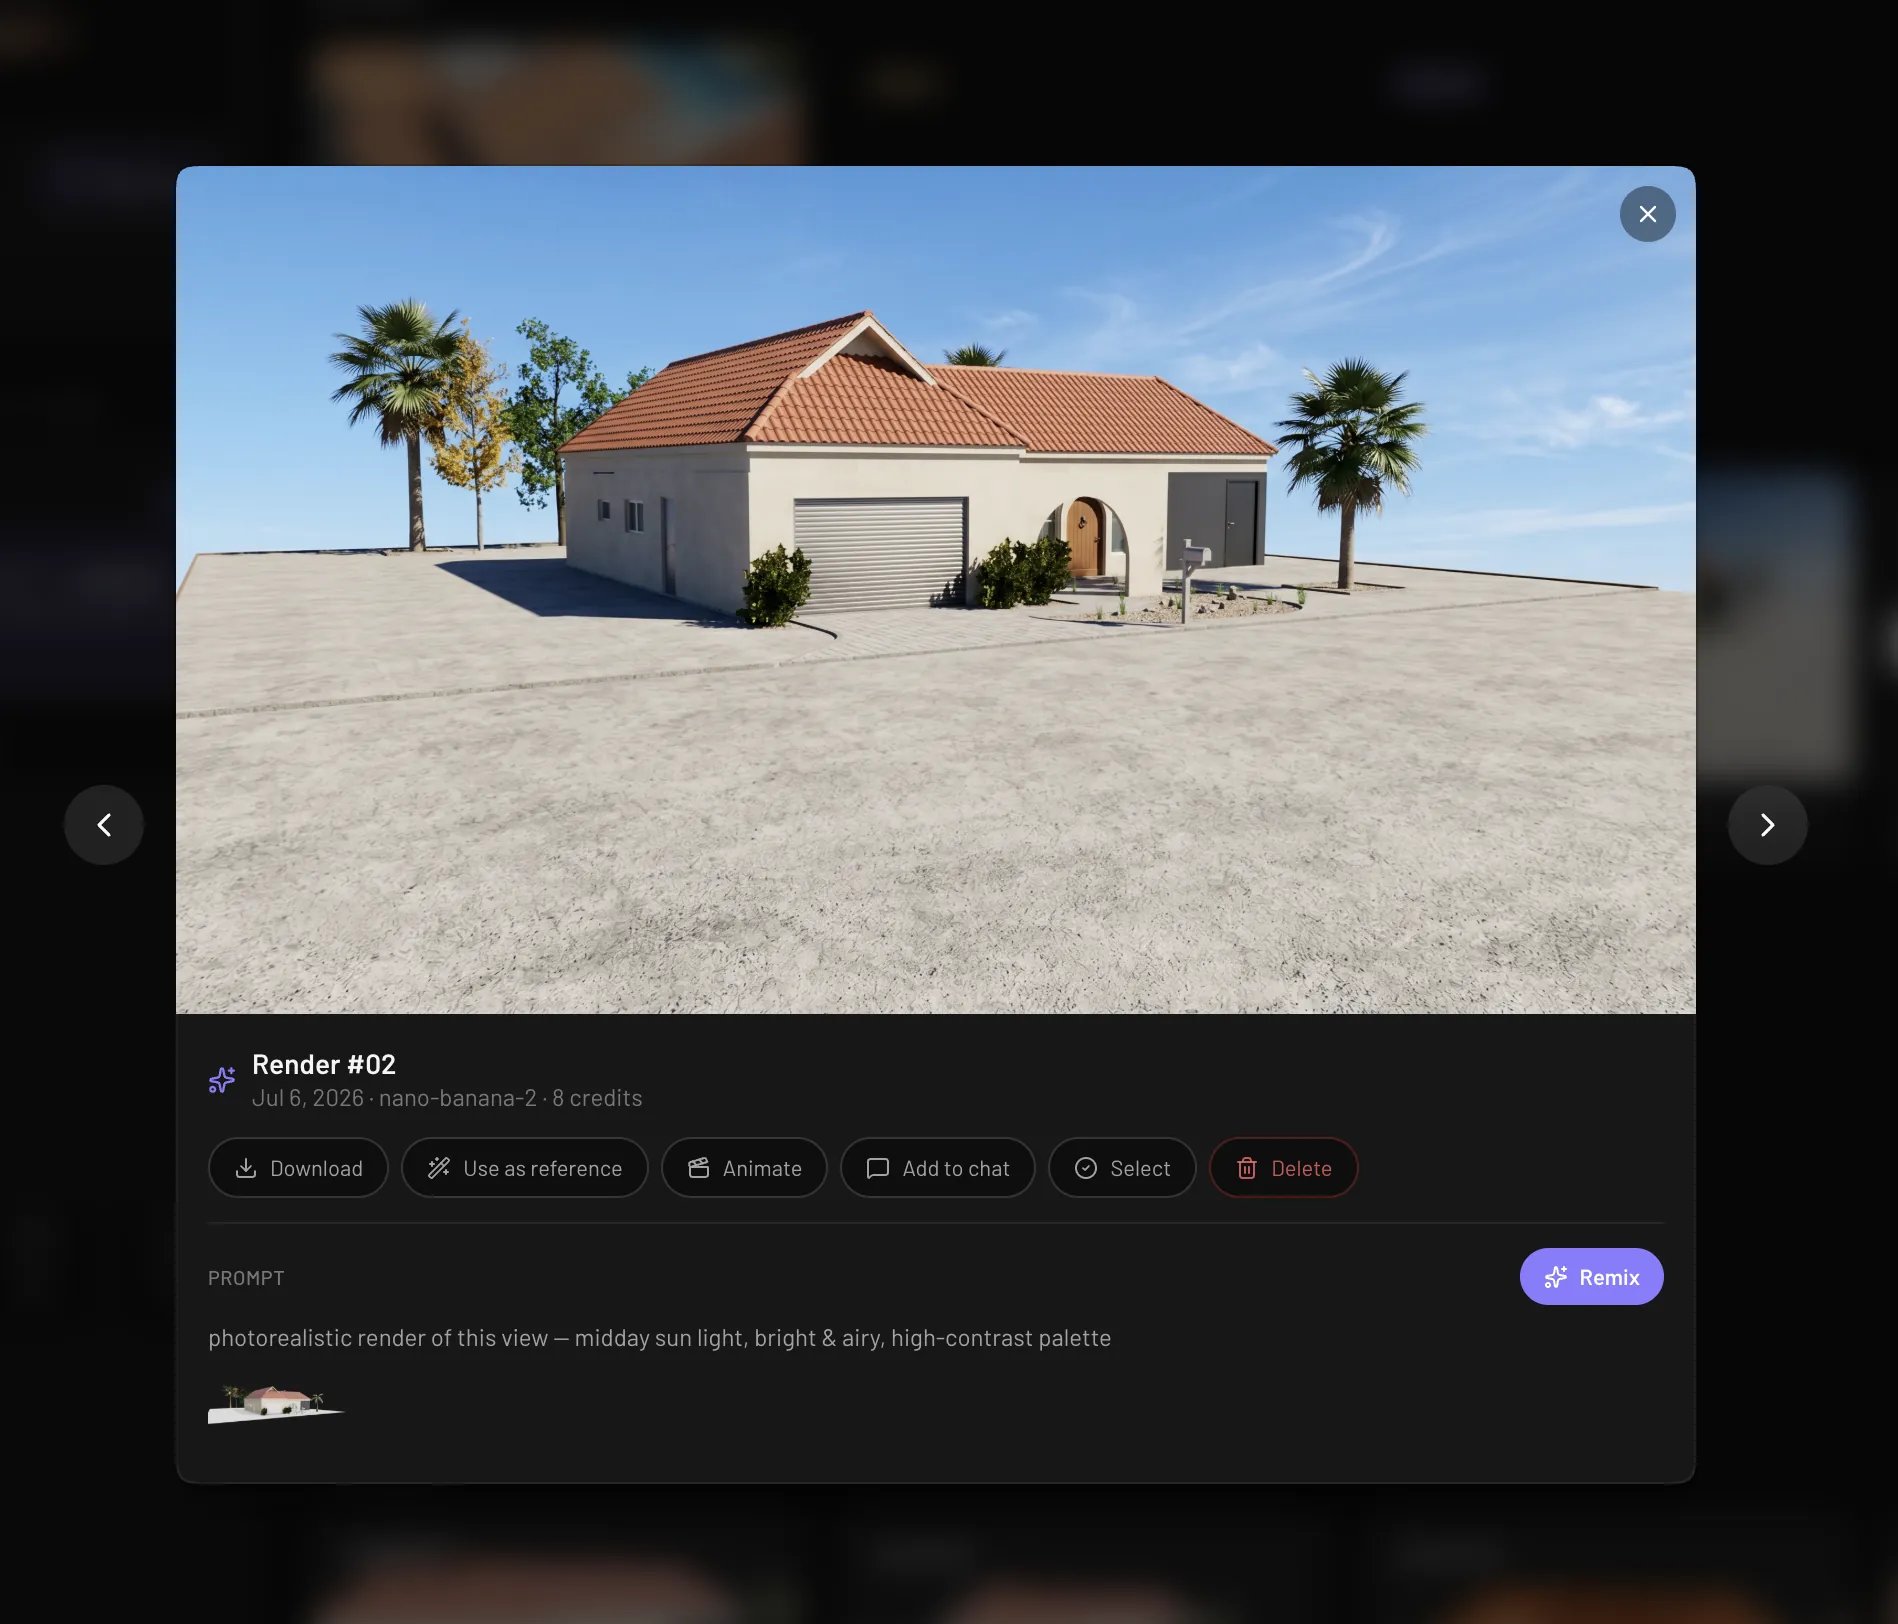
From scene snapshot to rendered image
Switch to Studio
Open a project and use the Edit / Studio toggle in the navbar. Studio replaces the editing rail with a Generate panel and swaps the bottom toolbar for a capture bar. Your credit balance shows next to the Studio toggle. A second Studio tab, Materials, generates paintable PBR materials — see Material Studio.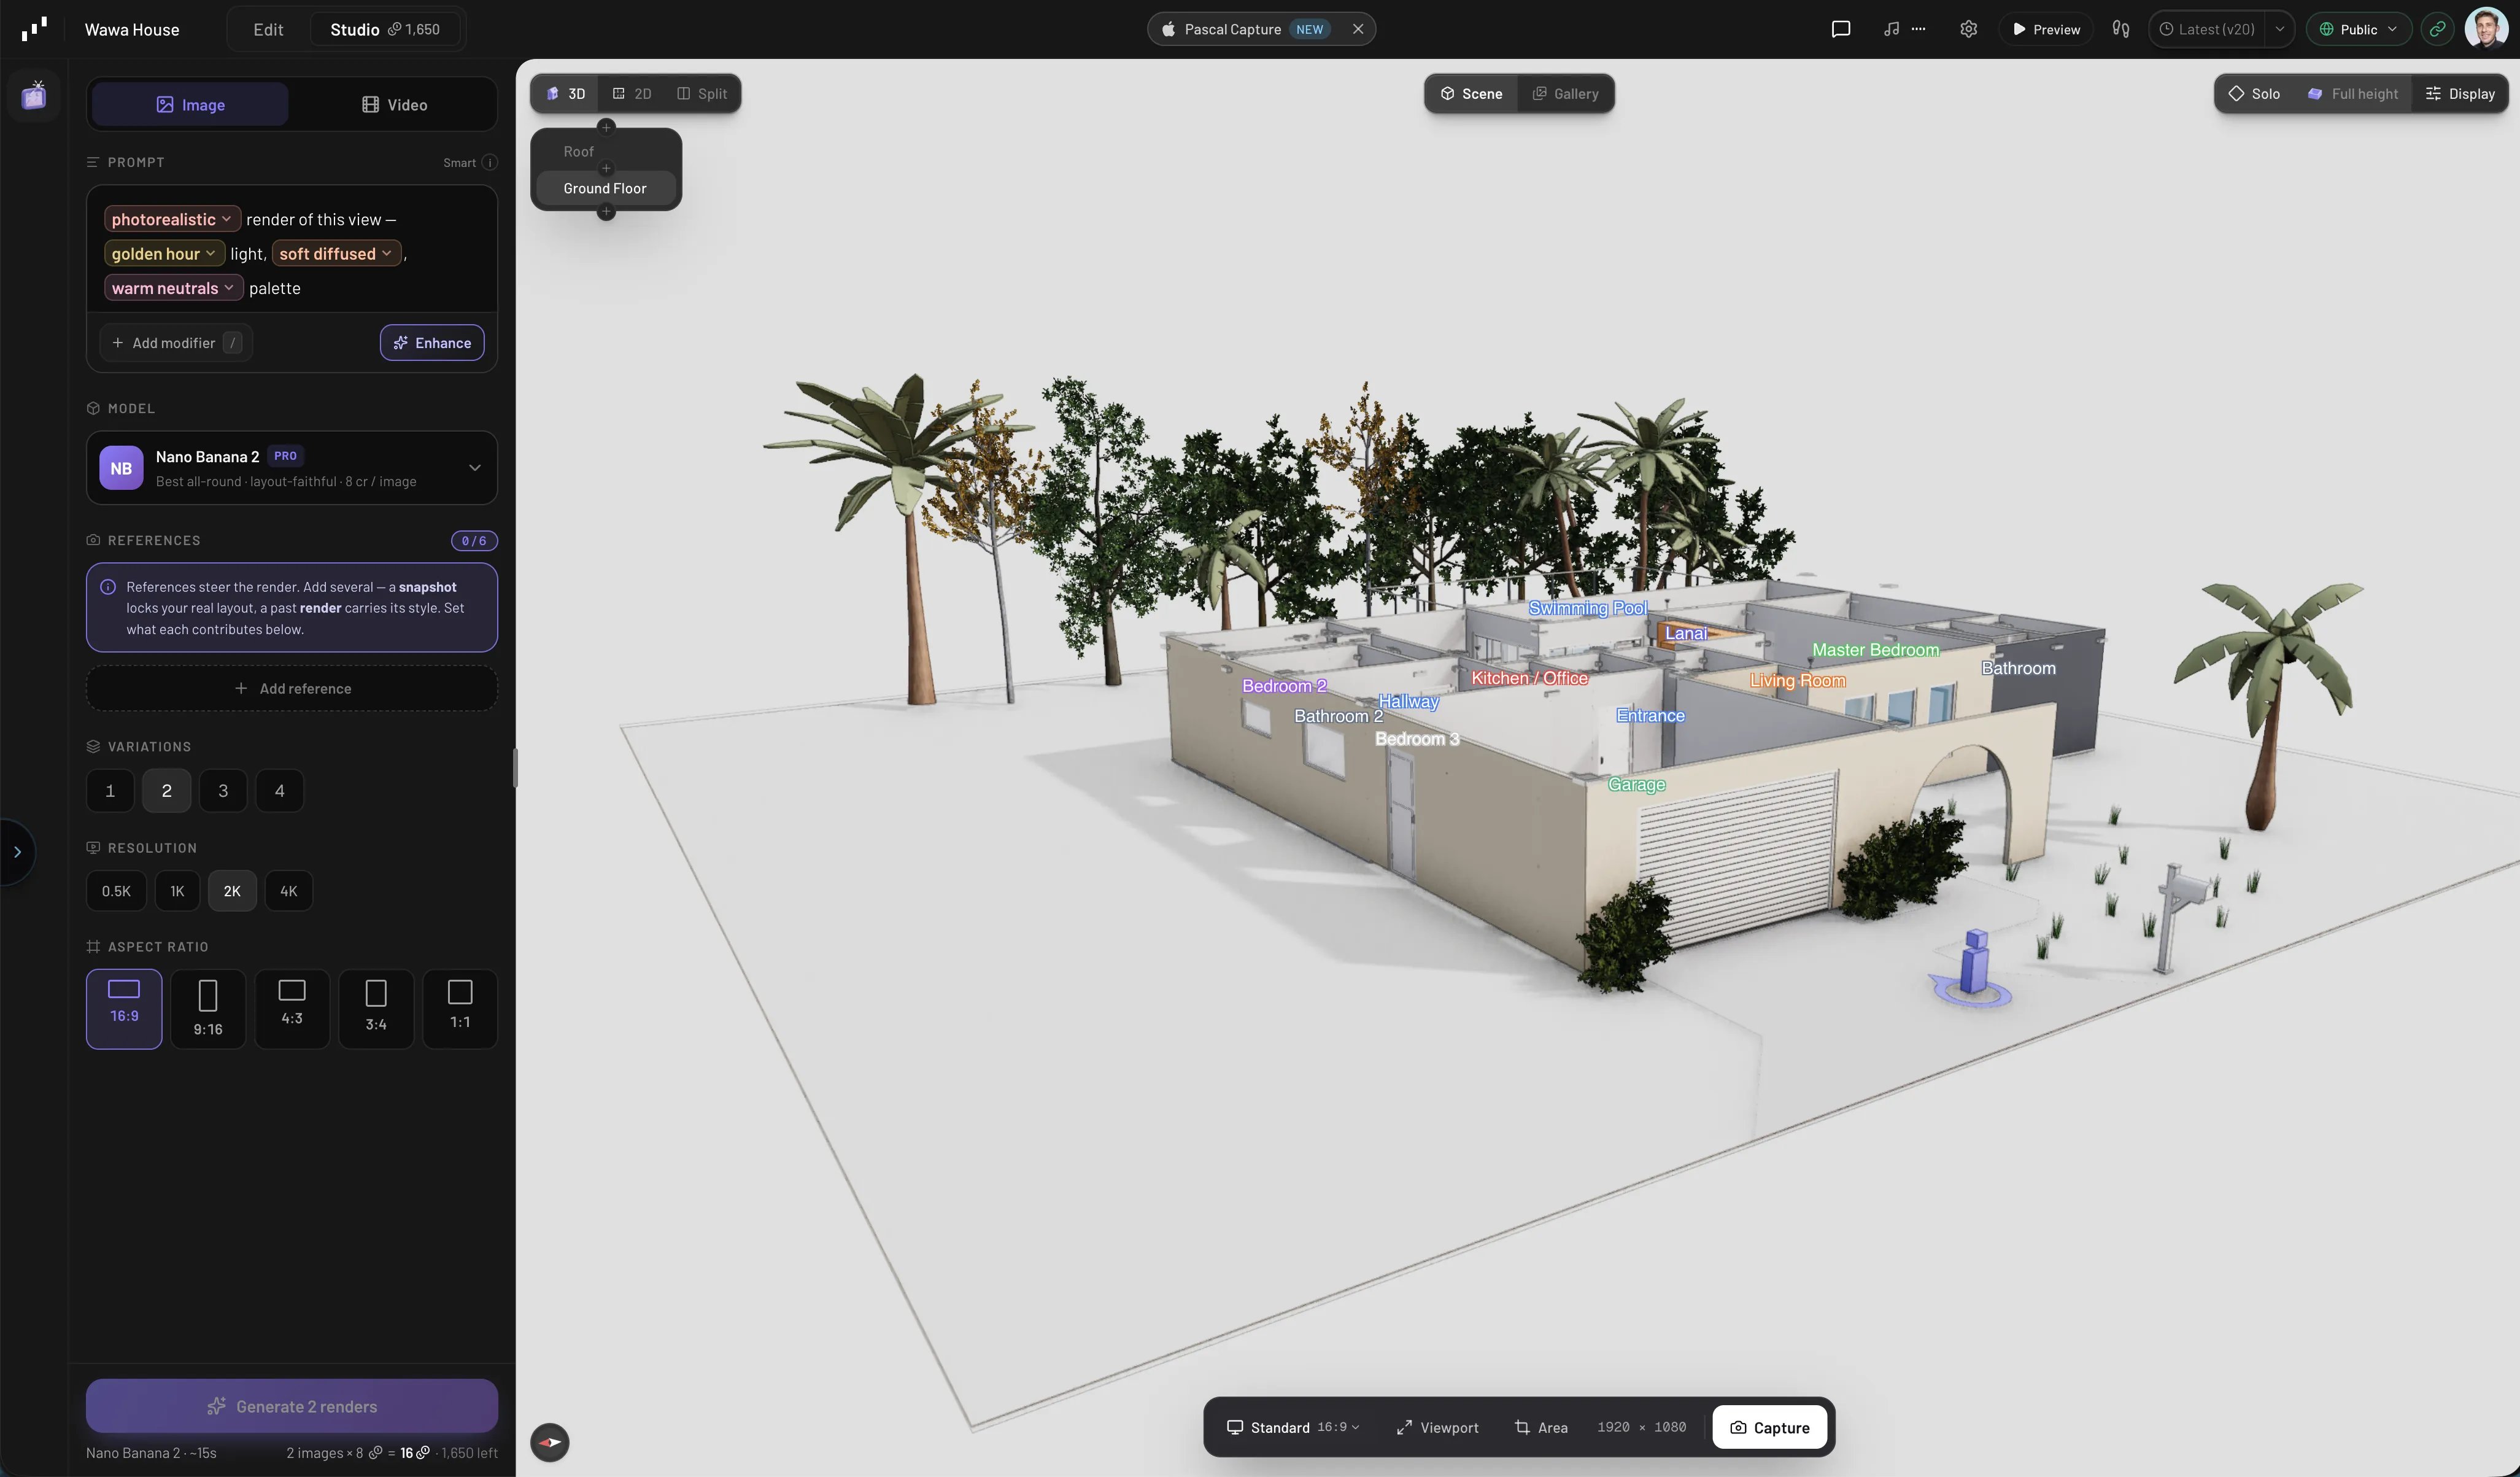
The Studio workspace
Capture a snapshot
Snapshots are how the AI sees your actual scene. Frame the view you want in the viewport, then use the capture bar at the bottom:- Standard — a fixed aspect ratio (
16:9,9:16,4:3,3:4, or1:1) at high resolution. Click Standard again to switch aspect. - Viewport — exactly what your canvas shows, at canvas size.
- Area — drag to capture just part of the view.
Compose a generation
The Generate panel is where you set up the render:- Image or Video — the switch at the top picks the output type.
- Prompt — describe the result. The prompt is smart: highlighted modifiers can be clicked to swap their value, and the Enhance button rewrites your draft into a stronger prompt.
- Model — the model card opens a picker of image and video models, each with a short description of its strengths, a speed estimate, and its credit price. Some models are better at preserving your exact layout; others at restyling or motion.
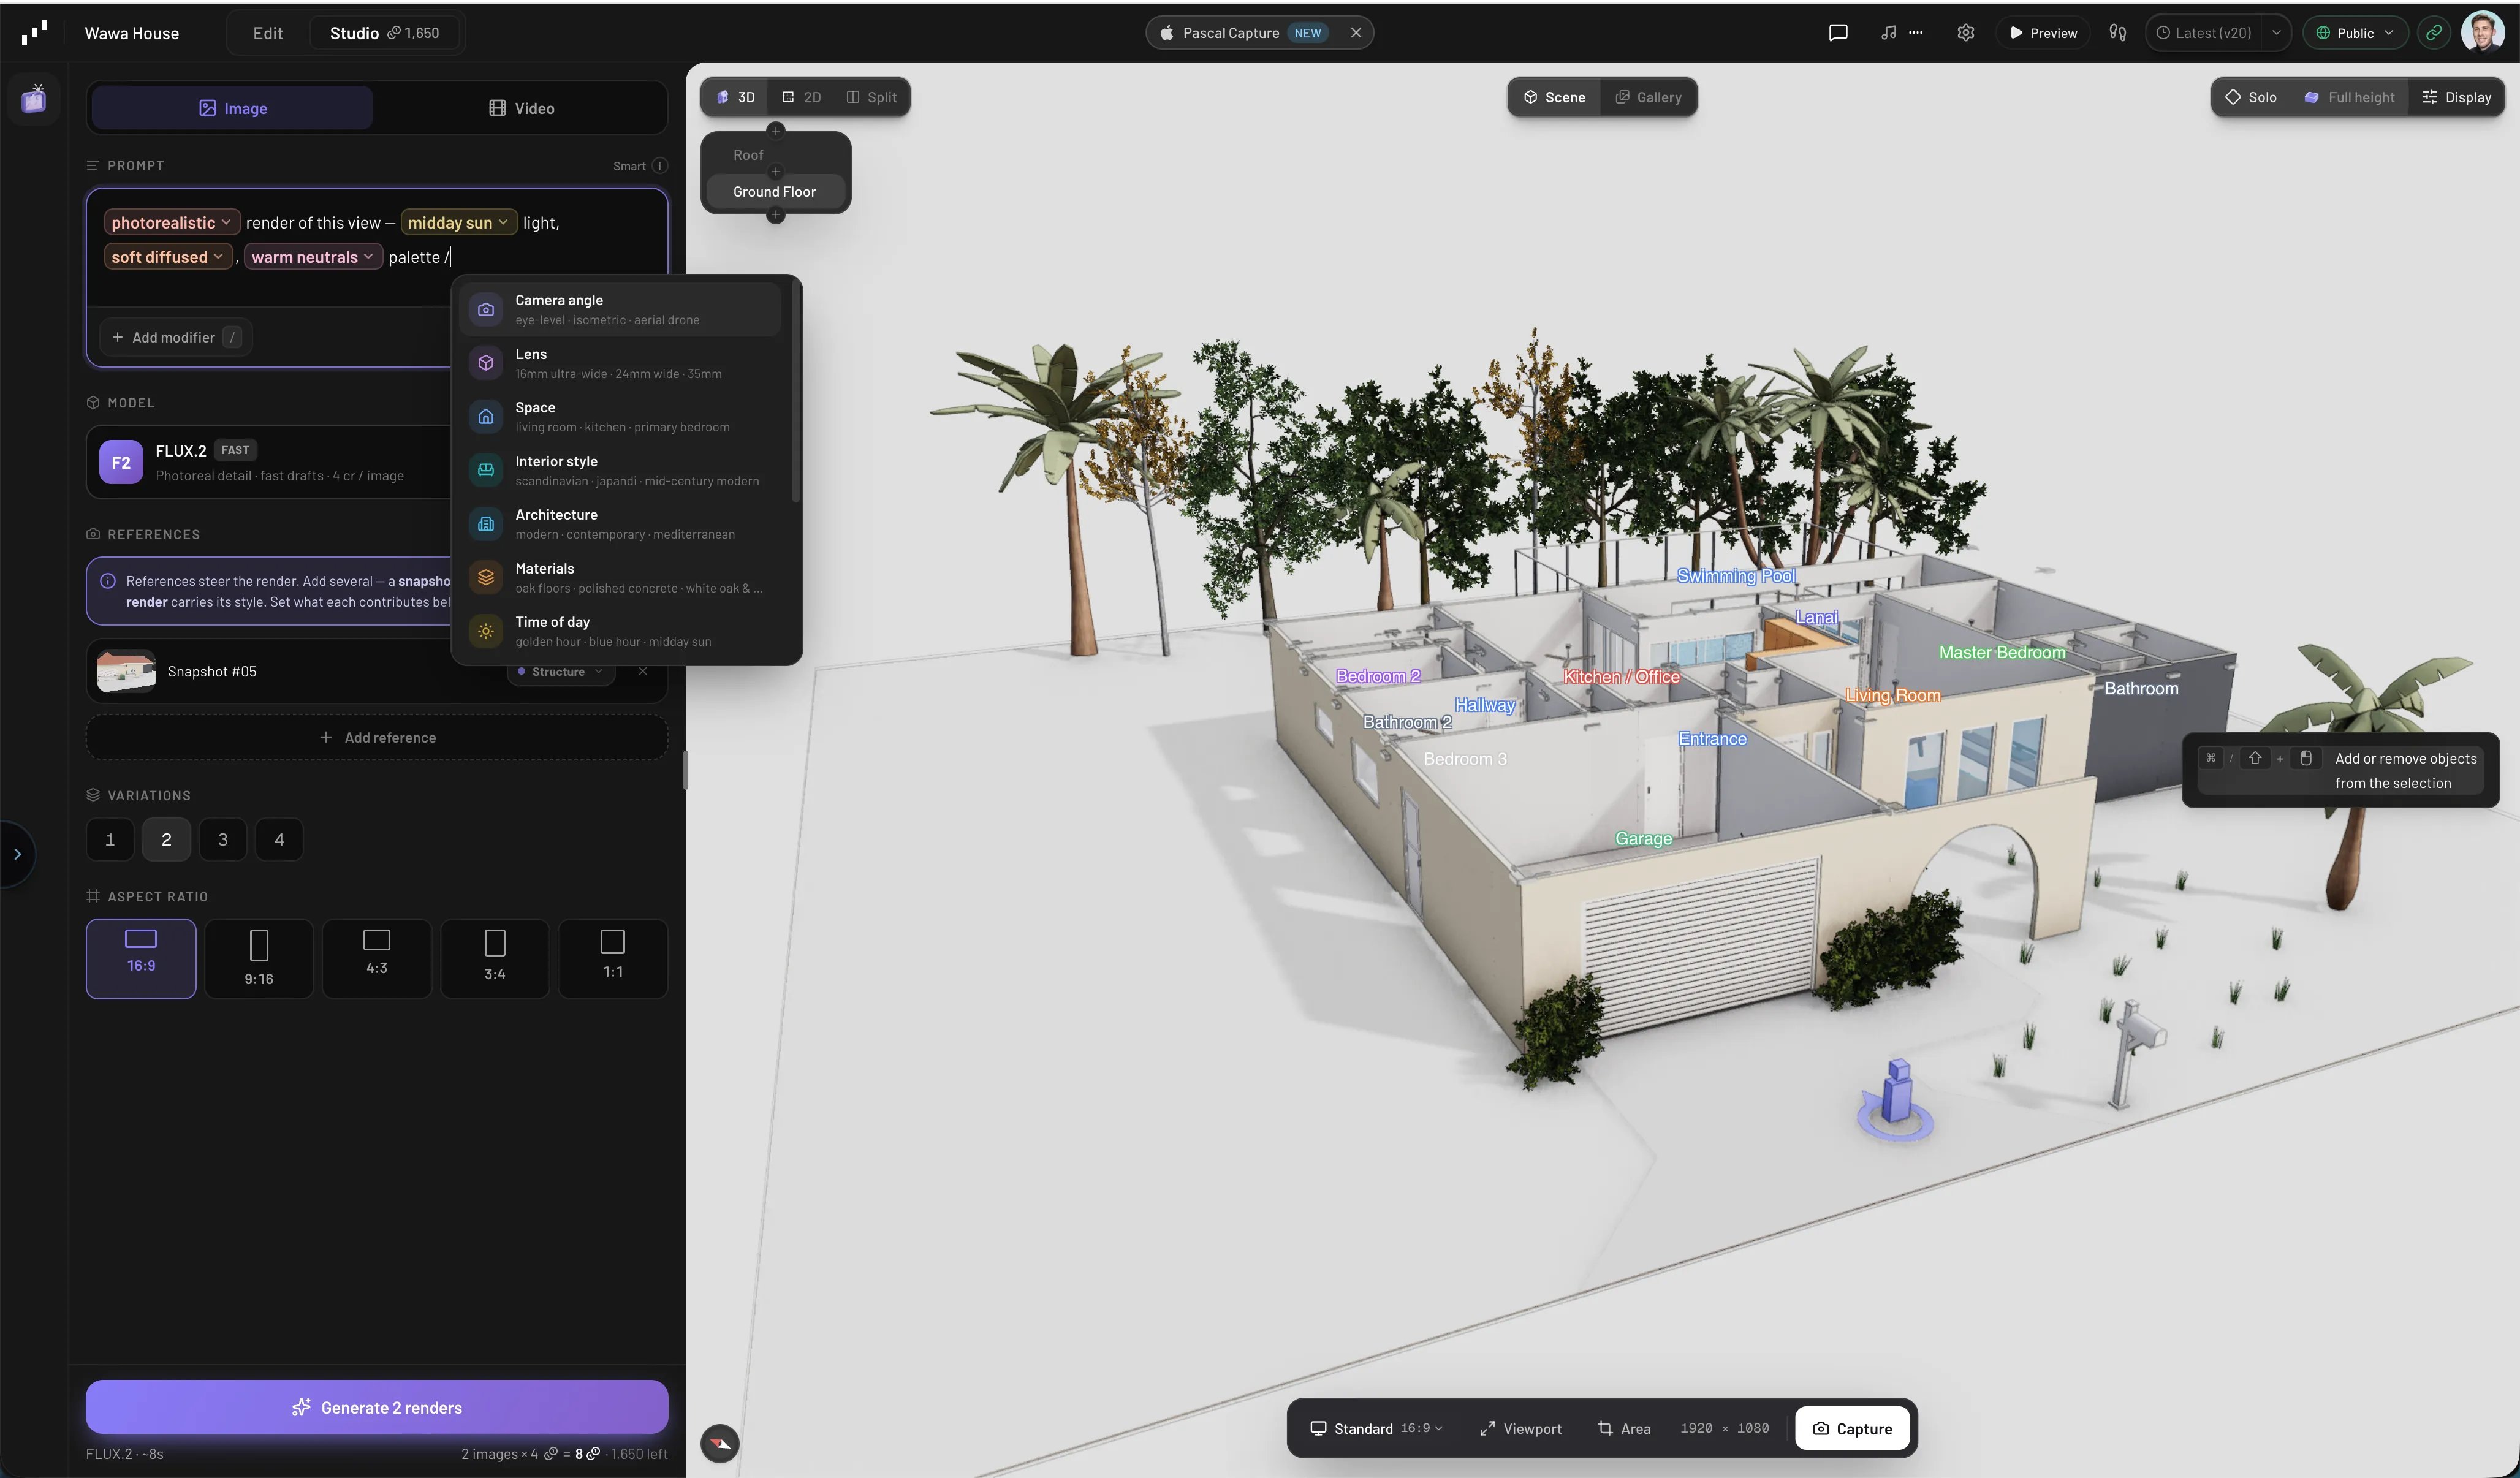
Composing a render in the Generate panel
References
References steer the result. Use Add reference to take a snapshot, pick a past render from the gallery, or upload an image. You can give each reference a role:- Structure — locks your real layout and proportions (typically your snapshot).
- Style — carries look, color, and materials (a render or photo you like).
- Composition — guides framing and element placement.
Output settings
Depending on the mode and model you’ll also see:- Variations — generate 1 to 4 images per run.
- Quality or resolution — output tiers on models that support them; higher tiers cost more credits.
- Aspect ratio — when the model can honor one.
- Motion length and resolution — for video, the clip duration and output resolution.
Generate and track
The generate button shows the credit cost of the run before you commit — count (or seconds) × the model’s per-unit price, next to your remaining balance. While a render is in flight it appears in the in-progress list at the bottom of the panel with a rough time estimate; you can keep composing the next one.The gallery
Gallery is one of Studio’s views, beside 3D and 2D in the view bar above the stage: it shows everything you’ve generated in this project. Pick it to fill the stage, or Split to keep the gallery next to your scene while you compose. Open a render to:- Download it.
- Use as reference — feed it back into the next generation to iterate on a look.
- Add to chat — send it to the AI assistant to discuss or act on.
- See the prompt and references that produced it.
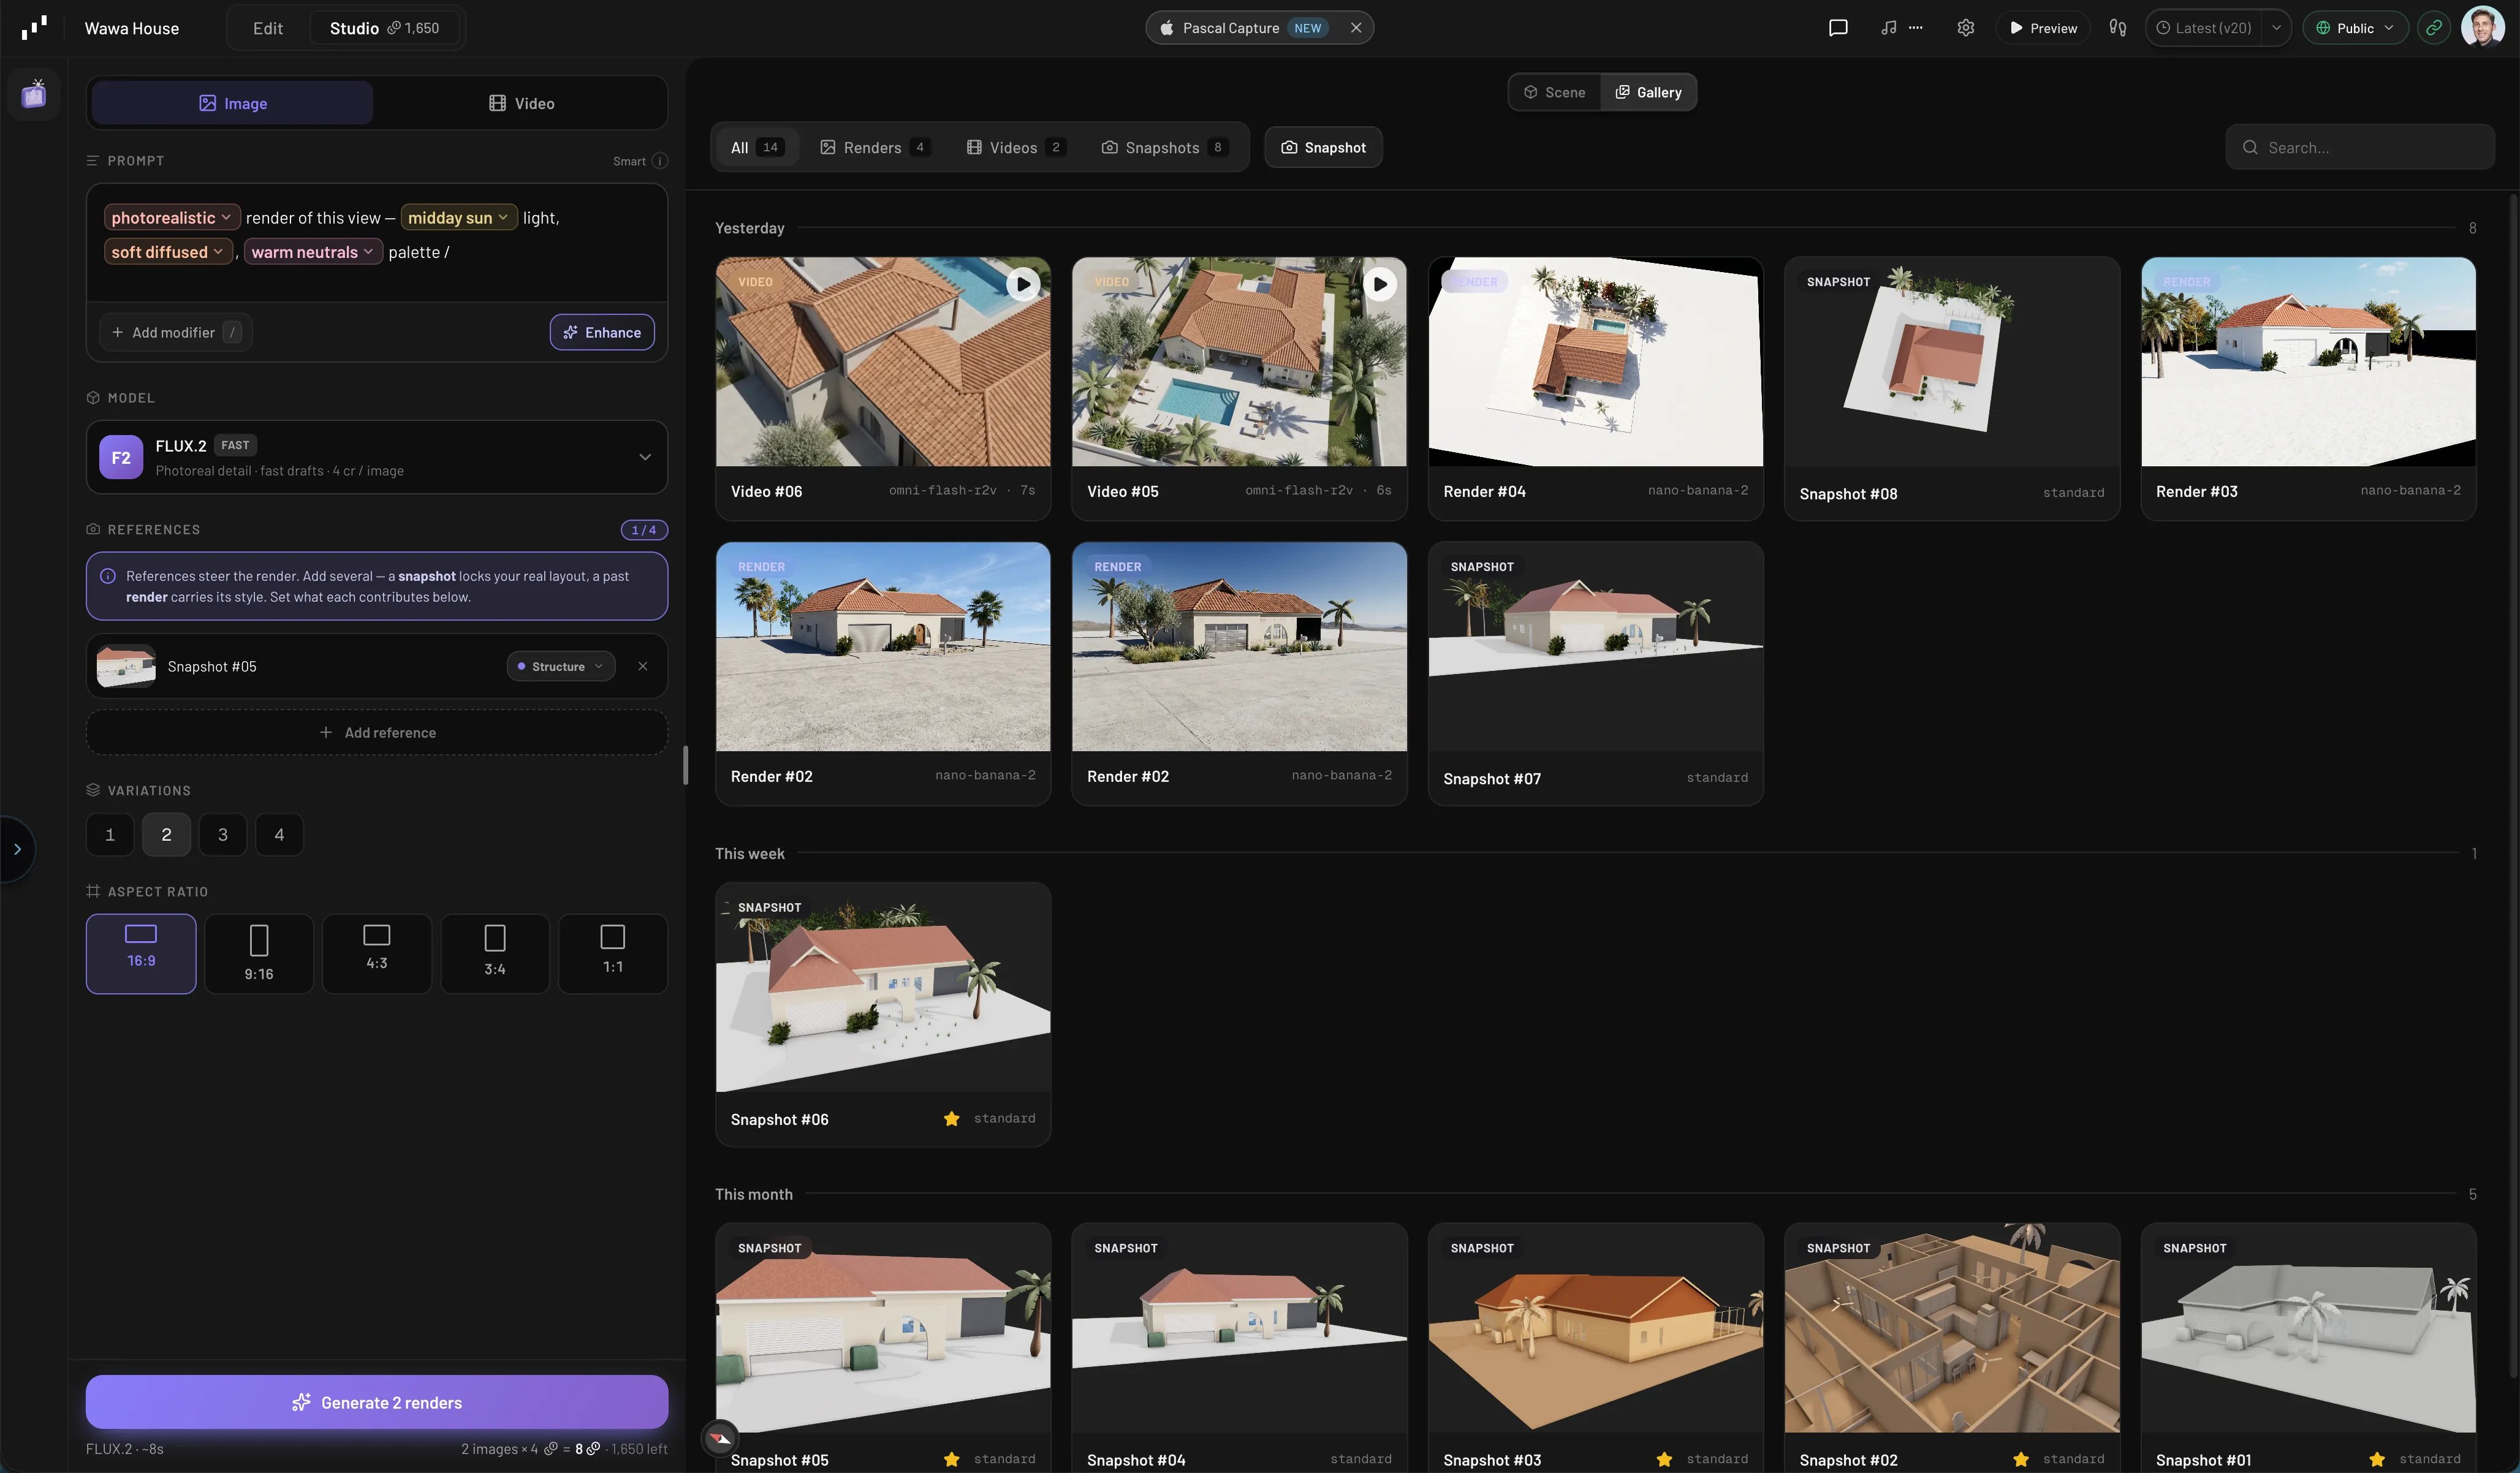
The gallery collects every render and snapshot from your project
Watch the Studio tutorial
Prefer to follow along on video? This walkthrough covers the complete workflow from capturing your scene to generating a photorealistic render.Make your 3D home look photoreal in Pascal AI Studio
How credits work
Generations are metered in credits:- Each model has its own price, per image for image models and per second for video models — it’s shown on the model card and in the cost line under the generate button. Higher quality and resolution tiers cost more.
- Pro and Max plans include monthly credits, which are spent first and renew each billing period.
- Purchased credits never expire and are spent after your plan credits. Buy packs from the in-app credits screen — checkout supports promotion codes.
- If a run costs more than you have left, the generate button becomes Buy more credits.