

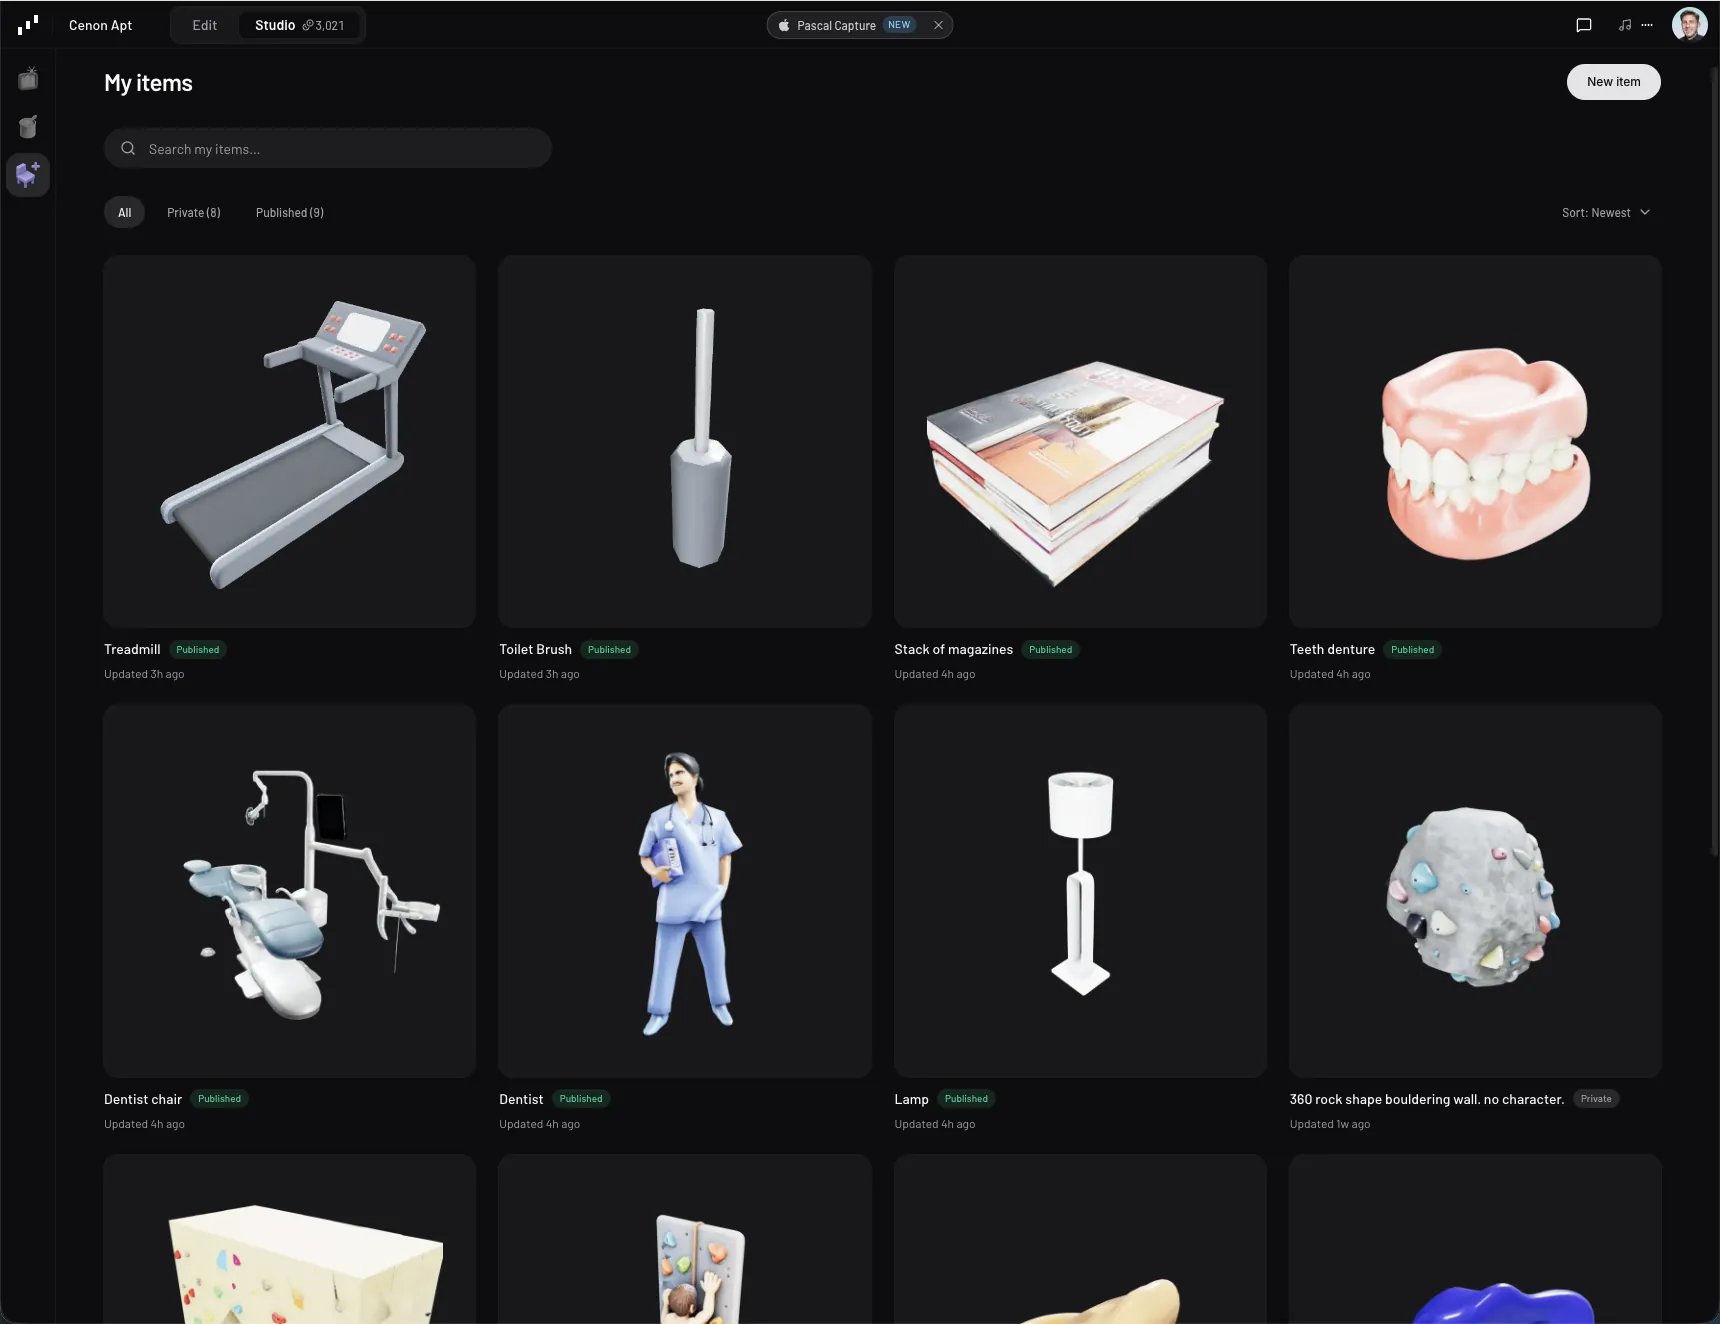
My items in the item builder
Open the item builder
Two ways in:- Switch to Studio with the Edit / Studio toggle in the navbar, then pick Item builder in the icon rail — under Renders and Materials.
- From the Items tab while building: the first tile in any item grid is Create item, which jumps you straight here with the create dialog already open.
Start a new item
New item offers two starting points:- Upload a model — a
.glbfile you already have. See Uploading your own model. - Generate with AI — from a photo, a description, or both.
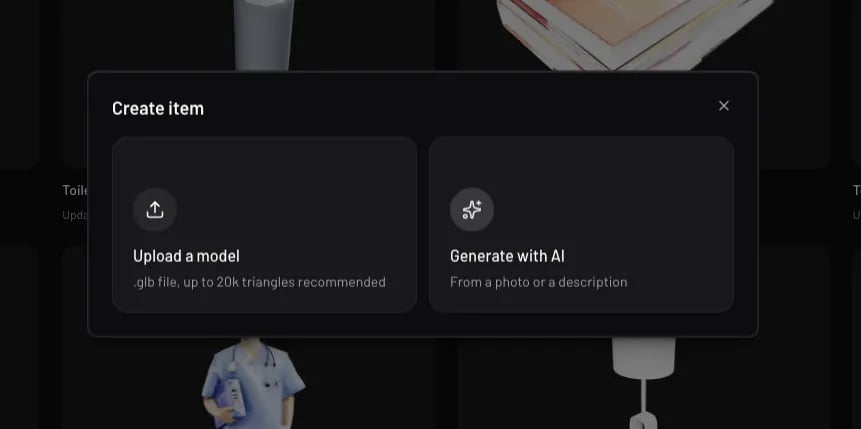
Choosing how to create an item
Pick a model
The Model picker groups every generation model by what it starts from — Image to 3D and Text to 3D. Each row shows its vendor, what it’s good at, and what it costs in credits; your selection is remembered for next time.
Photos beat prose. If you can shoot or find a picture of the thing you want, an
image-to-3D model will get closer than any description — and cost less to iterate on.
Describe what you want
Below the model come the two inputs, each labelled Required or Optional for the model you picked:- Reference image — drop a PNG, JPEG, or WebP, or click to browse. One clean subject against an uncluttered background works best; Rodin is the one to reach for when the photo is busy.
- Description — what the object is (“a walnut mid-century sideboard with brass legs”). Required for text-to-3D models. On models that take both, it steers the result.
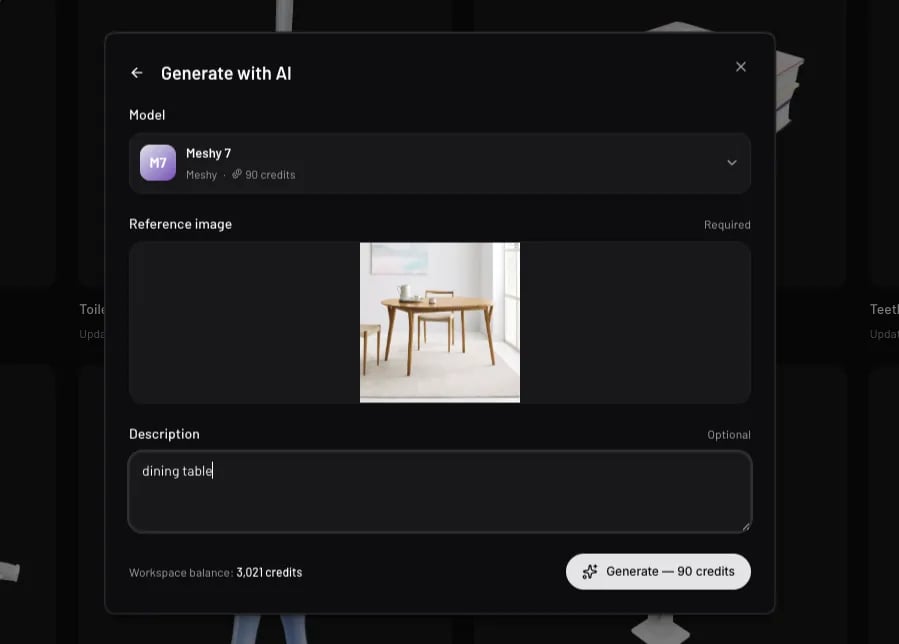
Composing a generation
While it generates
The new item appears immediately as a Generating card with the model’s name and a running clock. Generations take a few minutes depending on the model, and nothing about them is exclusive — start a second, a third, or keep editing an item you already have while they run. Keep the item builder open while a generation is in flight: Pascal picks up finished models from the listing. If you navigate away, come back to My items and it resumes where it left off. From a generating card’s ⋯ menu you can Cancel generation. A card that fails says so, and offers one of two things in its menu:- Retry — the generation never reached the model provider, so it runs again.
- Resume — it failed after the model was built, so Pascal picks the finished model up instead of generating it a second time.
What Pascal does for you
A finished model still isn’t a usable item — it has to be measured, framed, named, and filed. The builder does all of that while the card reads Setting up:- Optimizes the mesh — models over 20k triangles are simplified and their textures compressed. Simplification stops before it would visibly damage the mesh, so a genuinely detailed model is allowed to stay above budget rather than be mangled.
- Measures it — dimensions and offset are read from the model’s own bounding box, so it’s placeable at the right size straight away.
- Captures its images — the catalog thumbnail and the top-down floor plan drawn inside the item’s footprint in the editor’s 2D floor plan view.
- Names and files it — a name, a category, and the rooms it belongs in, inferred from your prompt and reference image. All of it is yours to overwrite.
Tune the item
Click any finished card to open it on the stage with its panel on the right. Rename it at the top, then work through the tabs:- Info — categories, status, and the Thumbnail and Floor plan images. This is where you re-capture either image if the automatic one didn’t frame the item well. For a generated item, the top of this tab shows its provenance: the model that made it, your prompt, and the source photo.
- Transform — Attach to (floor, wall face, wall side, or ceiling), Dimensions, Offset, Rotation, Scale, and Surface — the height of the flat top other items can sit on, so lamps land correctly on a table.
- Interactive — animations and interactions the item exposes when someone walks through the scene.
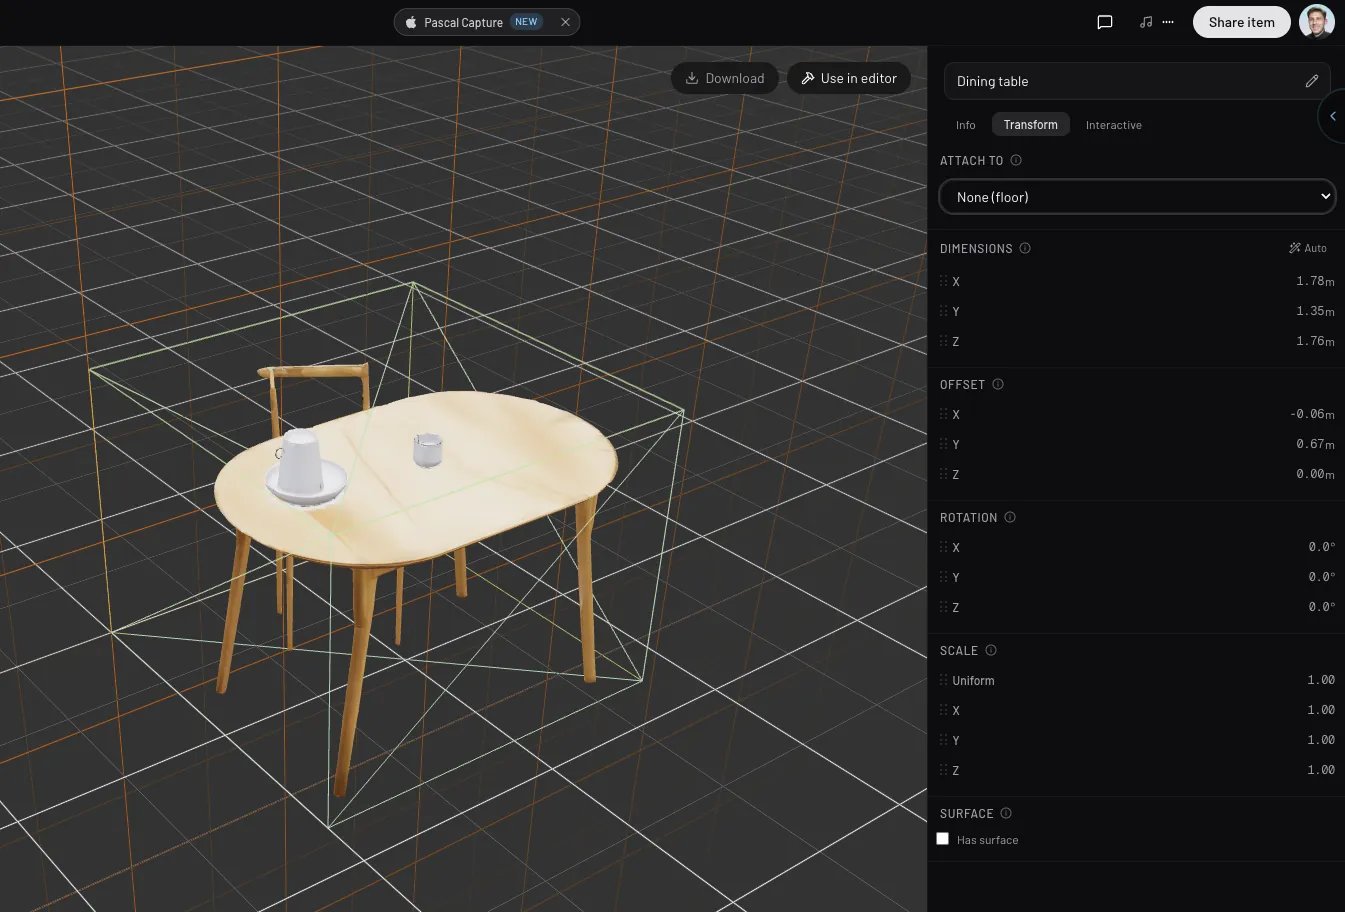
A generated item open in the builder, on the Transform tab
Use it, share it, export it
With an item open, Download and Use in editor sit above the stage and Share item in the navbar. From the listing, the same actions live in each card’s ⋯ menu:- Use in editor — leaves Studio, arms the item for placement, and drops you back in the scene with it on your cursor. See Placing and arranging.
- Download model — the optimized
.glb, for use anywhere else. - Publish to Community — makes the item public. Share item does the same from inside an open item, saving it first.
- Delete item — permanent.
Uploading your own model
The upload path takes a.glb file and runs the same setup pipeline — optimize, measure,
capture, classify. Upload-born items get one extra tab:
- Asset — replace the model, browse previous versions, and control optimization with Auto-optimize on save and its Compress textures (KTX2) sub-option. Leave both on unless you have already optimized the file yourself. Turning auto-optimize off exposes a manual Simplify ratio you can preview before committing.
How credits work
Item generations draw from the same credit balance as Studio renders and Material Studio: each model prices its own generation, the cost is shown on the model row and on the generate button next to your workspace balance, failed runs are refunded, and a balance too low for the selected model surfaces Buy credits right where you are. See Credits for balances and packs.Watch it in action
A full run start to finish: photographing a real object, generating it, and placing the result in a home.Create any 3D item you need in Pascal