> ## Documentation Index
> Fetch the complete documentation index at: https://editor.pascal.app/docs/llms.txt
> Use this file to discover all available pages before exploring further.
# Your first scene
> Build your first room in Pascal in about five minutes — draw walls, add a door and window, place furniture, and move the camera.
In about five minutes you'll go from an empty project to a furnished room. You'll draw
walls, cut in a door and a window, drop in some furniture, and learn how to move around
your scene.
Open [editor.pascal.app](https://editor.pascal.app) and sign in — with your email
(you'll get a code and a sign-in link) or with Google. Click **Create a new project**
and give it a name. Under **Starting point**, keep **Blank project** for this
walkthrough — or pick one of the templates to start from a ready-made building you
can reshape. Choose **Public** or **Private**, and click **Create project**.
The editor opens on an empty canvas. Everything you do from here is saved to your
account automatically — there is no save button to remember.
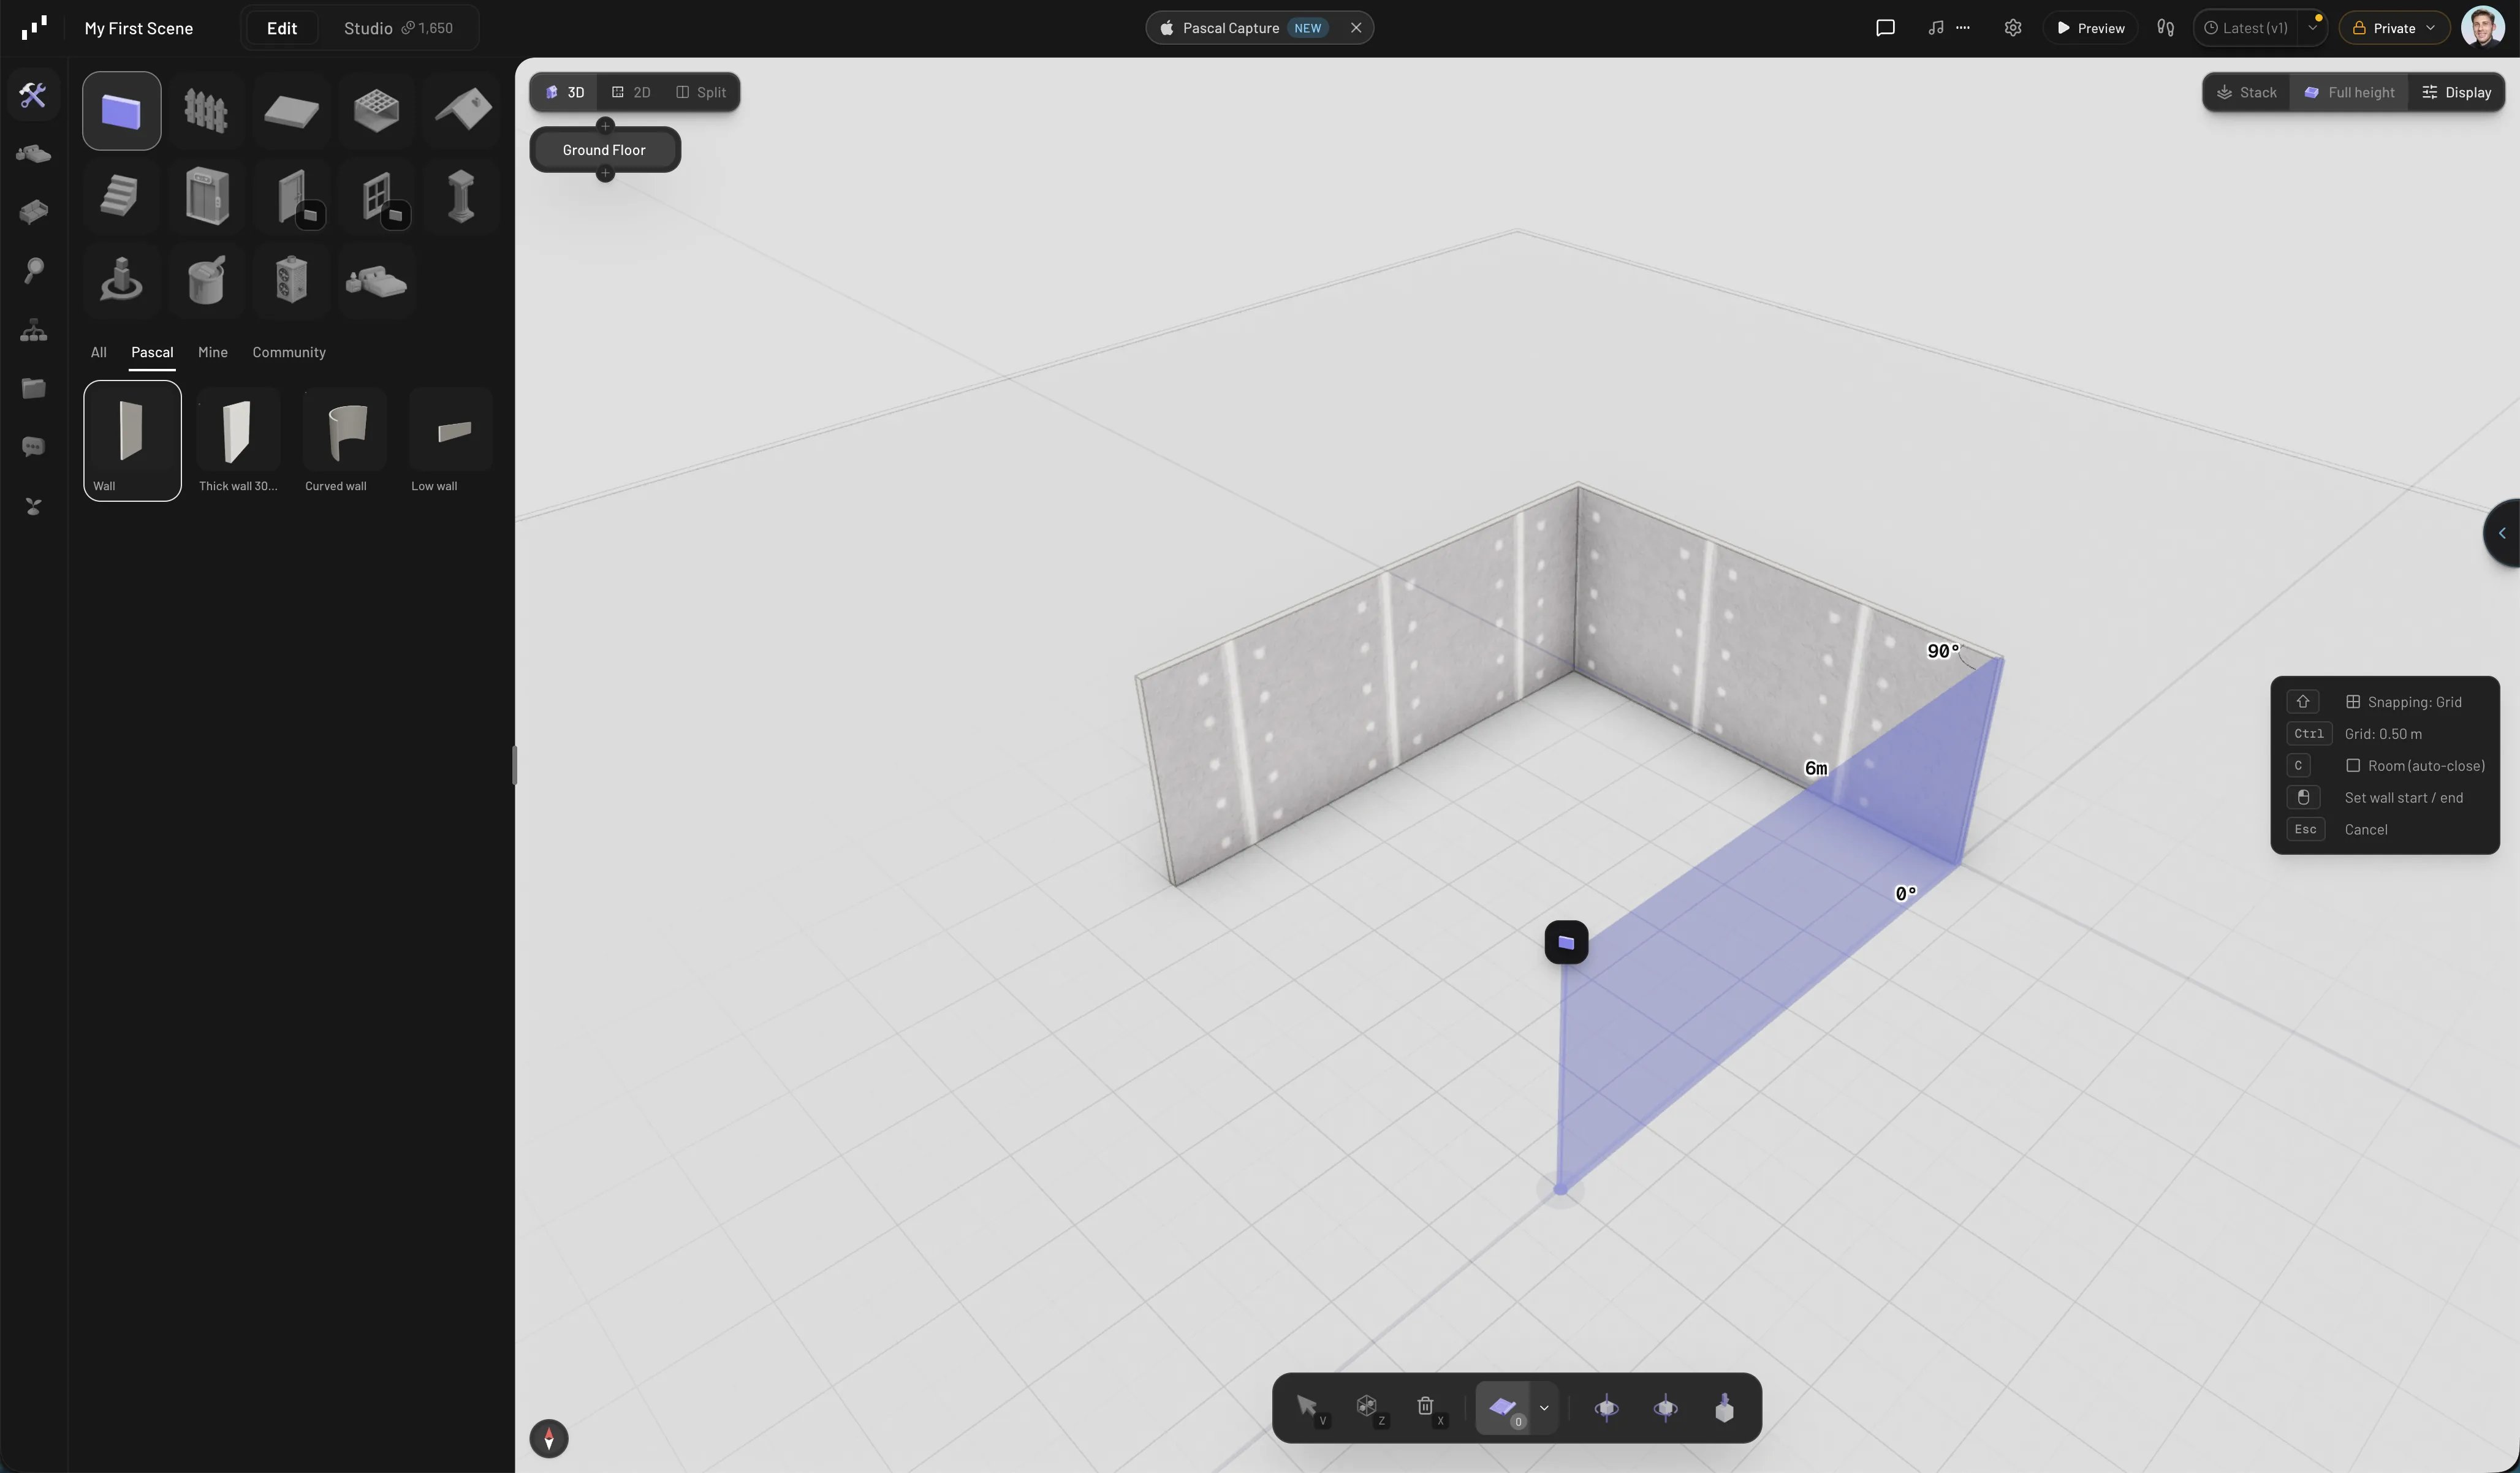
Open the **Build** tab in the left sidebar. The **Wall** tool is armed by default
(you can also press `B` at any time).
Click on the canvas to place the first corner, move the mouse — a measurement label
follows the wall — and click again for each corner. The wall tool starts in
**Room (auto-close)** mode: click back on your starting corner and the loop closes
into a room. When walls enclose a space, Pascal automatically adds a floor and
ceiling for it.
Press `Esc` to stop drawing, and `Cmd/Ctrl + Z` if a wall lands wrong. If a corner
won't land where you want it, tap `Shift` to cycle the snapping mode — **Grid**,
**Lines**, **Angles**, or **Off** — shown in the helper panel on the right.
More detail lives in [Walls](/building/walls).
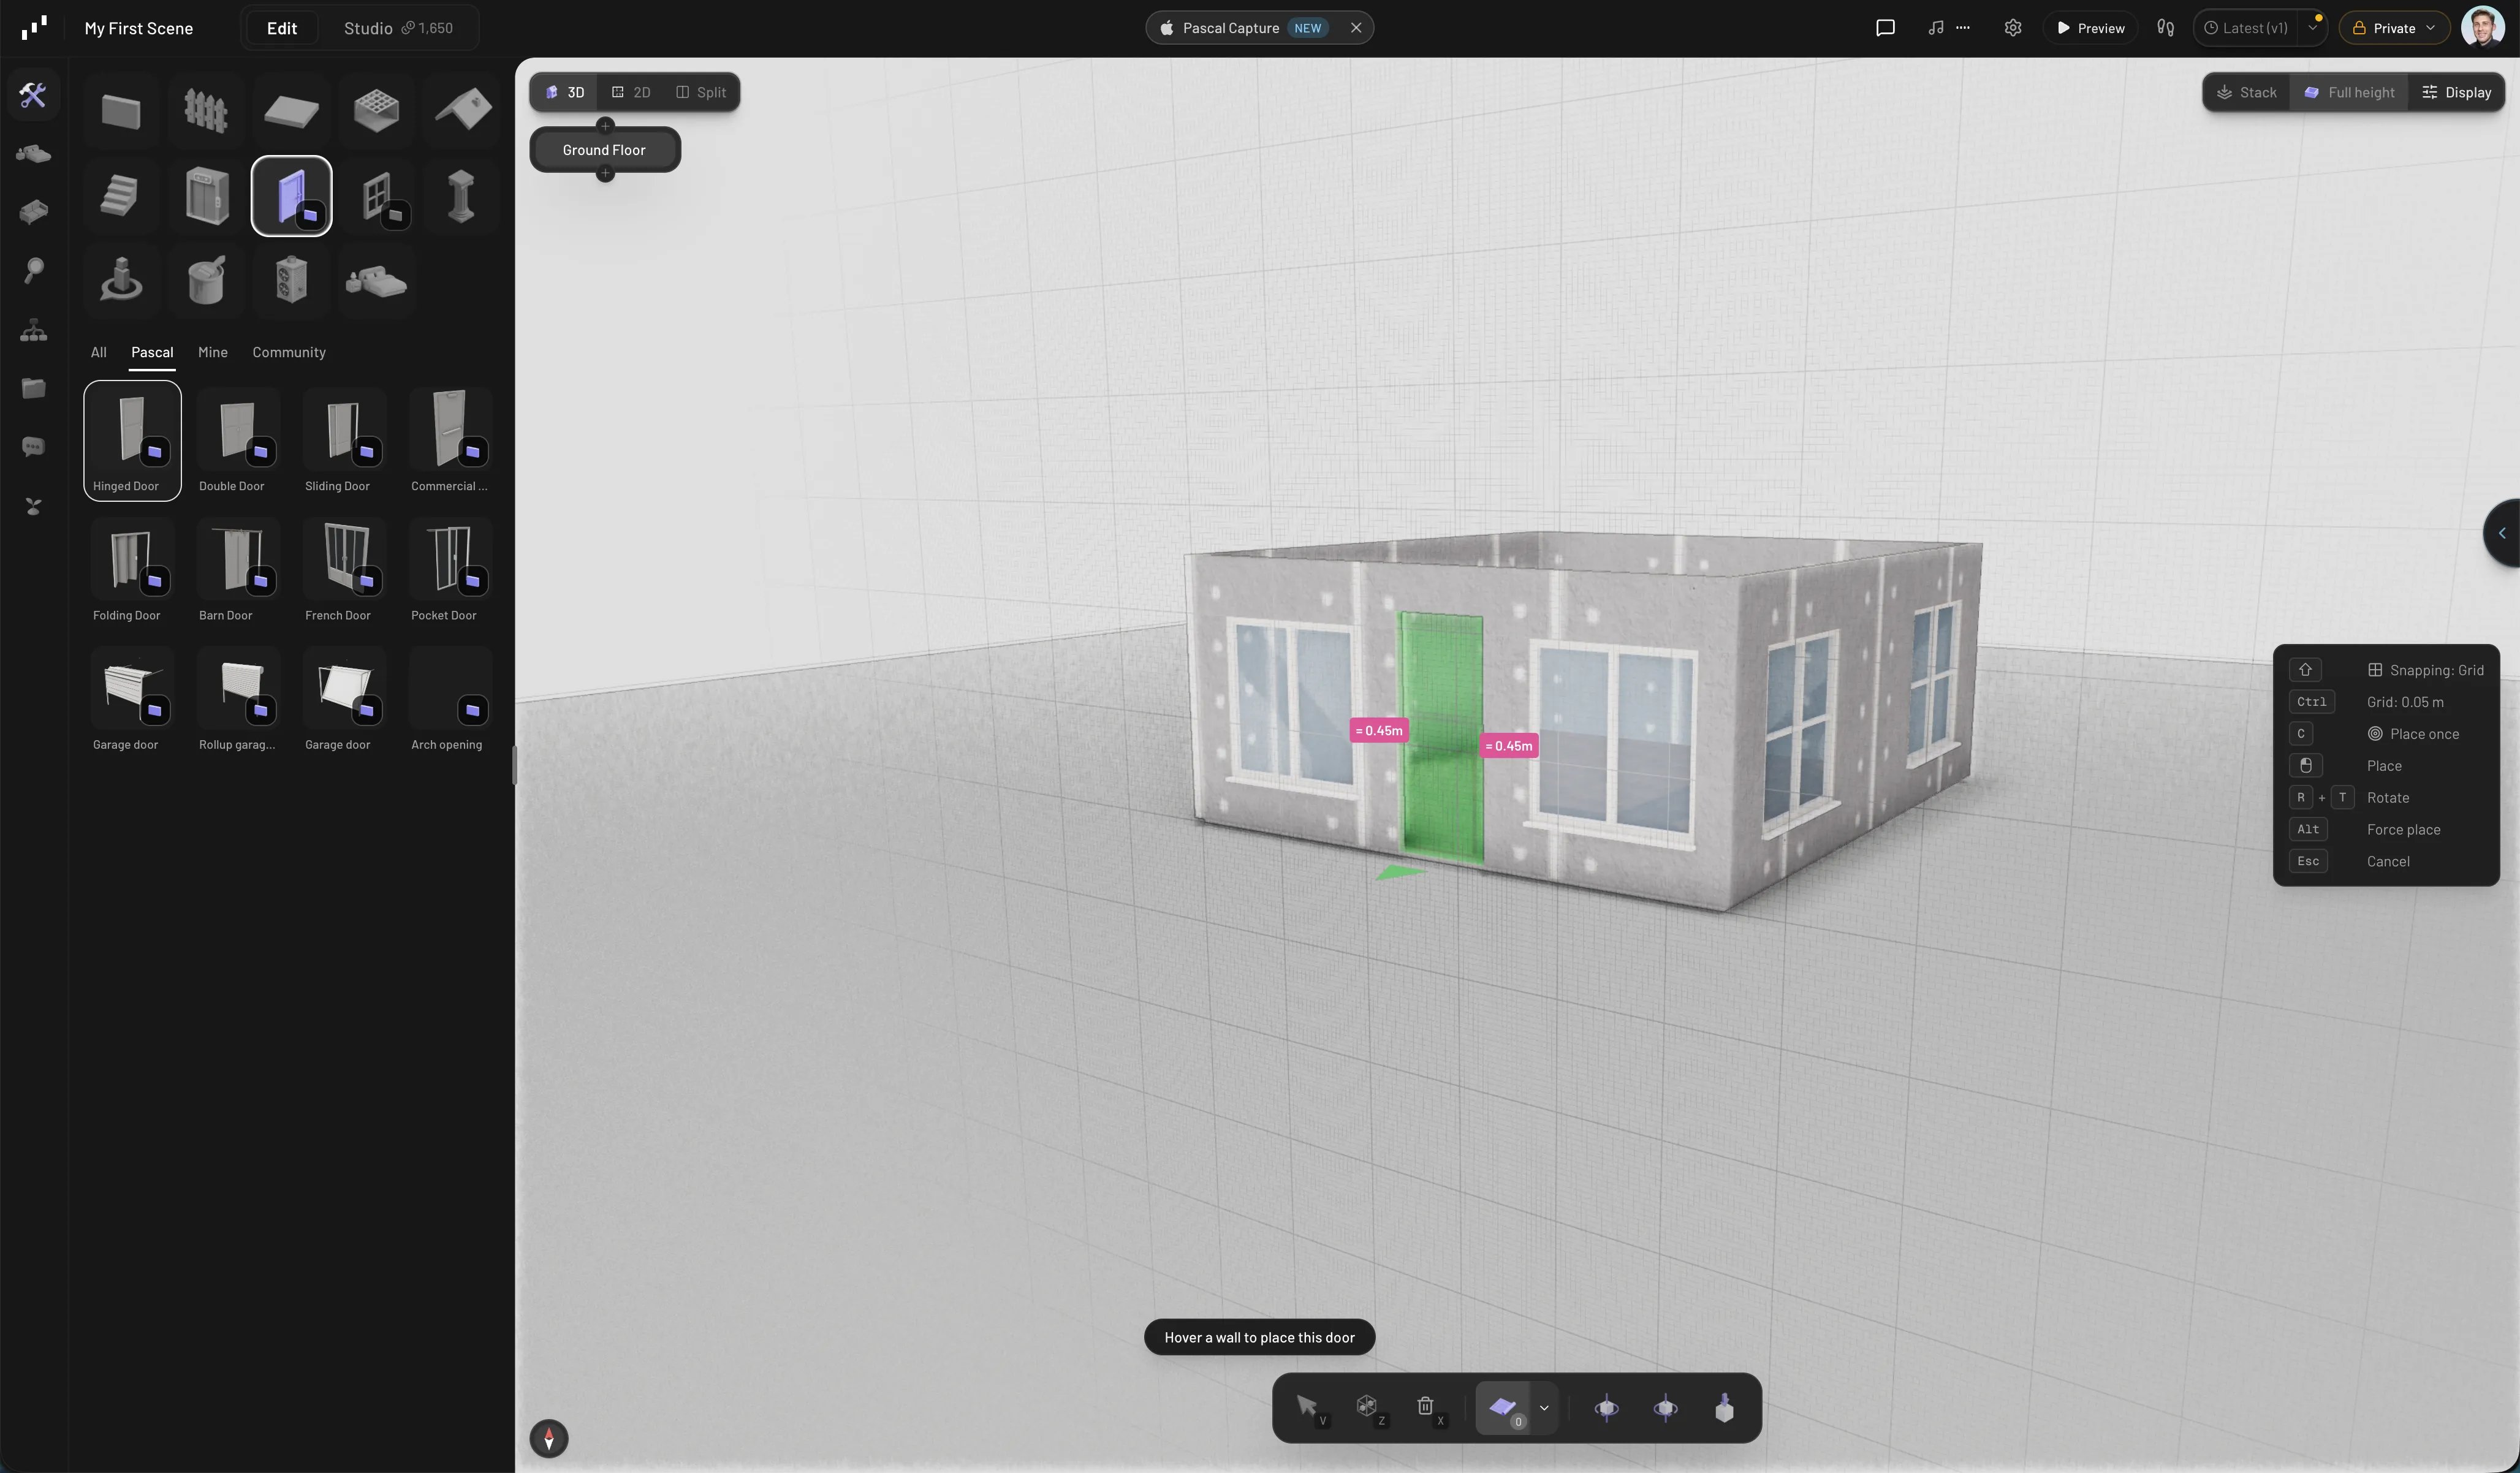
In the **Build** tab, click **Door**. A door preset attaches to your cursor and snaps
to walls — click a wall to place it. Click **Window** and do the same on another wall.
While placing (or with the opening selected), press `R` to flip which side it faces.
With a placed door or window selected, press `E` to swing it open and closed.
See [Doors & windows](/building/doors-and-windows) for opening types and options.
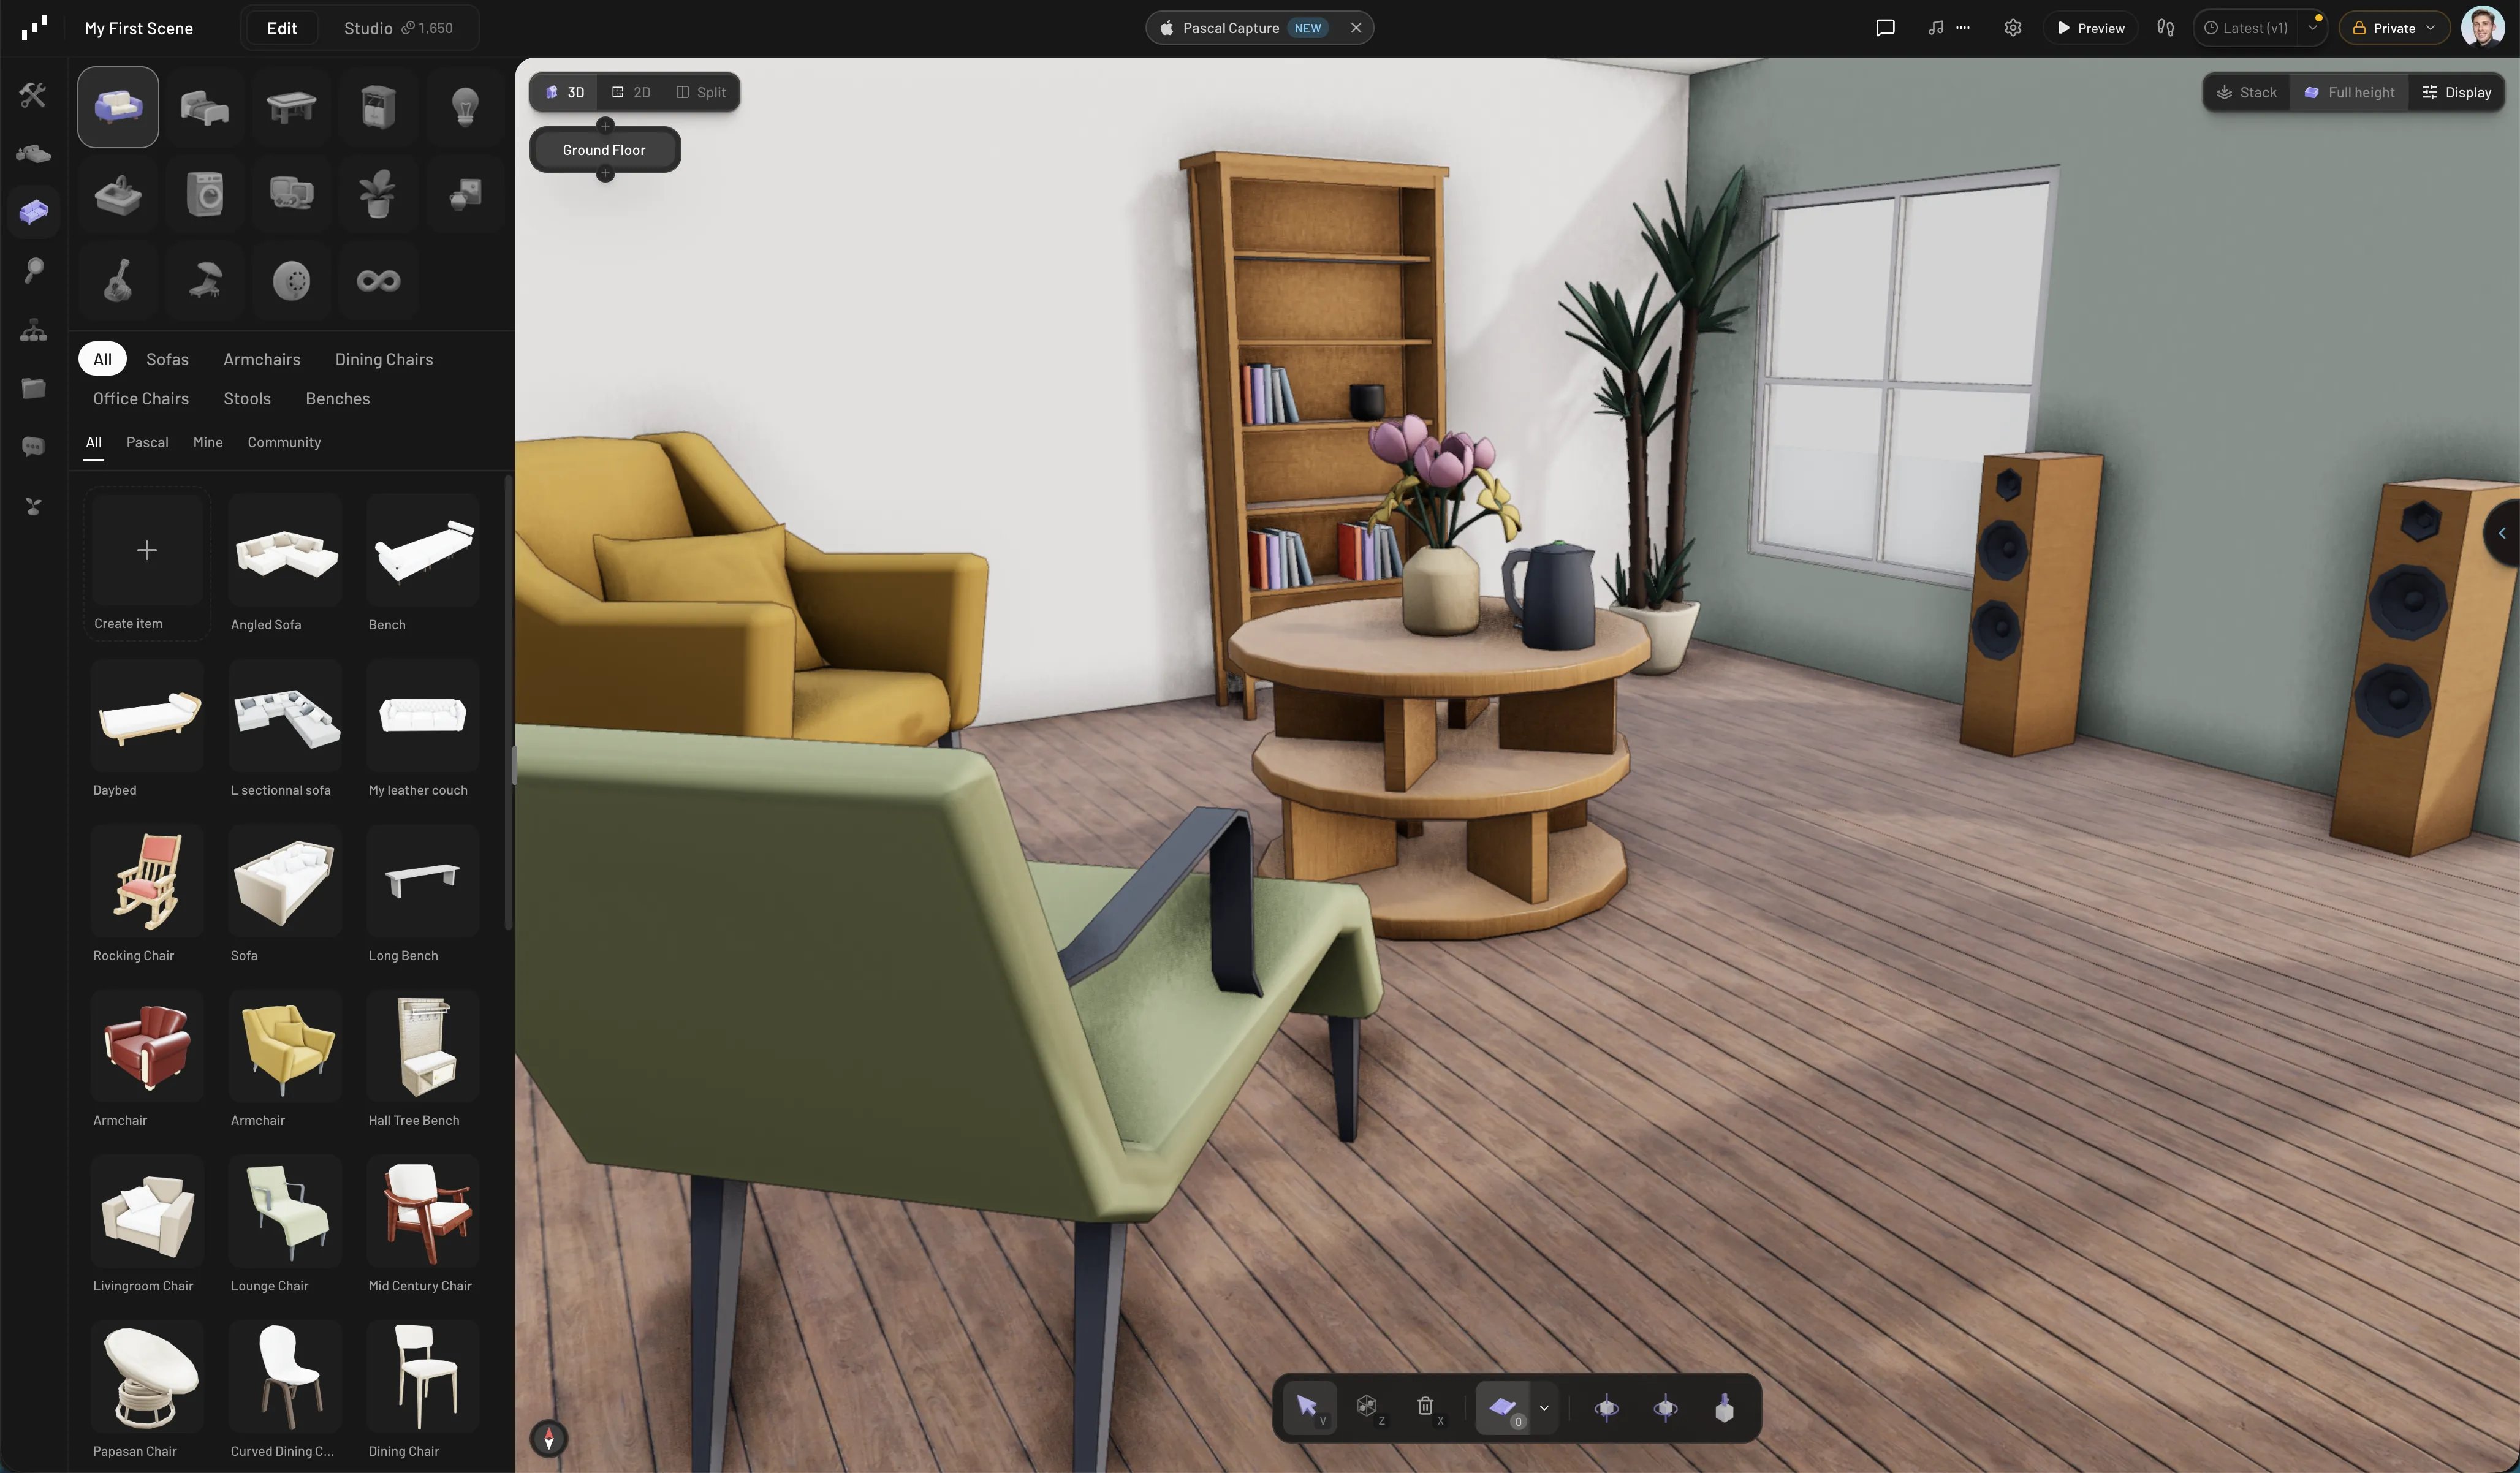
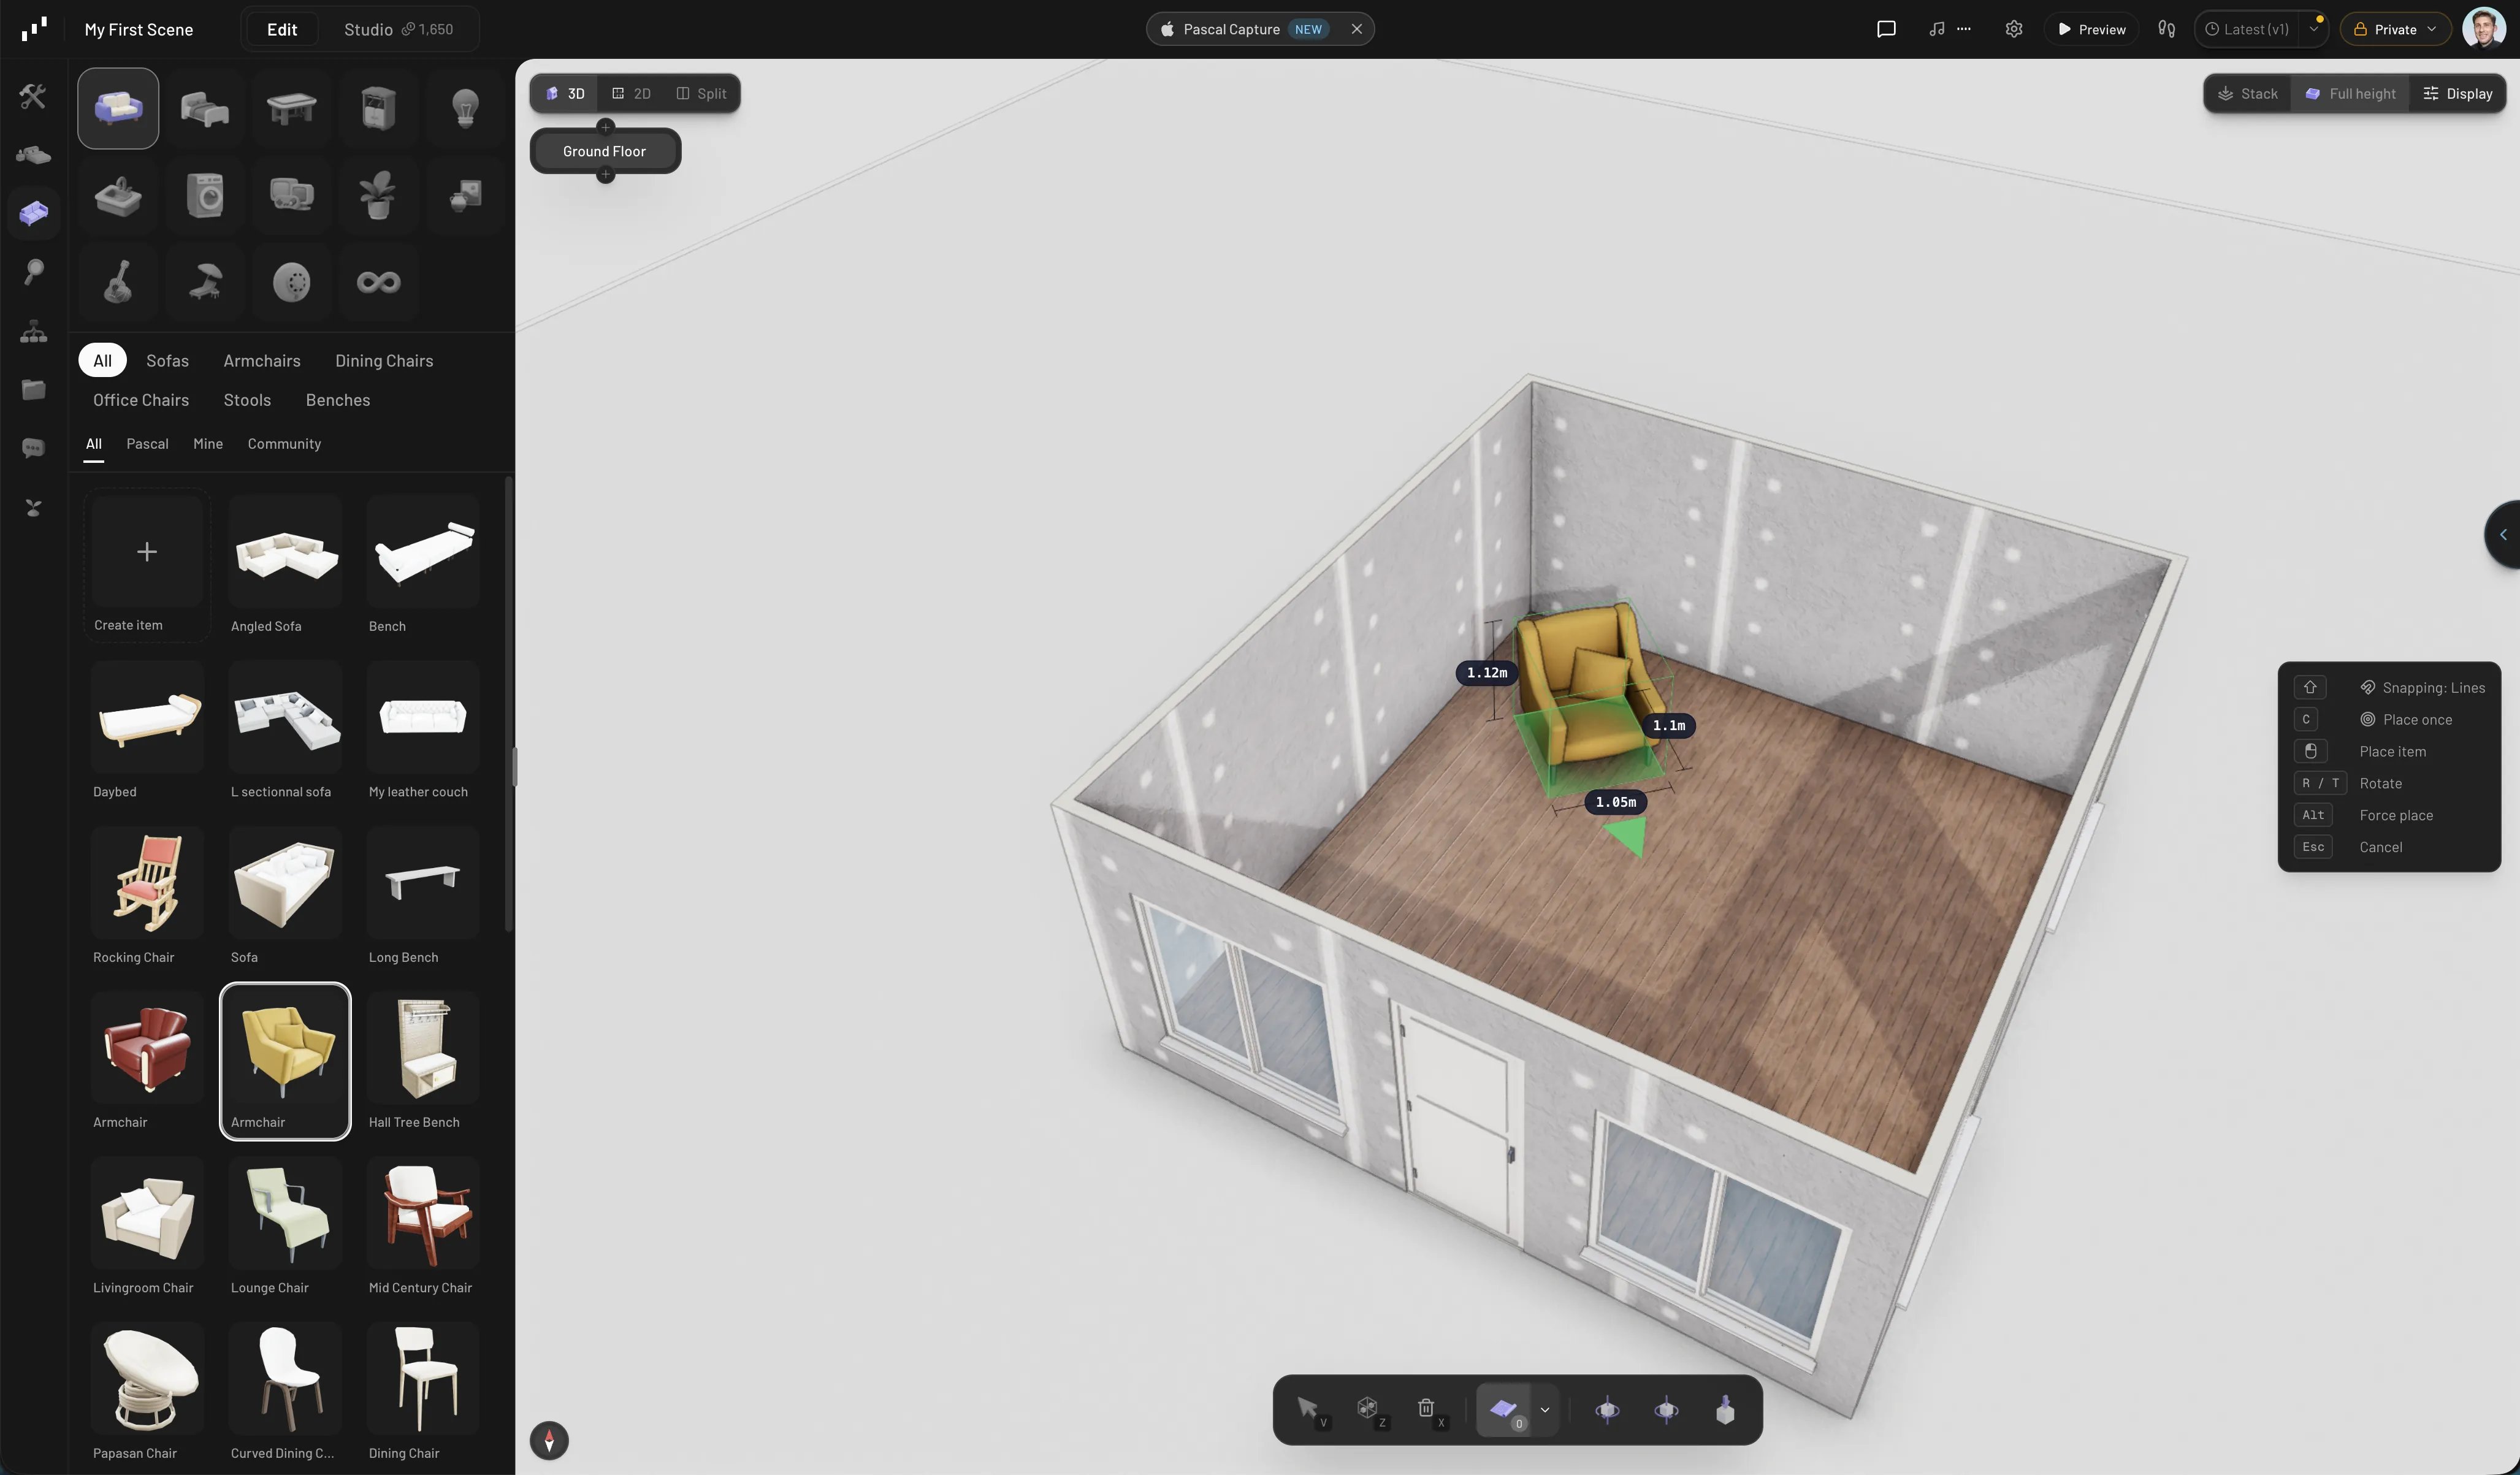
Open the **Items** tab (or press `F`). Pick a category, then click an item — it
attaches to your cursor. Click inside your room to place it. Press `R` and `T` to
rotate it in 45° steps before or after placing, and `Esc` when you're done.
Browse tips are in [Finding items](/items/finding-items), and precise arranging in
[Placing & arranging](/items/placing-and-arranging).
* **Orbit** — drag with the right mouse button.
* **Pan** — drag with the middle mouse button, or hold `Space` and drag. `W` `A`
`S` `D` also pan.
* **Zoom** — scroll.
The bottom toolbar has **Orbit Left**, **Orbit Right**, and **Top View** buttons,
and the toolbar at the top left of the canvas switches between **3D**, **2D**
(floor plan), and **Split** views.
Pascal autosaves to your account about a second after every change. The version
control in the top bar also lets you click **Save** to pin a named version you can
come back to or publish later.
If your project is **Public**, anyone with the link can open it in the viewer — no
account needed on their side. Manage that from the **Private**/**Public** control in
the top bar, and see [Sharing your work](/community/sharing-your-work).
## Watch the full tutorial
Prefer to follow along on video? This walkthrough covers the same ground — and builds
a whole house.
## Where to go next
Take the [interface tour](/getting-started/interface-tour) to learn what every panel
does, or keep the [keyboard shortcuts](/getting-started/keyboard-shortcuts) reference
handy while you build.
 More detail lives in [Walls](/building/walls).
 See [Doors & windows](/building/doors-and-windows) for opening types and options.
 Browse tips are in [Finding items](/items/finding-items), and precise arranging in
[Placing & arranging](/items/placing-and-arranging).
Browse tips are in [Finding items](/items/finding-items), and precise arranging in
[Placing & arranging](/items/placing-and-arranging).