> ## Documentation Index
> Fetch the complete documentation index at: https://editor.pascal.app/docs/llms.txt
> Use this file to discover all available pages before exploring further.
# Zones
> Mark each room with a named, colored zone — zones label your floor plan, let the AI assistant work room by room, and tell visitors where they are in the viewer.
A zone marks an area of a level as a named room — "Kitchen", "Guest bedroom",
"Hallway". It's a flat colored polygon, not geometry: a zone adds no walls or
floors, it adds meaning. That meaning travels everywhere: the room label floating
in the scene, the floor plan, the AI assistant's understanding of your layout, and
the room name visitors see while walking through your shared project.
Closing a loop of walls already gets you a
[floor and ceiling](/building/floors-and-levels) automatically — but it does not
create a zone. Zones come from you or from the tools that build rooms for you:
* **Drawn by hand** — with the zone tool, described below.
* **The AI assistant** — every room the assistant builds arrives with a named
zone, so "add a bedroom" gives you a Bedroom zone for free. See
[AI assistant](/ai/assistant).
* **Pre-built rooms** — dropping a room preset from the **Build** tab's
**Pre-built rooms** places its zone along with the walls and furniture.
* **Captured scans** — importing an iPhone scan creates a zone for the captured
room. See [Capture](/capture/overview).
## Draw a zone
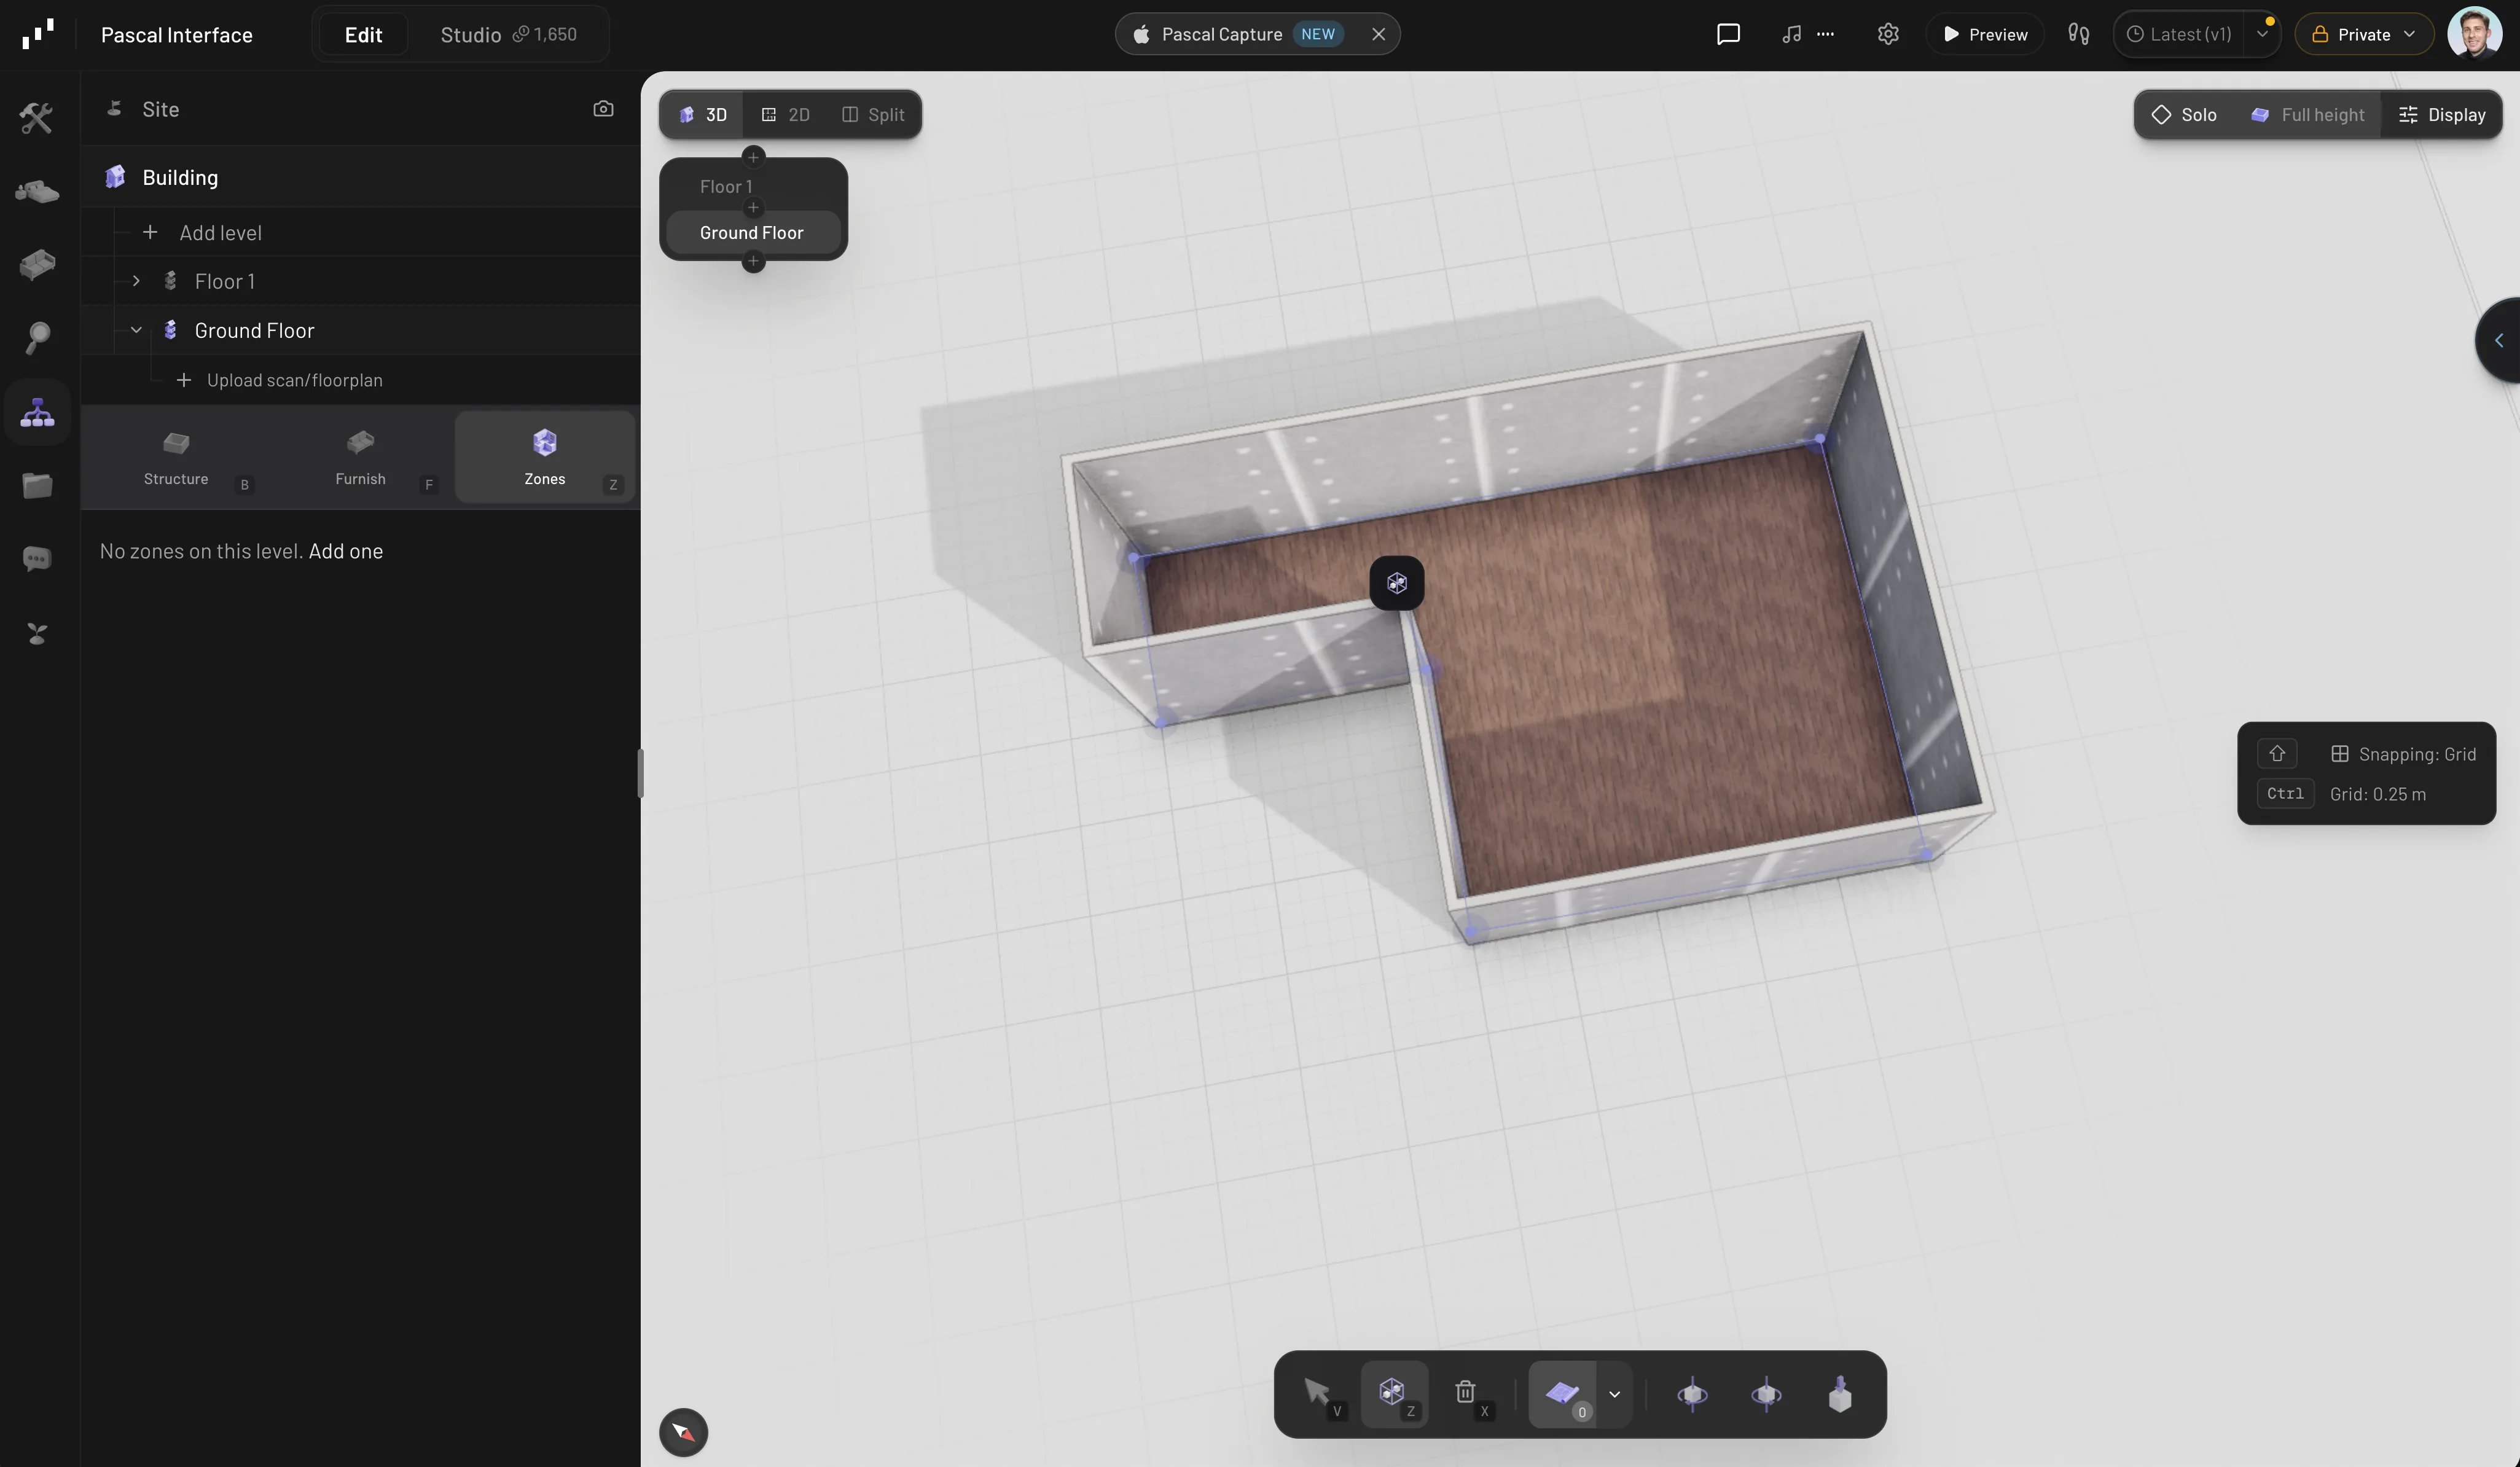
Press `Z` (or pick **Zone** in the bottom toolbar) and outline the room:
1. Click to place the first corner.
2. Keep clicking corners around the area — corners follow the active snapping
mode, the same chip the wall tool shows (`Shift` cycles it).
3. Click your first corner again, or double-click anywhere, to close the polygon.
The zone appears with an auto-generated name (**Zone 1**, **Zone 2**, …) and a
default blue color. `Esc` leaves zone mode.
 Zones don't have preset room types — the name is free text, so call a room
whatever you like. The names are what the viewer and the assistant surface, so
"Kitchen" beats "Zone 3".
## Rename a zone
The room label in the scene is live:
* **Click the label once** to select the zone, then **click it again** to type a
new name right on the label — `Enter` saves.
* In the 2D floor plan, **double-click the label** to rename it in place.
* In the **Scene** tab's **Zones** list, hover a zone and use the pencil to
rename it.
## Manage zones in the Scene tab
The **Scene** sidebar tab has a **Zones** layer (next to **Structure** and
**Furnish**). It lists every zone on the active level:
* The color dot changes the zone's color — the tint used for its label, floor
plan polygon, and highlight.
* The camera button stores a viewpoint per room: **Take snapshot** saves the
current camera angle on the zone, **View snapshot** flies back to it later.
* The trash button deletes the zone.
Zones don't have preset room types — the name is free text, so call a room
whatever you like. The names are what the viewer and the assistant surface, so
"Kitchen" beats "Zone 3".
## Rename a zone
The room label in the scene is live:
* **Click the label once** to select the zone, then **click it again** to type a
new name right on the label — `Enter` saves.
* In the 2D floor plan, **double-click the label** to rename it in place.
* In the **Scene** tab's **Zones** list, hover a zone and use the pencil to
rename it.
## Manage zones in the Scene tab
The **Scene** sidebar tab has a **Zones** layer (next to **Structure** and
**Furnish**). It lists every zone on the active level:
* The color dot changes the zone's color — the tint used for its label, floor
plan polygon, and highlight.
* The camera button stores a viewpoint per room: **Take snapshot** saves the
current camera angle on the zone, **View snapshot** flies back to it later.
* The trash button deletes the zone.
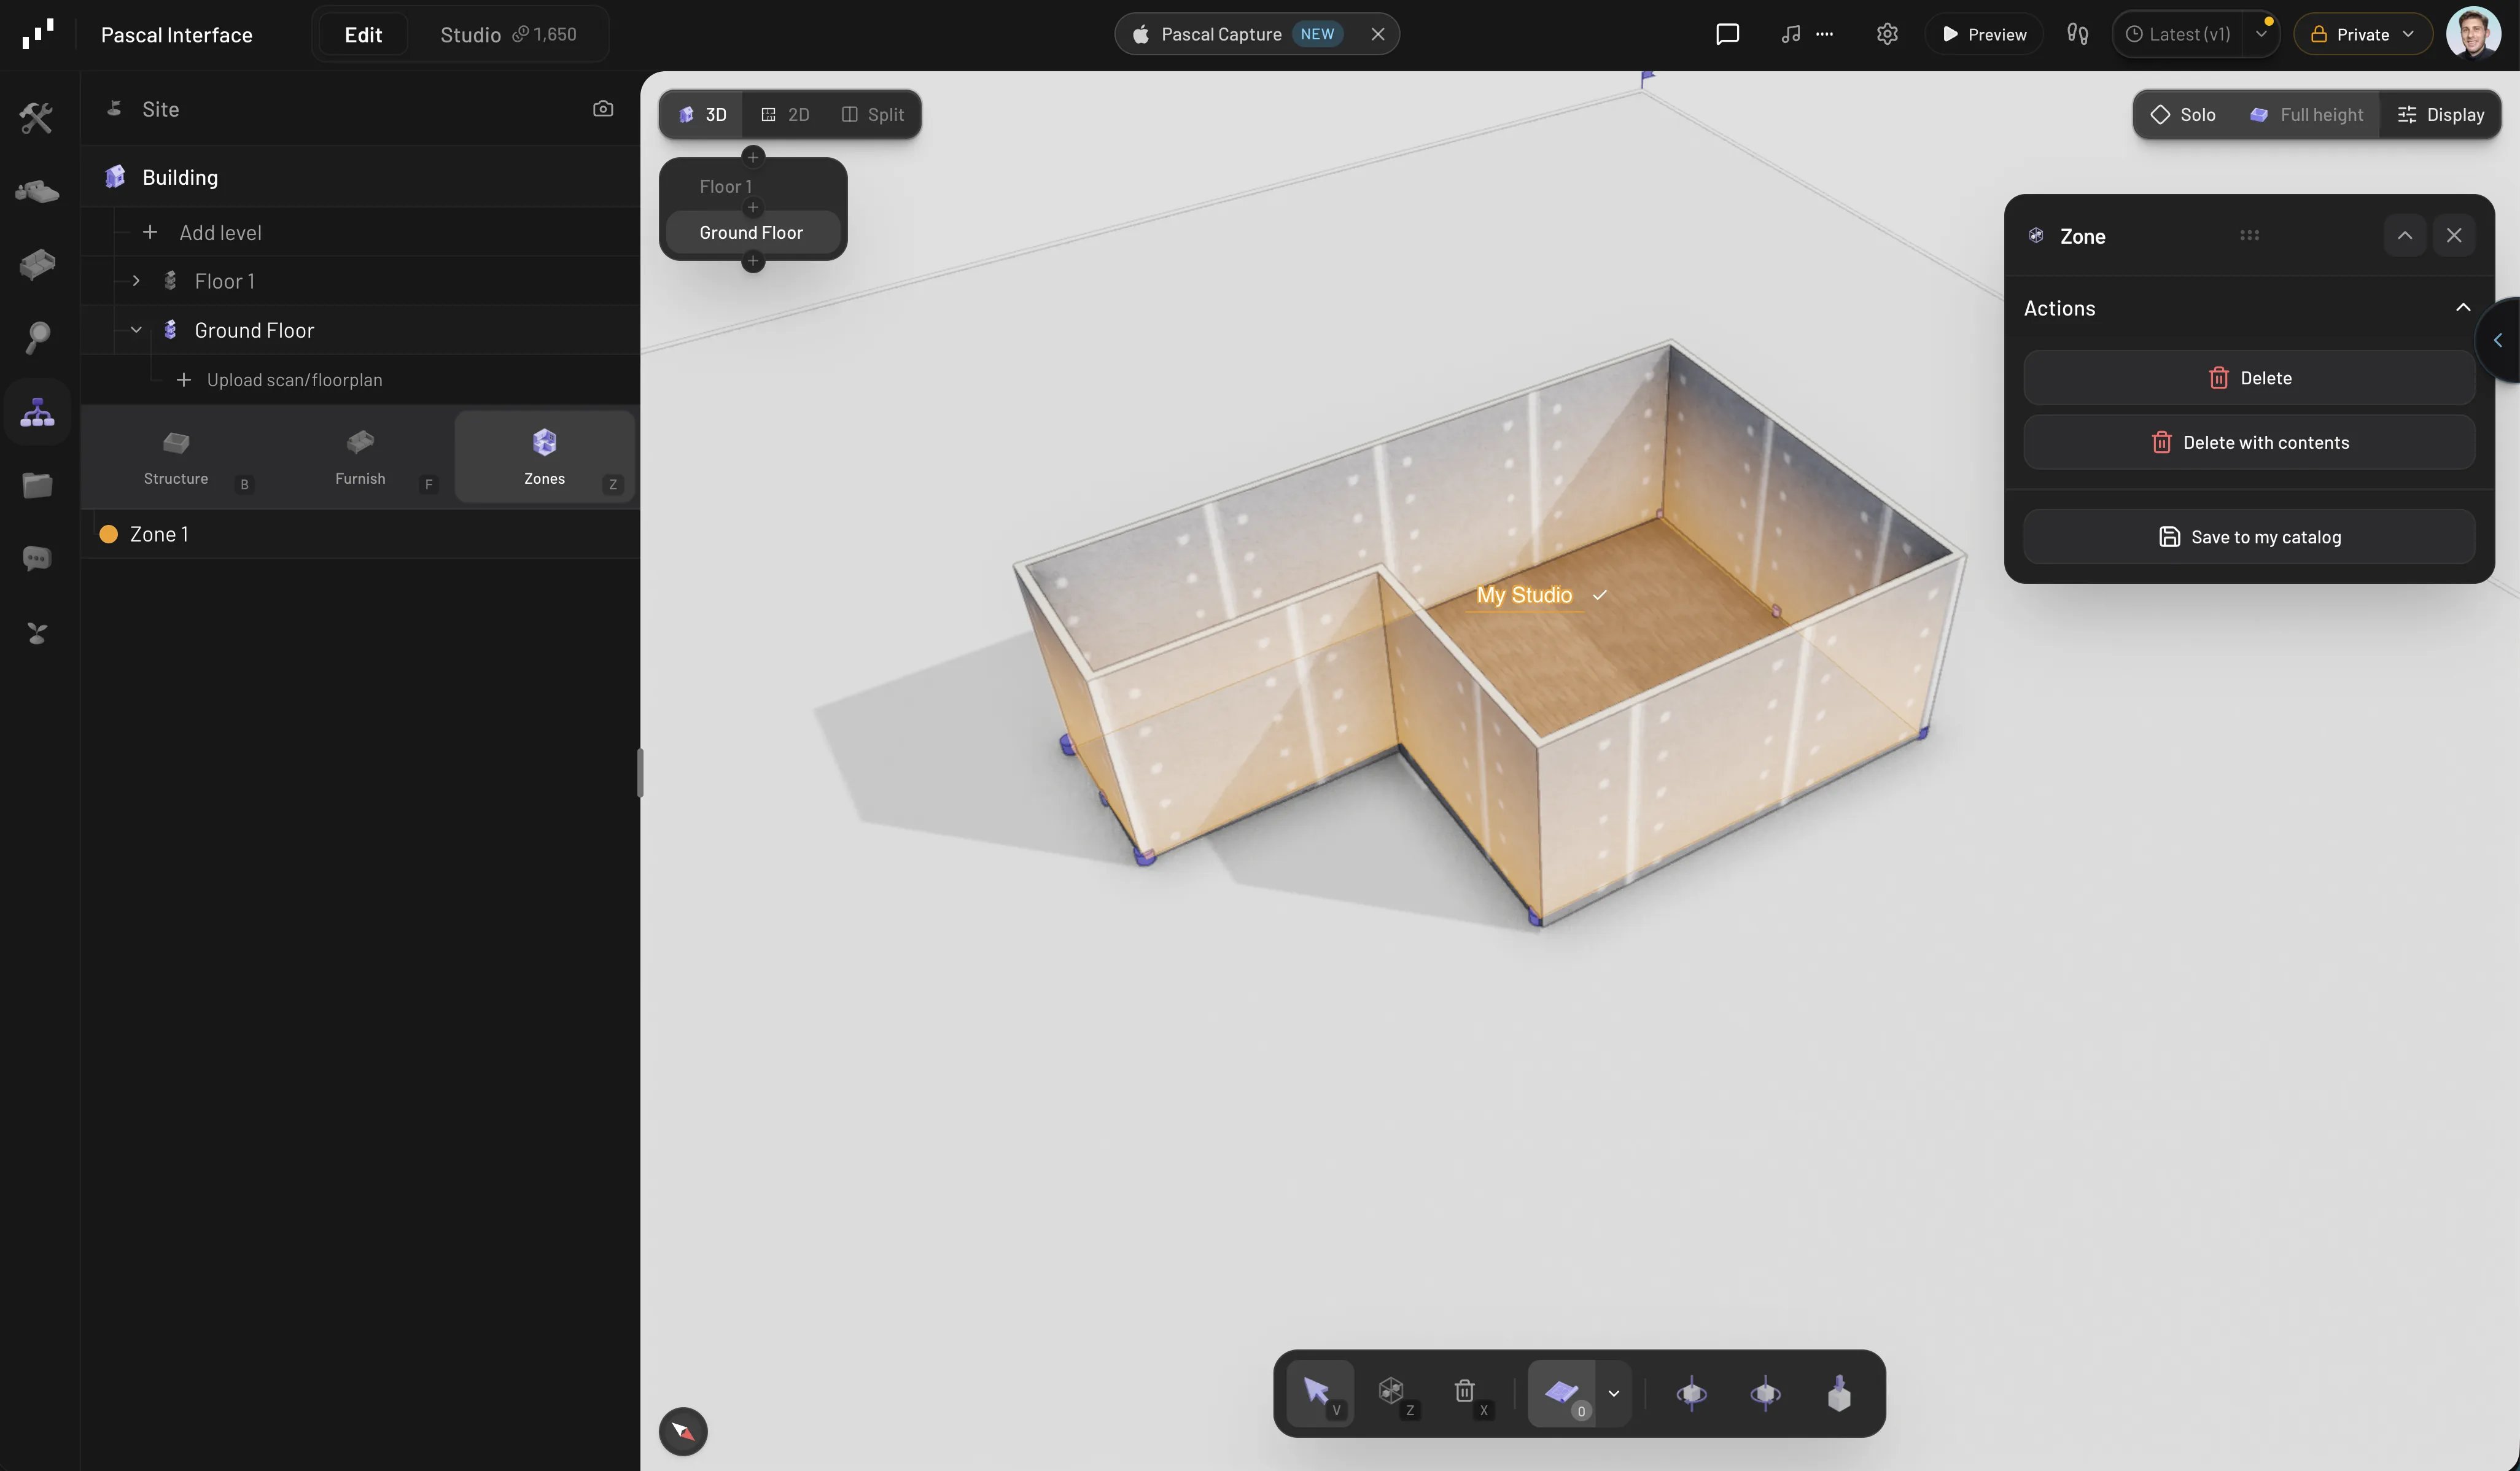 Selecting a zone also opens its inspector and shows extra actions:
* **Save to my catalog** — saves the zone and everything inside it (walls,
floor, furniture) as a reusable room preset, available under **Pre-built
rooms** in the Build tab.
* **Delete** removes just the zone marker; **Delete with contents** removes the
room's walls, floor, ceiling, and items along with it.
To reshape a zone, select it in the 2D floor plan: drag corner handles to move
vertices, drag an edge to shift it, use the midpoints to add new corners, or
drag the body to move the whole polygon. In delete mode (`X`), clicking a room
label removes the zone, and `Delete` removes the selected zone.
## Zones in the viewer and walkthrough
Zones are where naming pays off. When someone opens your shared project:
* Every room on the active level shows its **name label** floating at its
center — the labels are the map of your building.
* Clicking a room focuses it — the viewer's breadcrumb walks Site › Building ›
Level › your room's name, and clicks inside the room now select its contents.
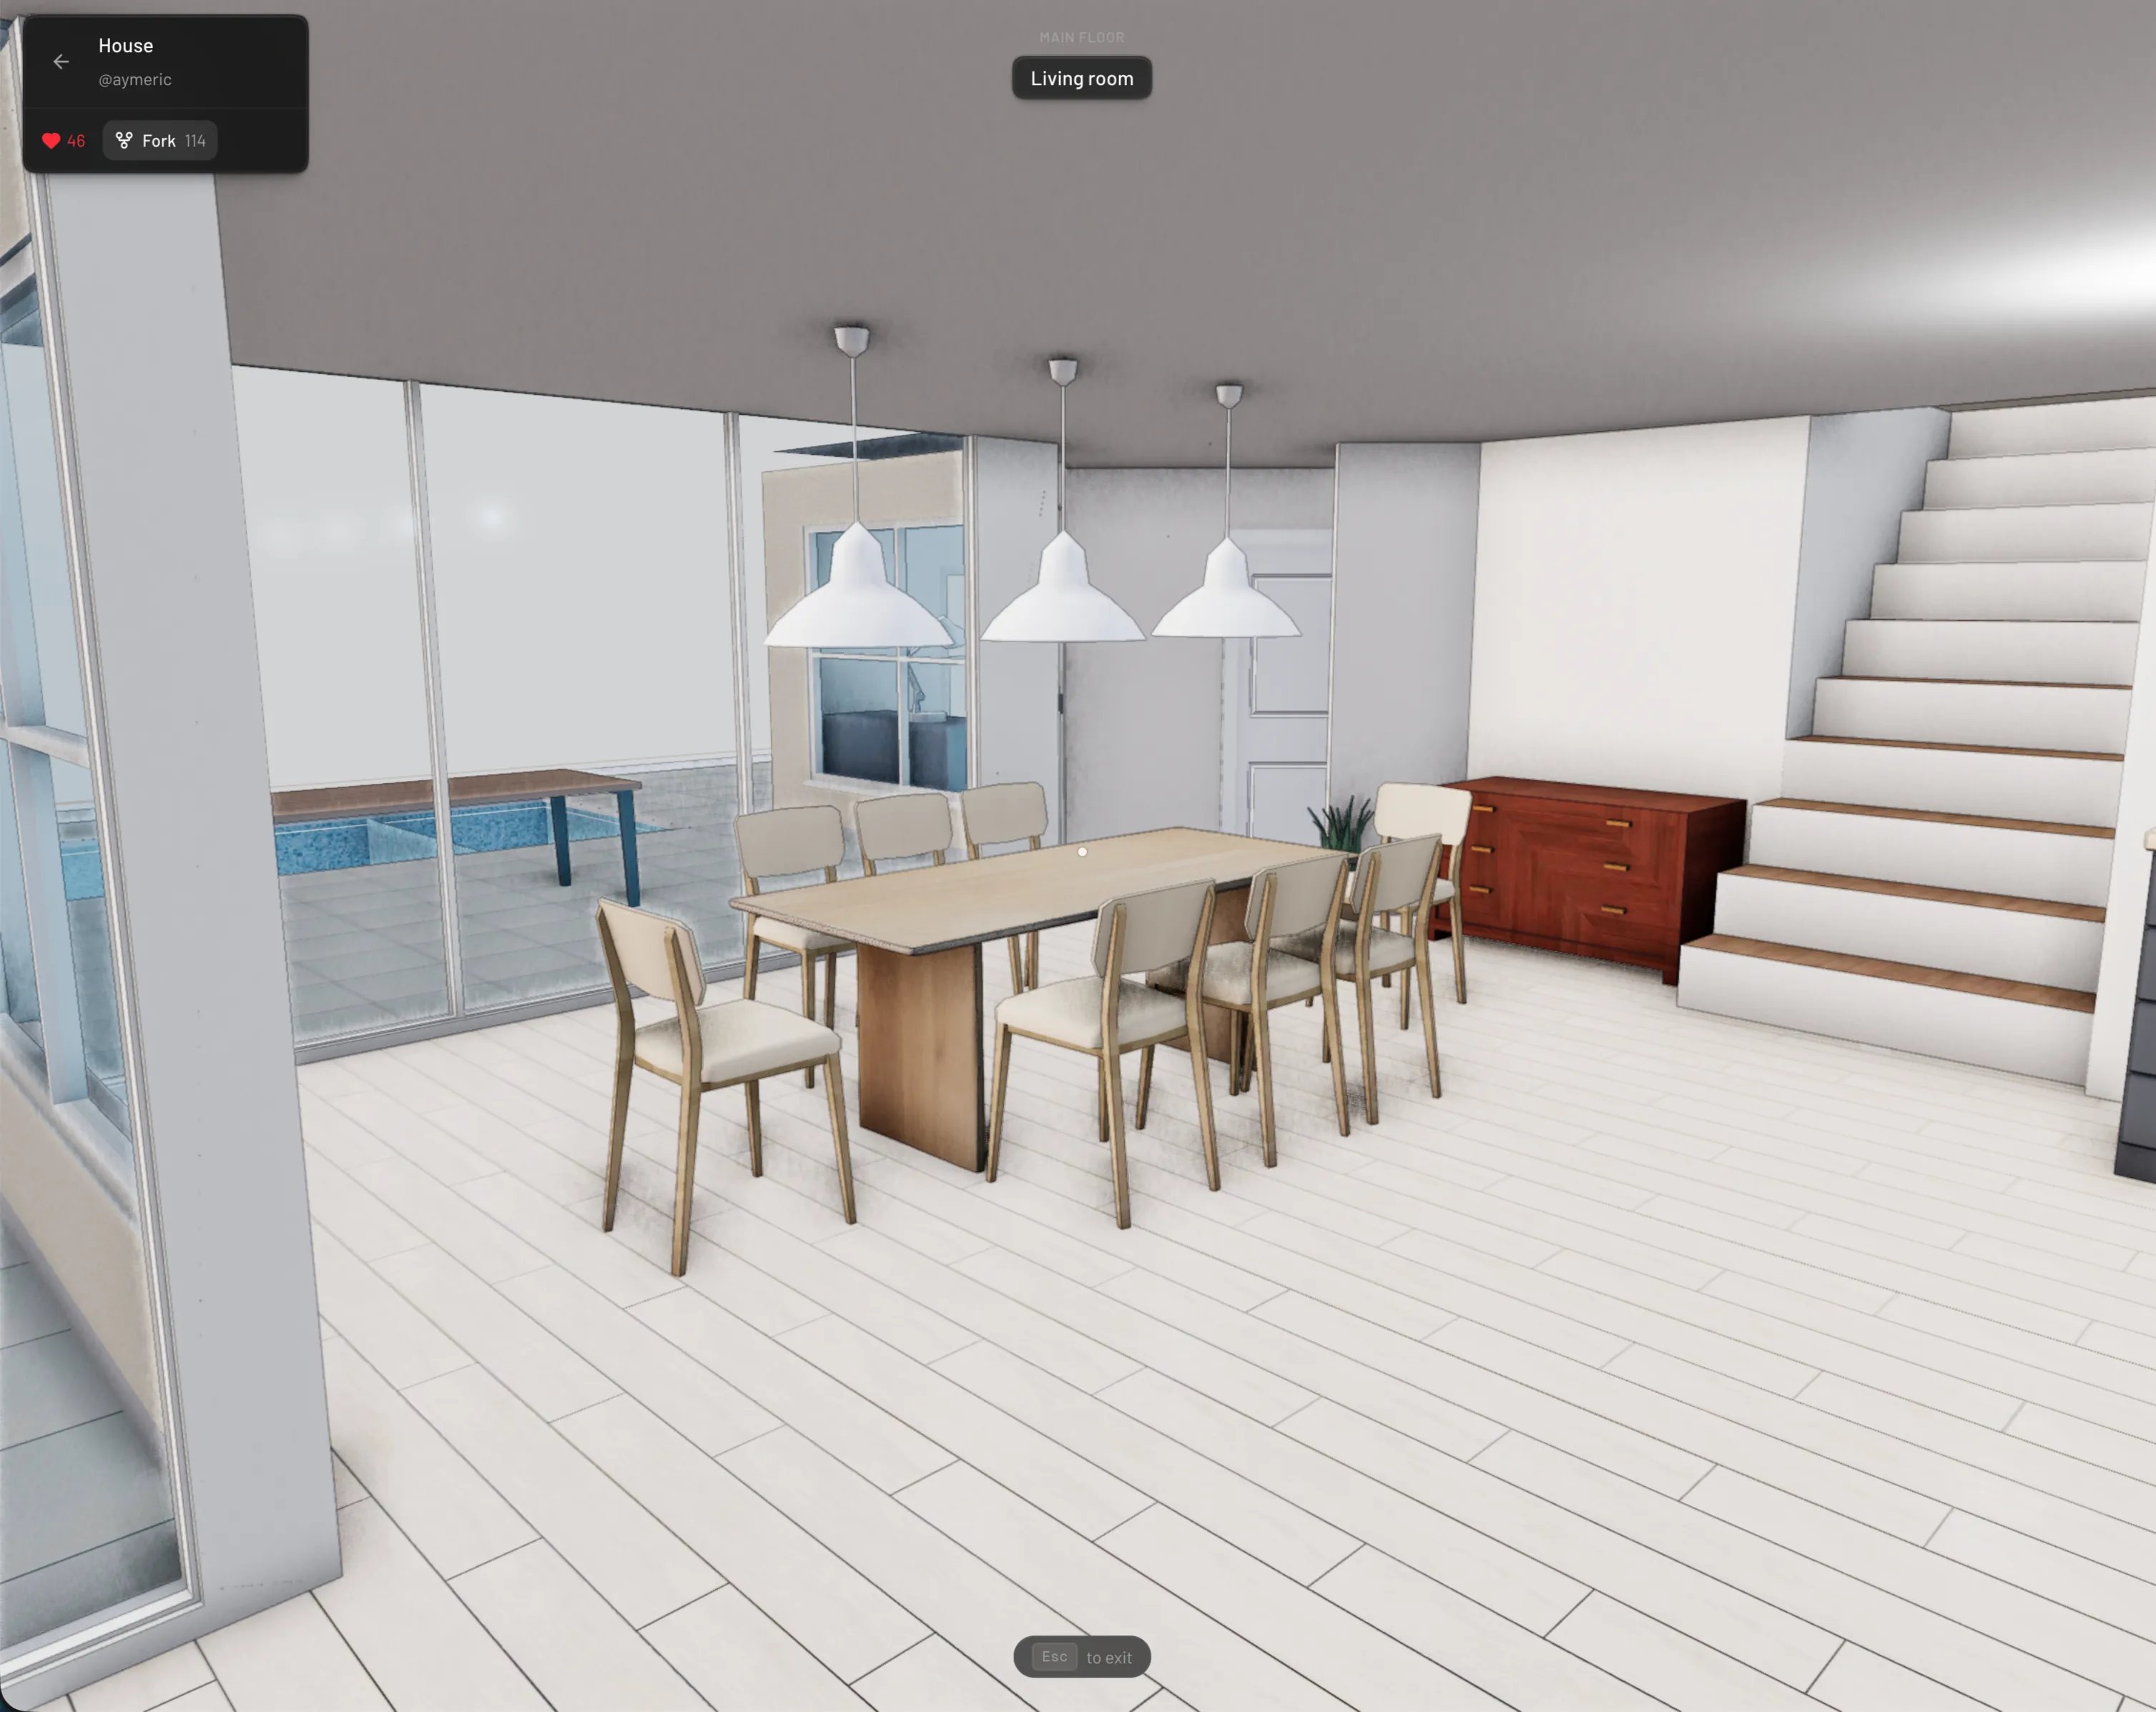
* In the first-person **Walkthrough**, the HUD pins the current level and room
name at the top of the screen and updates as you cross from room to room.
Selecting a zone also opens its inspector and shows extra actions:
* **Save to my catalog** — saves the zone and everything inside it (walls,
floor, furniture) as a reusable room preset, available under **Pre-built
rooms** in the Build tab.
* **Delete** removes just the zone marker; **Delete with contents** removes the
room's walls, floor, ceiling, and items along with it.
To reshape a zone, select it in the 2D floor plan: drag corner handles to move
vertices, drag an edge to shift it, use the midpoints to add new corners, or
drag the body to move the whole polygon. In delete mode (`X`), clicking a room
label removes the zone, and `Delete` removes the selected zone.
## Zones in the viewer and walkthrough
Zones are where naming pays off. When someone opens your shared project:
* Every room on the active level shows its **name label** floating at its
center — the labels are the map of your building.
* Clicking a room focuses it — the viewer's breadcrumb walks Site › Building ›
Level › your room's name, and clicks inside the room now select its contents.
* In the first-person **Walkthrough**, the HUD pins the current level and room
name at the top of the screen and updates as you cross from room to room.
 A project with unnamed or missing zones still works — visitors just see less: no
room labels, no "you are here". A few minutes of naming makes a shared project
read like a real floor plan.
## Zones and the AI assistant
The assistant reads your zones to understand the layout, so room names are how
you address rooms in chat: "furnish the kitchen" or "how big is the guest
bedroom?" resolves against your zone names. In the chat panel you'll see it use
room tools like **Get zones**, **Get room blueprint**, **Create room**,
**Furnish room**, and **Connect rooms** as it works.
For furnishing by hand, the **By room** sidebar tab organizes the catalog by
room type — pick a room, browse the furniture that belongs in it, and place away.
See [Finding items](/items/finding-items).
A project with unnamed or missing zones still works — visitors just see less: no
room labels, no "you are here". A few minutes of naming makes a shared project
read like a real floor plan.
## Zones and the AI assistant
The assistant reads your zones to understand the layout, so room names are how
you address rooms in chat: "furnish the kitchen" or "how big is the guest
bedroom?" resolves against your zone names. In the chat panel you'll see it use
room tools like **Get zones**, **Get room blueprint**, **Create room**,
**Furnish room**, and **Connect rooms** as it works.
For furnishing by hand, the **By room** sidebar tab organizes the catalog by
room type — pick a room, browse the furniture that belongs in it, and place away.
See [Finding items](/items/finding-items).