> ## Documentation Index
> Fetch the complete documentation index at: https://editor.pascal.app/docs/llms.txt
> Use this file to discover all available pages before exploring further.
# Roofs
> Draw a roof footprint in two clicks, choose from seven roof types, and shape its pitch, overhang, and trims.
Roofs in Pascal are drawn, not picked from a catalog: you trace a rectangular
footprint over your building and shape everything else — type, pitch, overhang,
trims — afterwards.
## Give the roof its own level
A roof sits on the level you draw it on, so the usual workflow is to roof from one
level up:
1. Click the **+** at the top edge of the level selector (**Add level above**).
2. Switch the level view to **Stacked** (the **Levels** menu in the toolbar at the
top right of the canvas) so the walls below stay visible while you work.
3. Draw the roof on that new, empty level — its corners snap to the wall corners of
the level below, so it lands exactly on top of your walls.
Keeping the roof on its own level pays off later: switch that level to **Solo**
or step below it in **Stacked** view whenever you need to furnish the rooms
underneath without the roof in the way.
## Draw a roof
Pick **Roof** in the Build tab, then:
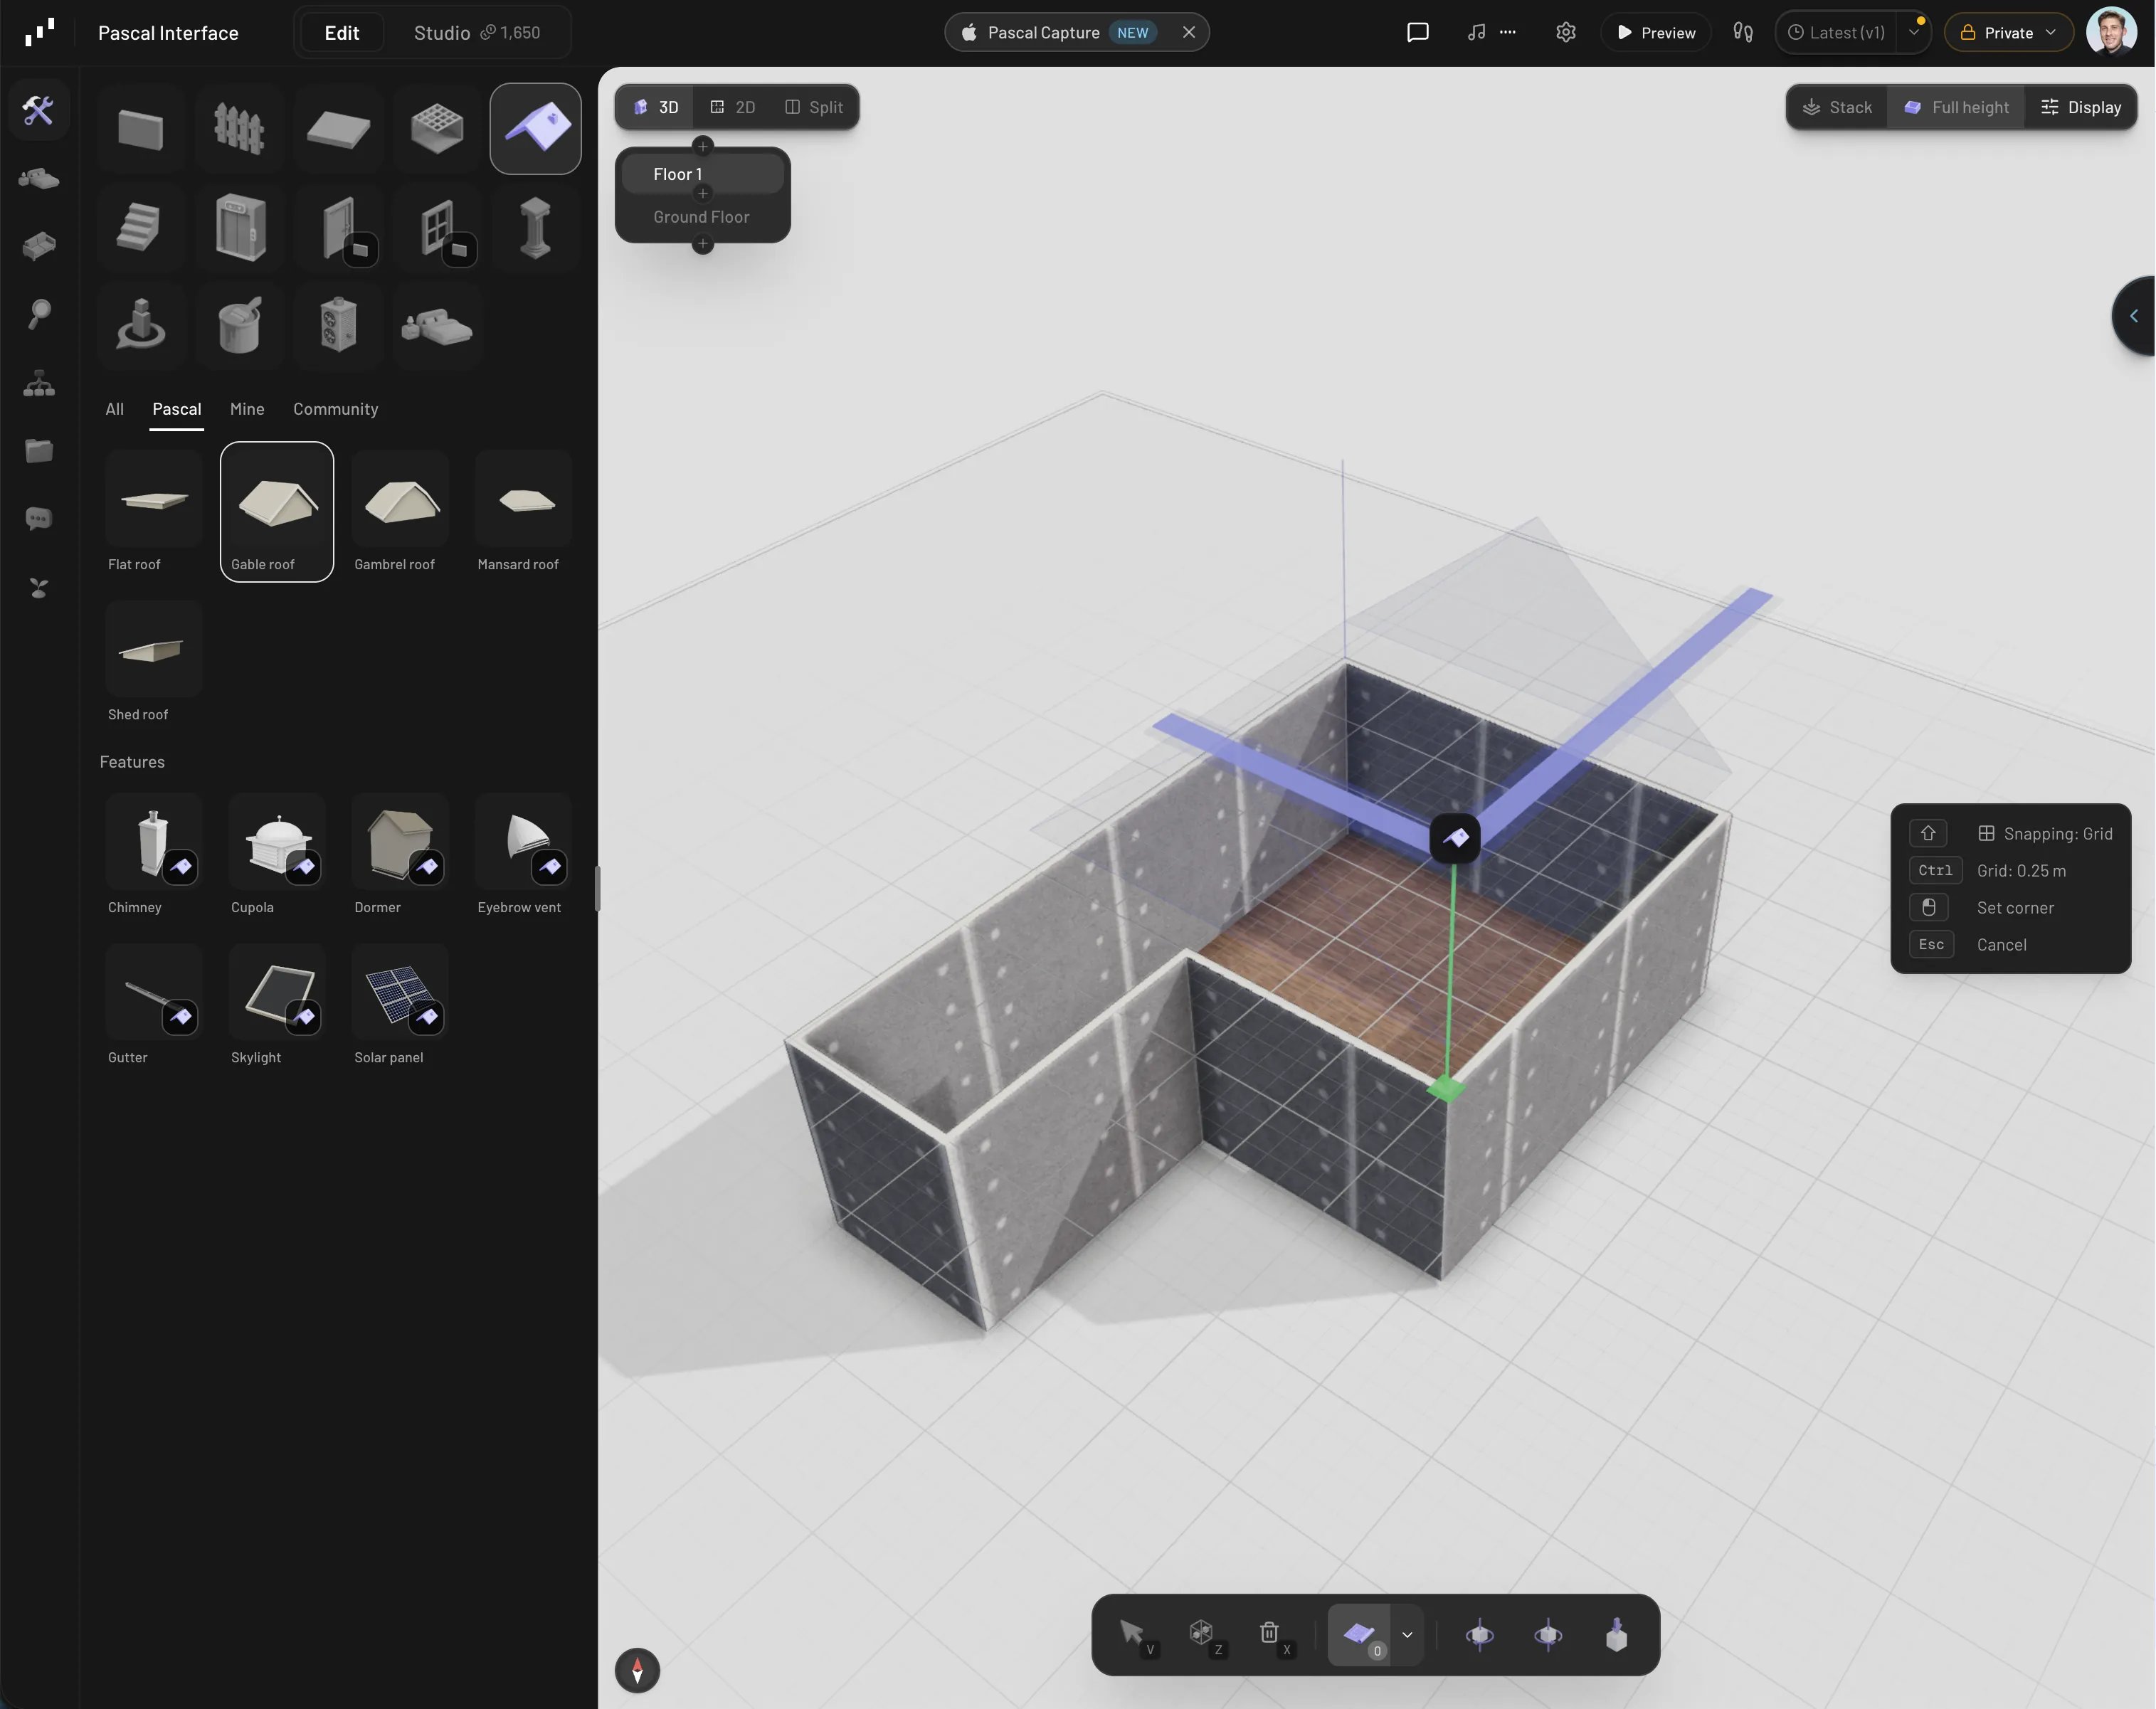
1. Click to set the first corner of the footprint.
2. Move the cursor — a live ghost of the roof follows — and click the opposite
corner to place it.
While you draw, the corners snap magnetically to the wall corners and edges of the
active level *and* the level below, so tracing a roof that sits exactly on your
walls takes seconds. New roofs start as a gable with a 40° pitch, ready to be
reshaped.
 ## Roof types
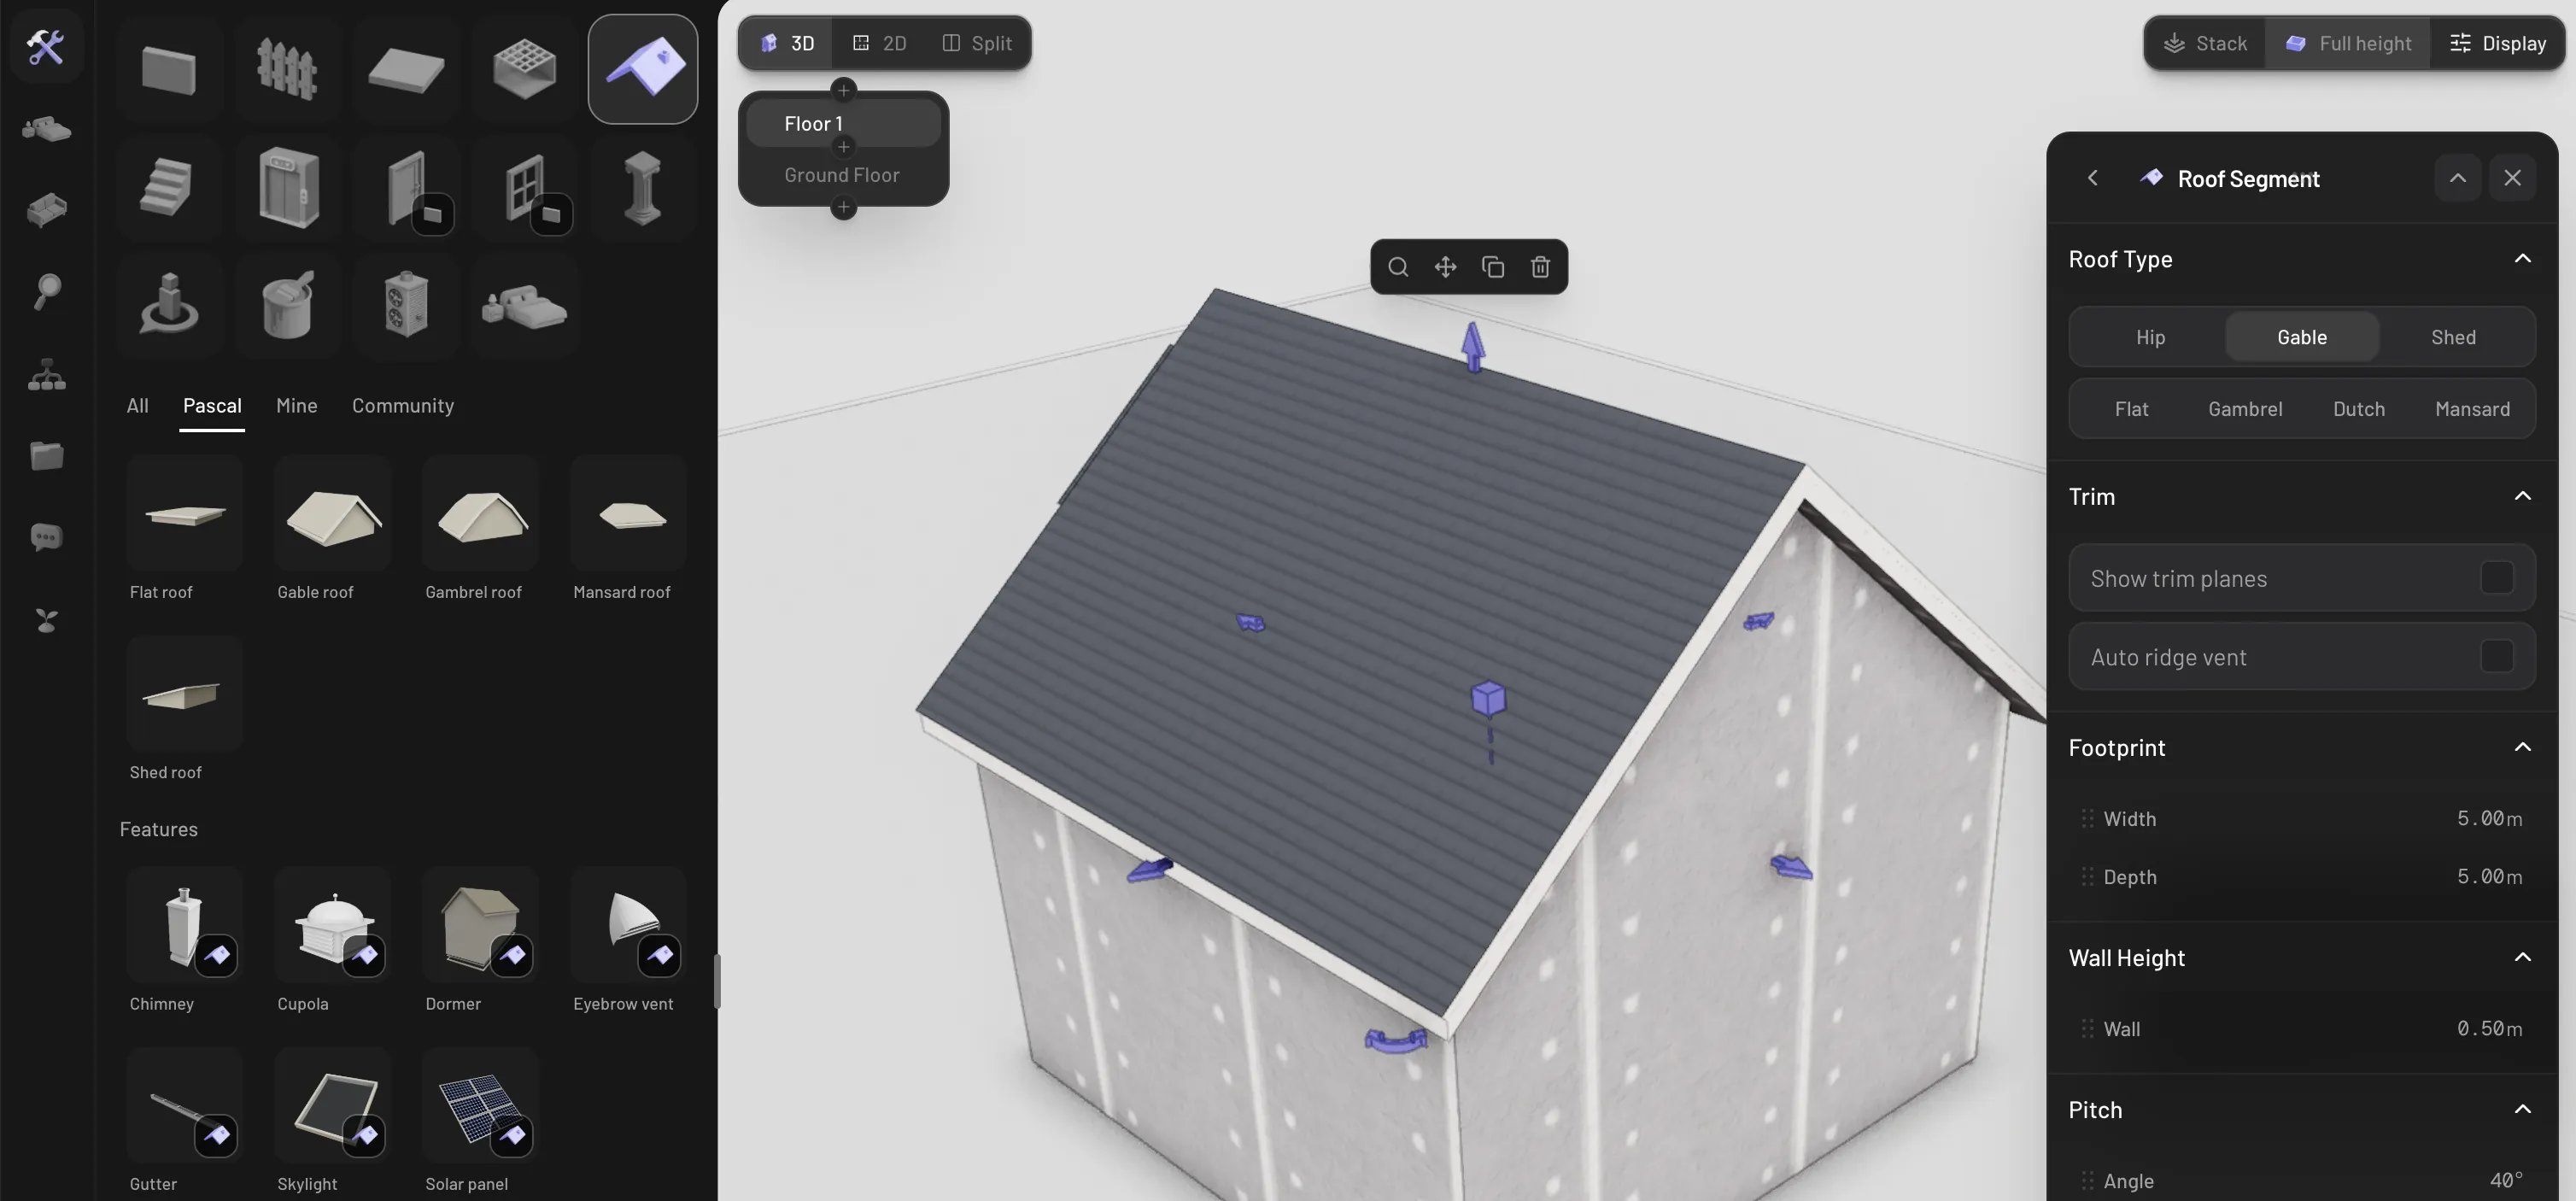
A roof is a container of one or more segments, and the type is set per segment.
Select the roof, then click again to select the segment inside it. The **Roof
Type** section of the properties panel offers seven types:
**Hip**, **Gable**, **Shed**, **Flat**, **Gambrel**, **Dutch**, and **Mansard**.
## Roof types
A roof is a container of one or more segments, and the type is set per segment.
Select the roof, then click again to select the segment inside it. The **Roof
Type** section of the properties panel offers seven types:
**Hip**, **Gable**, **Shed**, **Flat**, **Gambrel**, **Dutch**, and **Mansard**.
 ## Shape the roof
The segment panel gives you sliders for every dimension:
* **Footprint** — **Width** and **Depth** (0.5–25 m).
* **Wall Height** — the height of the walls the roof generates beneath itself
(0–5 m).
* **Pitch** — the slope **Angle** (0–60°), with quick presets **3/12**, **6/12**,
**9/12**, and **12/12**.
* **Structure** — **Wall Thick.**, **Deck Thick.**, **Overhang**, and
**Shingle Thick.**
* Shape-specific controls appear for the curvier types — kink position for
gambrel, waist controls for mansard and dutch roofs.
* **Position** and **Rotation** sliders (with `-45°` / `+45°` buttons) place the
roof exactly, and the **Move** action lets you drag it in the scene — press `R`
while moving to rotate it in steps.
Roof surfaces are painted with the **Painting** tool, like walls and floors — see
[Materials and paint](/items/materials-and-paint).
## Trim a roof
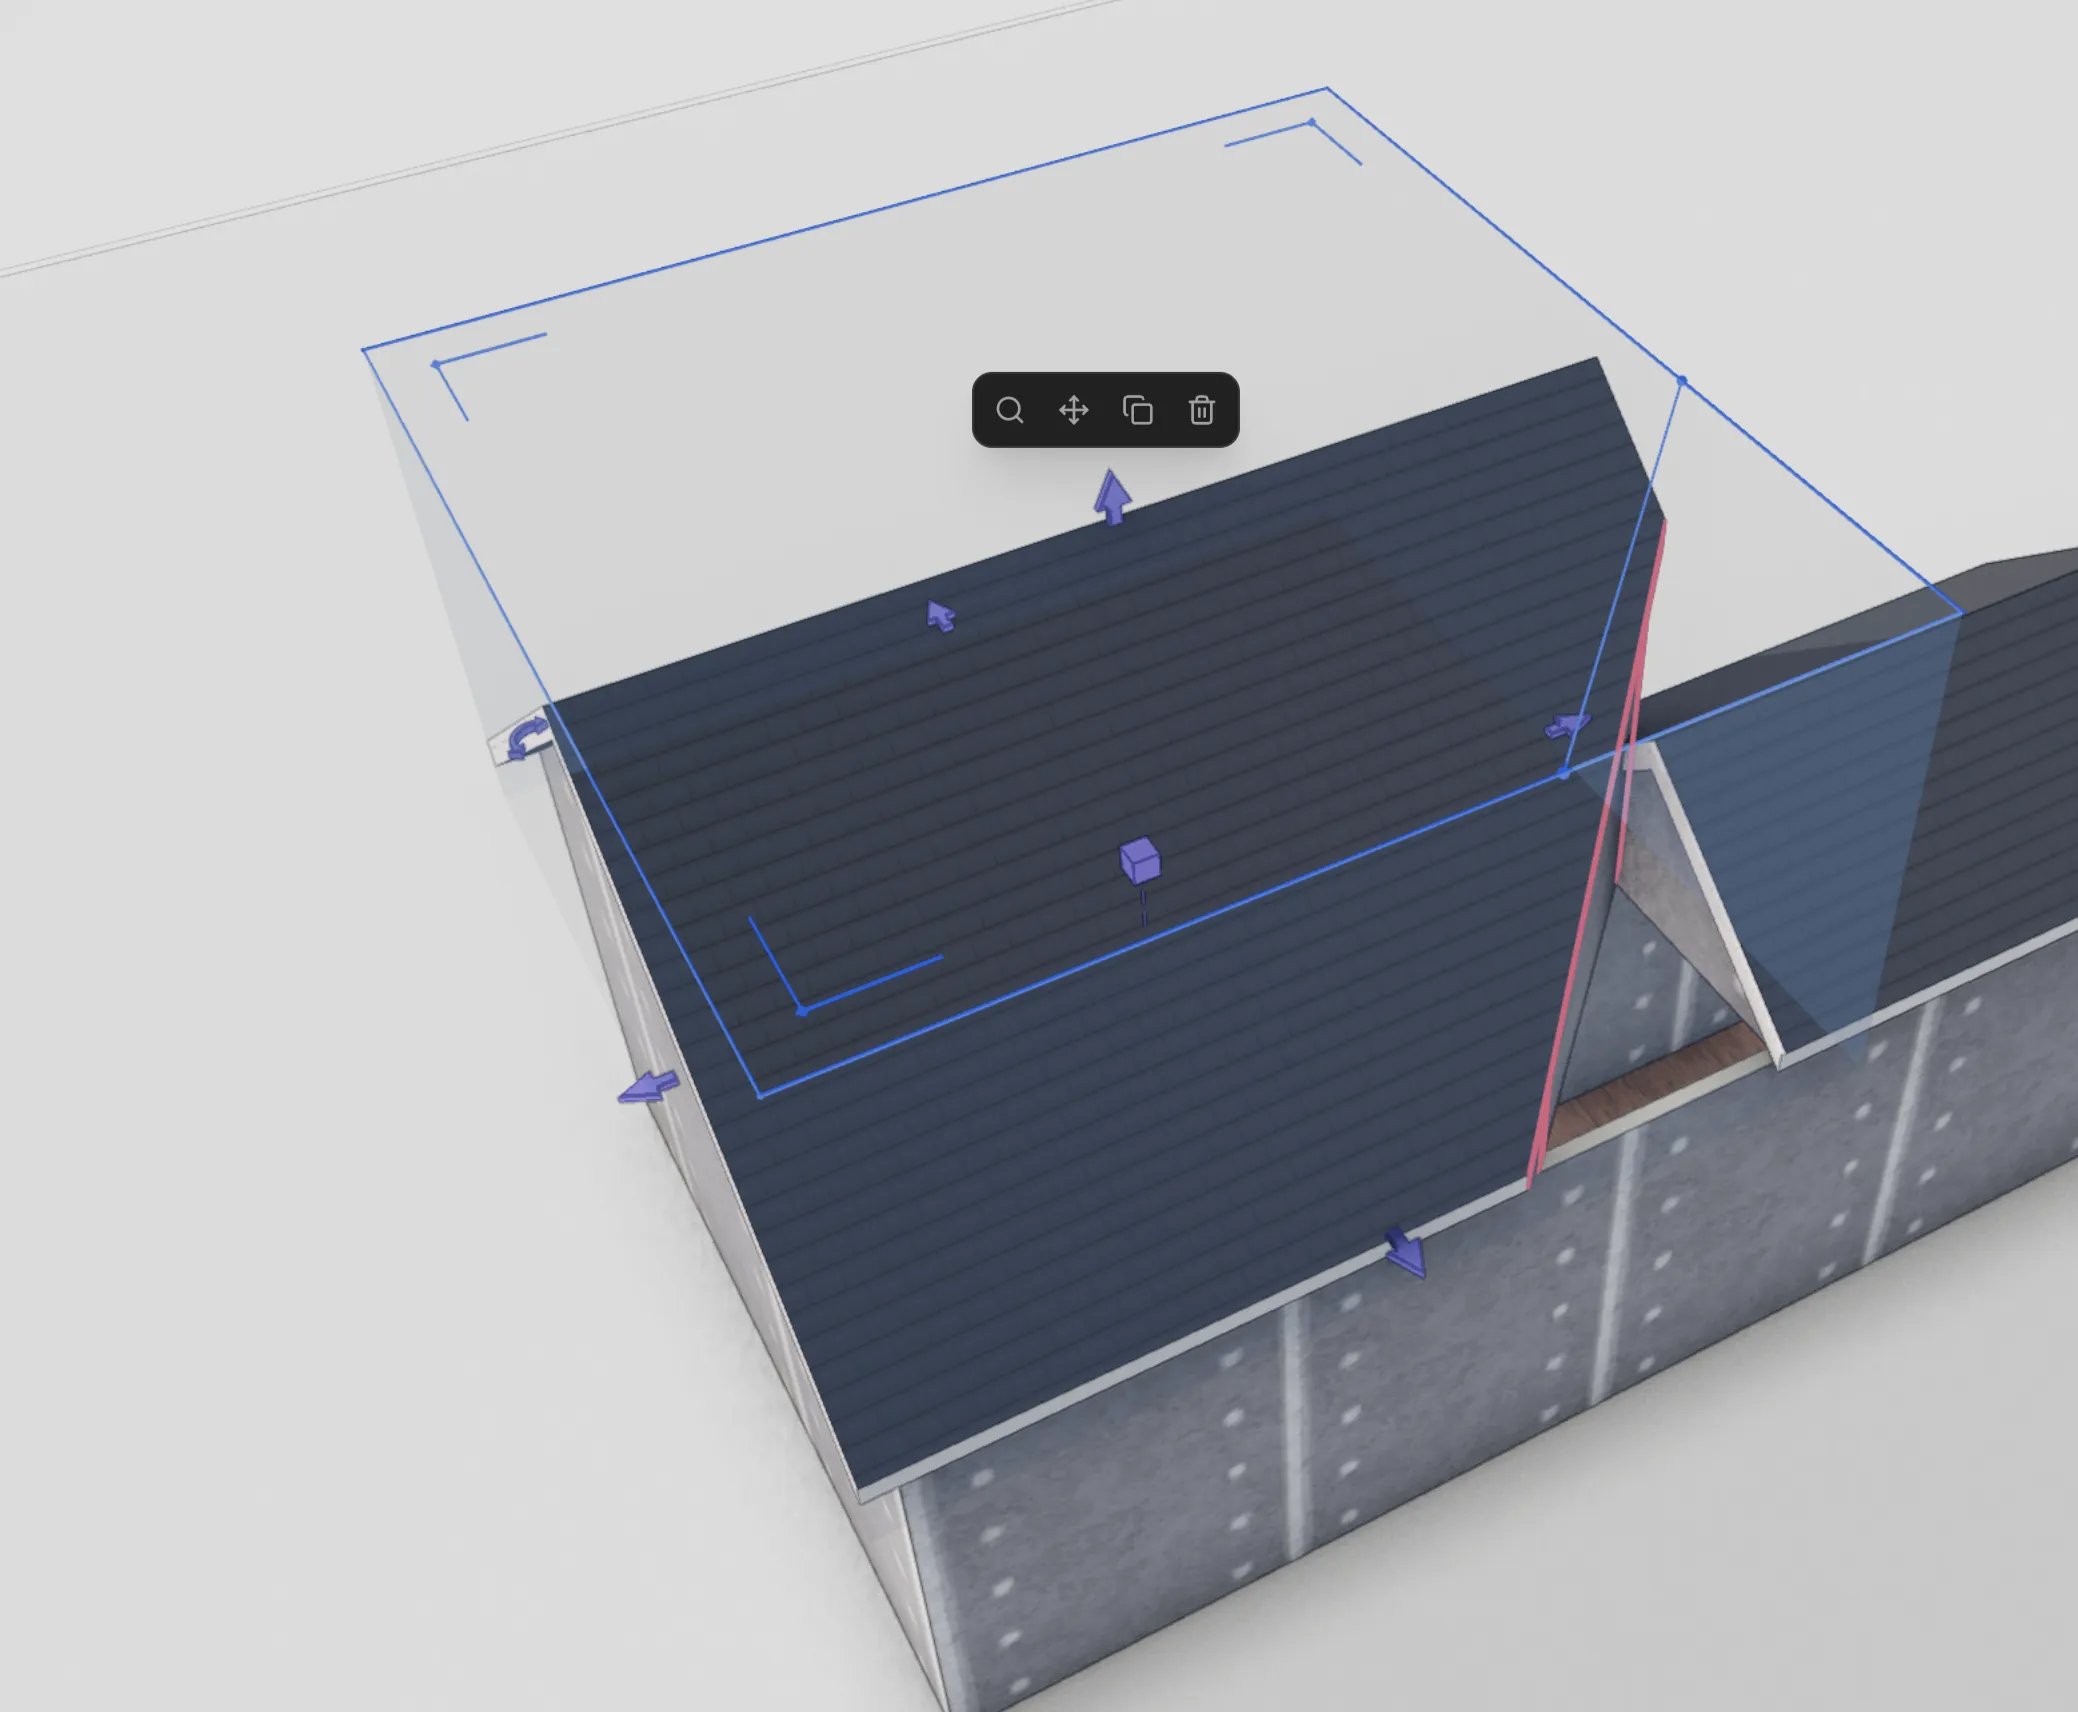
Turn on **Show trim planes** in the segment panel to reveal draggable trim handles
on each side of the roof. Drag a handle to cut the roof back along that side — a
red section preview shows exactly what's being removed. Use trims to fit segments
together or notch a roof around another volume.
## Shape the roof
The segment panel gives you sliders for every dimension:
* **Footprint** — **Width** and **Depth** (0.5–25 m).
* **Wall Height** — the height of the walls the roof generates beneath itself
(0–5 m).
* **Pitch** — the slope **Angle** (0–60°), with quick presets **3/12**, **6/12**,
**9/12**, and **12/12**.
* **Structure** — **Wall Thick.**, **Deck Thick.**, **Overhang**, and
**Shingle Thick.**
* Shape-specific controls appear for the curvier types — kink position for
gambrel, waist controls for mansard and dutch roofs.
* **Position** and **Rotation** sliders (with `-45°` / `+45°` buttons) place the
roof exactly, and the **Move** action lets you drag it in the scene — press `R`
while moving to rotate it in steps.
Roof surfaces are painted with the **Painting** tool, like walls and floors — see
[Materials and paint](/items/materials-and-paint).
## Trim a roof
Turn on **Show trim planes** in the segment panel to reveal draggable trim handles
on each side of the roof. Drag a handle to cut the roof back along that side — a
red section preview shows exactly what's being removed. Use trims to fit segments
together or notch a roof around another volume.
 ## Complex roofs
* **Add segments** — draw another footprint while a roof (or one of its segments)
is selected and the new rectangle joins that roof as an extra segment. That's
how you build L- and T-shaped roofs.
* **Duplicate** — the **Duplicate** action clones the whole roof and hands it to
you in move mode, ready to drop elsewhere.
* **Features** — with the Roof tool active, the Build tab shows a **Features**
grid of roof accessories (skylights, chimneys, dormers, vents, and more). Pick
one and click the roof segment you want it attached to.
## Roof walls and openings
Each segment is a complete volume: it generates its own walls under the roof
plane, including the triangular gable ends. Those faces behave like regular walls
for openings — you can place [doors and windows](/building/doors-and-windows)
straight into a gable.
## Delete a roof
The roof panel's **Delete** action removes the whole roof; a segment's **Delete**
removes just that segment and keeps the rest. Selecting a roof and pressing
`Delete` or `Backspace` works too.
## Complex roofs
* **Add segments** — draw another footprint while a roof (or one of its segments)
is selected and the new rectangle joins that roof as an extra segment. That's
how you build L- and T-shaped roofs.
* **Duplicate** — the **Duplicate** action clones the whole roof and hands it to
you in move mode, ready to drop elsewhere.
* **Features** — with the Roof tool active, the Build tab shows a **Features**
grid of roof accessories (skylights, chimneys, dormers, vents, and more). Pick
one and click the roof segment you want it attached to.
## Roof walls and openings
Each segment is a complete volume: it generates its own walls under the roof
plane, including the triangular gable ends. Those faces behave like regular walls
for openings — you can place [doors and windows](/building/doors-and-windows)
straight into a gable.
## Delete a roof
The roof panel's **Delete** action removes the whole roof; a segment's **Delete**
removes just that segment and keeps the rest. Selecting a roof and pressing
`Delete` or `Backspace` works too.