> ## Documentation Index
> Fetch the complete documentation index at: https://editor.pascal.app/docs/llms.txt
> Use this file to discover all available pages before exploring further.
# Floors and levels
> Stack levels into multi-storey buildings, switch between them, and shape floor slabs and ceilings — created automatically from your walls or drawn by hand.
A Pascal building is organized into levels — one per storey. Each level holds its
own walls, floors, ceilings, and items, and Pascal creates floor slabs and ceilings
for you whenever your walls enclose a room.
## Levels
Every scene starts with a single level named **Ground Floor**. Levels you add above
it are named **Floor 1**, **Floor 2**, and so on; levels below become
**Basement 1**, **Basement 2**. A level is 2.5 m tall by default and grows
automatically if you raise its walls or ceilings.
## Manage levels
The level selector floats at the top left of the canvas. From there you can:
* **Add a level** with the `+` buttons above and below the list, or insert one
between two existing levels.
* **Rename** a level by double-clicking its name — `Enter` saves, `Esc` cancels.
* **Reorder** levels by dragging the grip handle on a row.
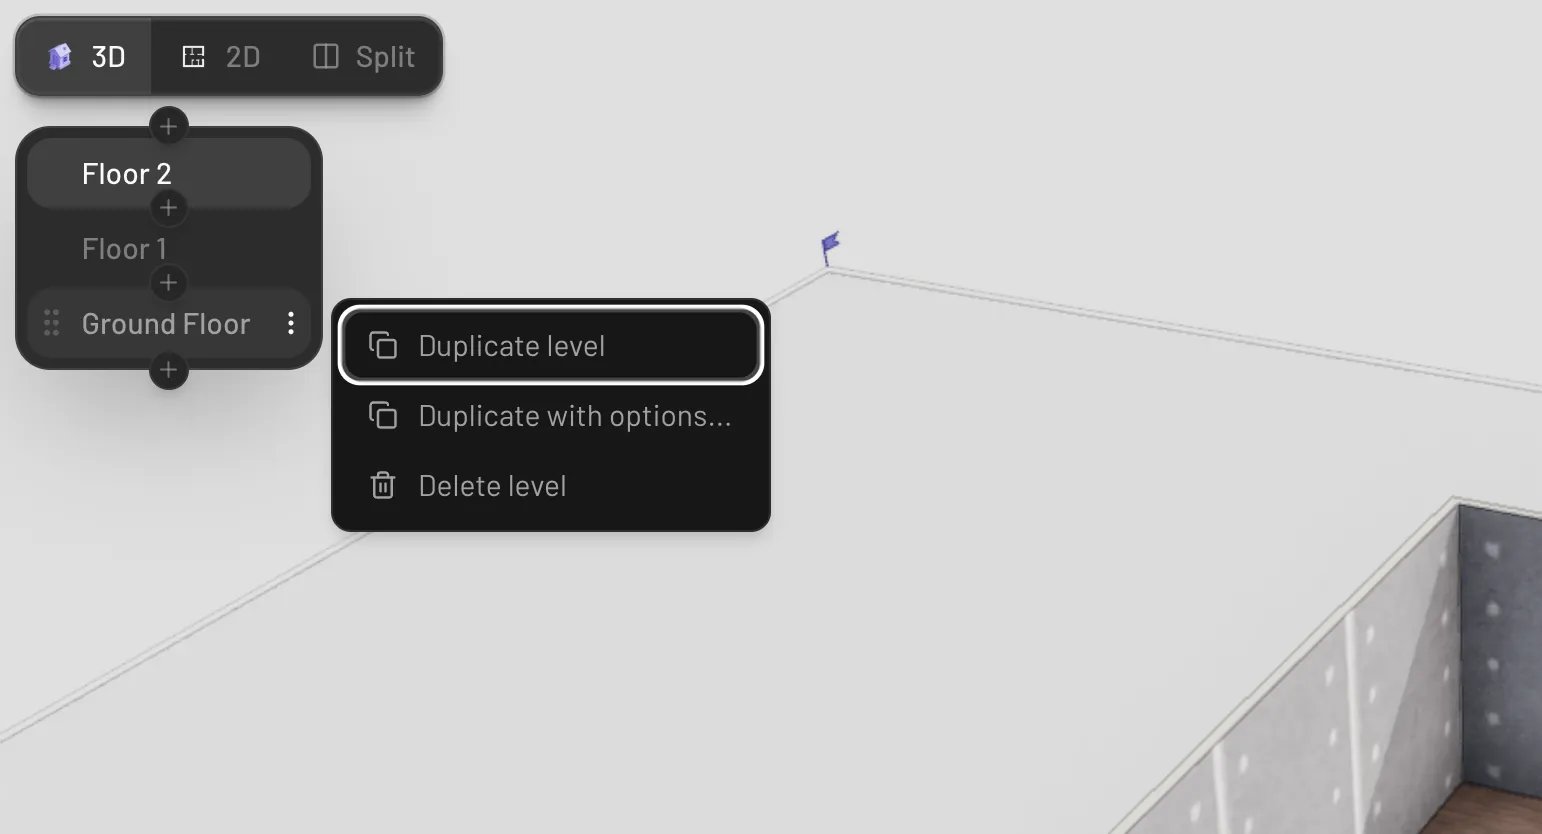
* **Duplicate** a level from its `⋯` menu — **Duplicate level** copies everything,
and **Duplicate with options...** lets you pick what comes along.
* **Delete** a level from the same menu. You'll be asked to confirm, since all
walls, floors, and objects on that level are removed with it. The ground floor
can't be deleted.
 ## Switch between levels
Click a level in the selector to make it active — new walls and items go onto the
active level. `Cmd/Ctrl + ↑` and `Cmd/Ctrl + ↓` step up and down through the
building.
How the other levels look is controlled by the levels toggle in the toolbar, which
cycles through three view modes:
* **Stacked** — the default; all levels sit at their true heights.
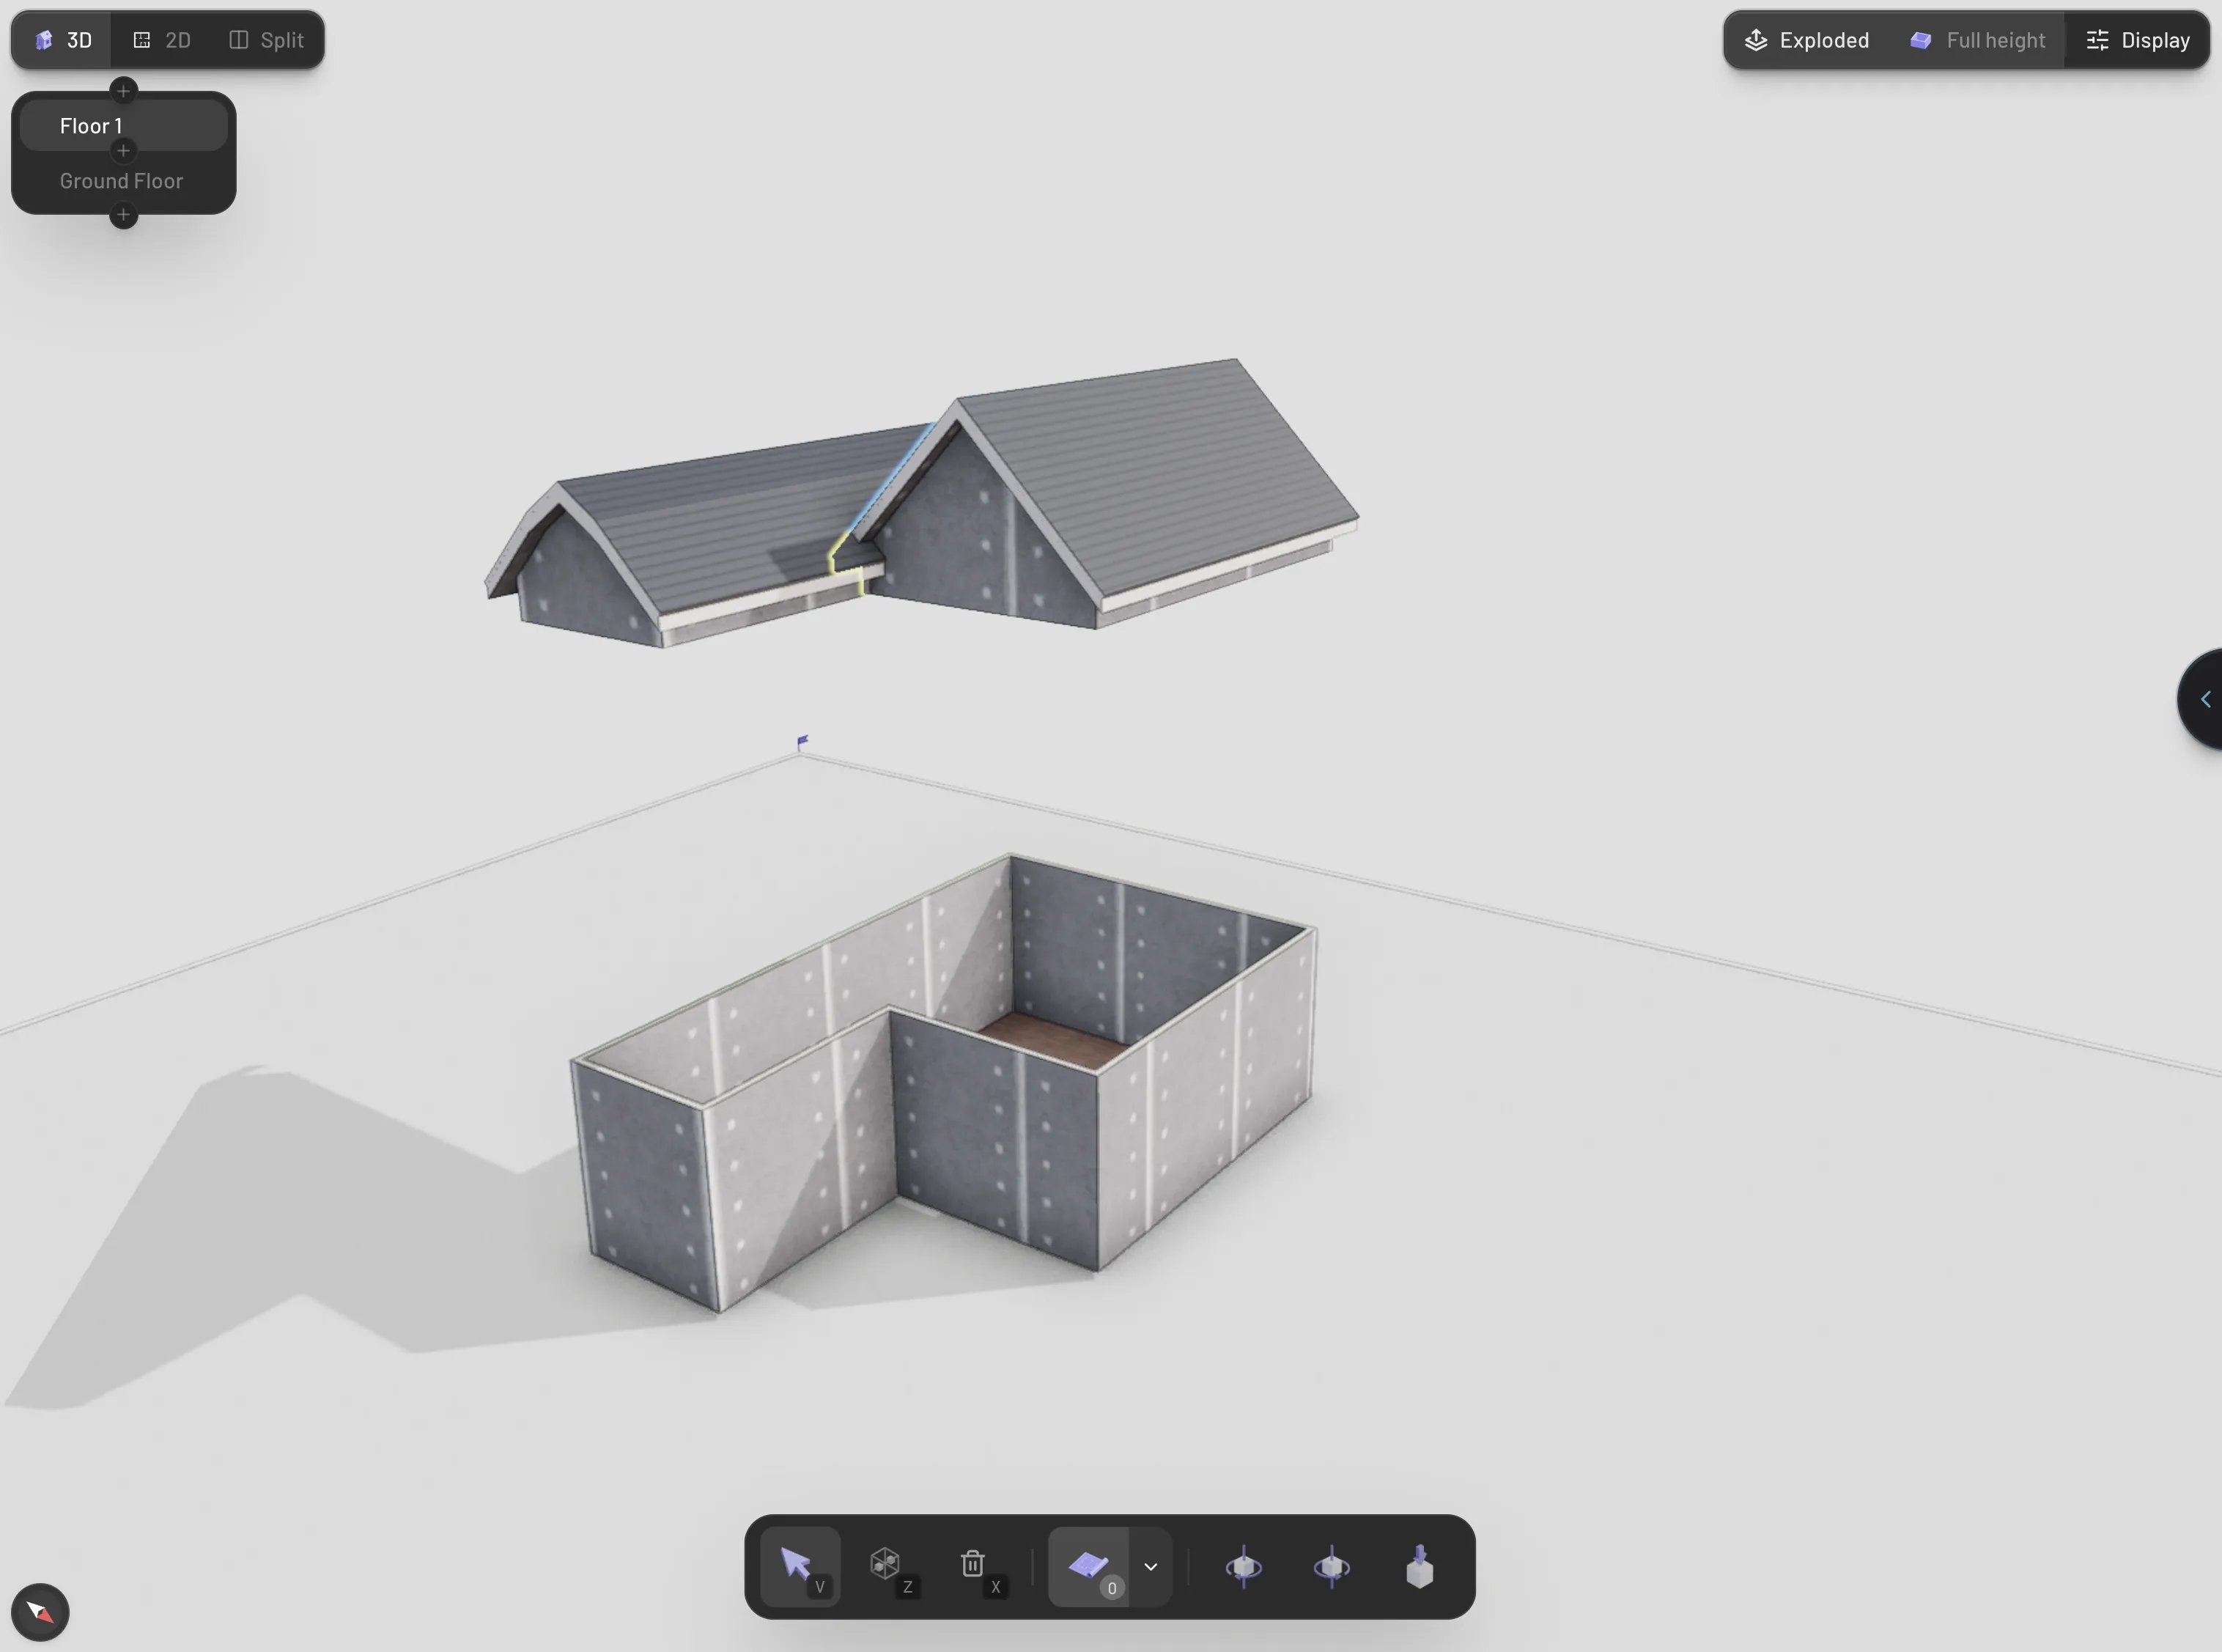
* **Exploded** — levels spread apart vertically so you can see into each one.
* **Solo** — only the active level is visible.
## Switch between levels
Click a level in the selector to make it active — new walls and items go onto the
active level. `Cmd/Ctrl + ↑` and `Cmd/Ctrl + ↓` step up and down through the
building.
How the other levels look is controlled by the levels toggle in the toolbar, which
cycles through three view modes:
* **Stacked** — the default; all levels sit at their true heights.
* **Exploded** — levels spread apart vertically so you can see into each one.
* **Solo** — only the active level is visible.
 ## Floors
Floors are slabs, and most of the time you don't draw them: the moment your walls
enclose a room, Pascal detects the space and generates its floor slab (and ceiling)
automatically. The auto floor keeps tracking your walls as you edit them.
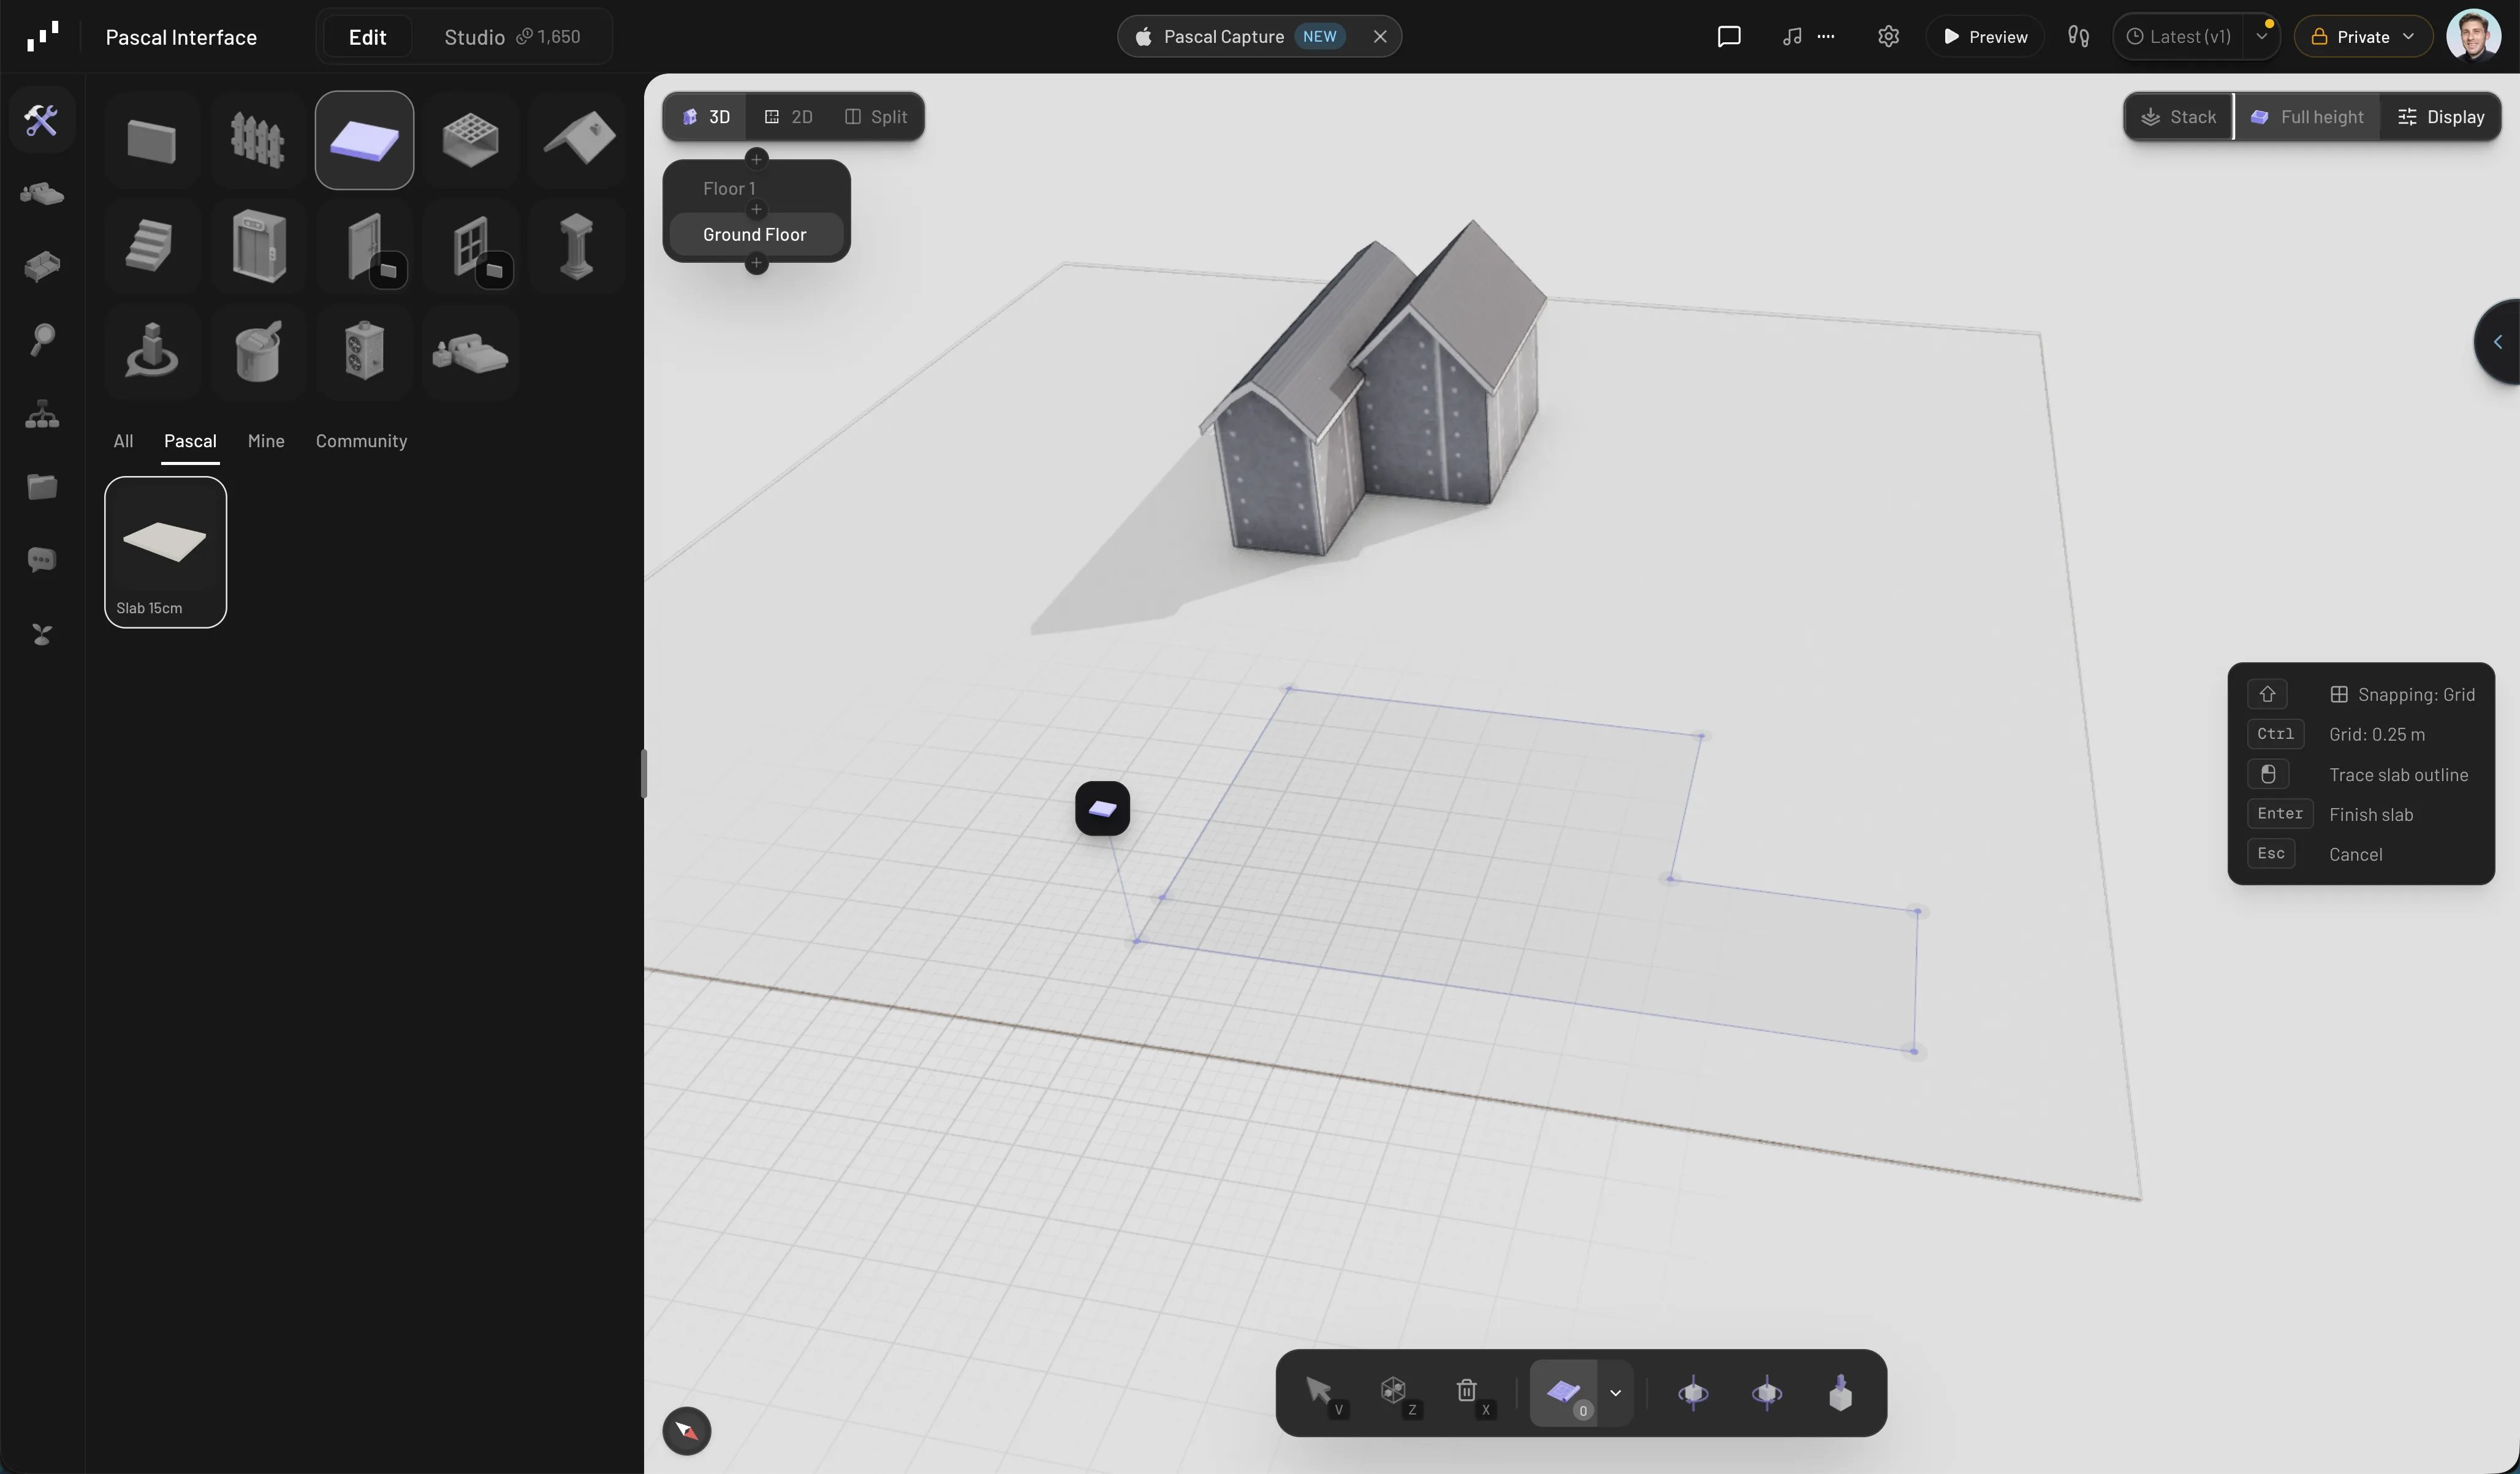
To draw a floor yourself — a terrace, a landing, a slab that doesn't follow the
walls — use the **Slab** tool in the Build tab:
1. Click to place each corner of the outline.
2. Finish by clicking back on the first point, double-clicking, or pressing
`Enter` (the outline needs at least three points). `Esc` cancels.
## Floors
Floors are slabs, and most of the time you don't draw them: the moment your walls
enclose a room, Pascal detects the space and generates its floor slab (and ceiling)
automatically. The auto floor keeps tracking your walls as you edit them.
To draw a floor yourself — a terrace, a landing, a slab that doesn't follow the
walls — use the **Slab** tool in the Build tab:
1. Click to place each corner of the outline.
2. Finish by clicking back on the first point, double-clicking, or pressing
`Enter` (the outline needs at least three points). `Esc` cancels.
 Select a slab to edit it. The properties panel shows its area and a **Height**
slider with quick presets — **Sunken (-15cm)**, **Ground (0m)**, **Raised (+5cm)**,
and **Step (+15cm)** — plus an **Add Hole** control for cutting openings into the
slab. Holes that Pascal cut automatically (for stairs and elevators) are marked
**Auto** and manage themselves. Slab surfaces are painted with the **Painting**
tool — see [Materials and paint](/items/materials-and-paint).
## Ceilings
Ceilings work like slabs: auto-generated for enclosed rooms, or drawn with the
**Ceiling** tool using the same outline tracing. A selected ceiling has a
**Height** slider with **Low (2.4m)**, **Standard (2.5m)**, and **High (3.0m)**
presets, and supports holes the same way slabs do.
## Stairs
To connect levels, use the **Stairs** tool in the Build tab: click to place the
staircase footprint, rotating it with `R` and `T` before you commit. Pascal cuts
the matching opening in the floor slab above automatically.
Select a slab to edit it. The properties panel shows its area and a **Height**
slider with quick presets — **Sunken (-15cm)**, **Ground (0m)**, **Raised (+5cm)**,
and **Step (+15cm)** — plus an **Add Hole** control for cutting openings into the
slab. Holes that Pascal cut automatically (for stairs and elevators) are marked
**Auto** and manage themselves. Slab surfaces are painted with the **Painting**
tool — see [Materials and paint](/items/materials-and-paint).
## Ceilings
Ceilings work like slabs: auto-generated for enclosed rooms, or drawn with the
**Ceiling** tool using the same outline tracing. A selected ceiling has a
**Height** slider with **Low (2.4m)**, **Standard (2.5m)**, and **High (3.0m)**
presets, and supports holes the same way slabs do.
## Stairs
To connect levels, use the **Stairs** tool in the Build tab: click to place the
staircase footprint, rotating it with `R` and `T` before you commit. Pascal cuts
the matching opening in the floor slab above automatically.